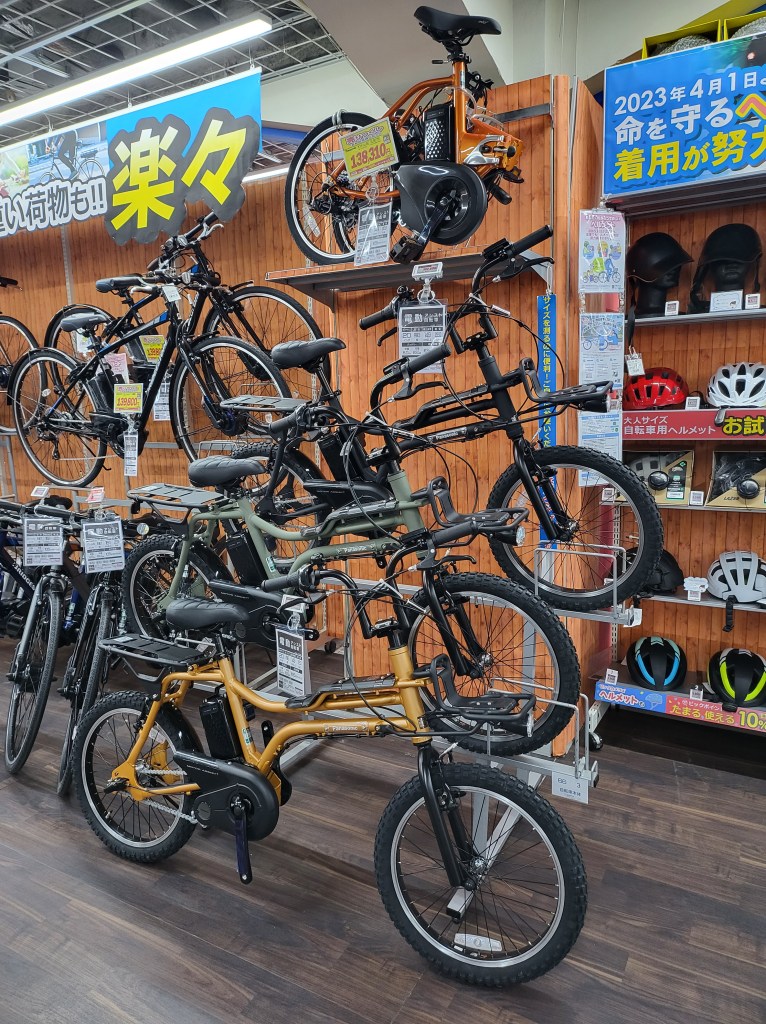
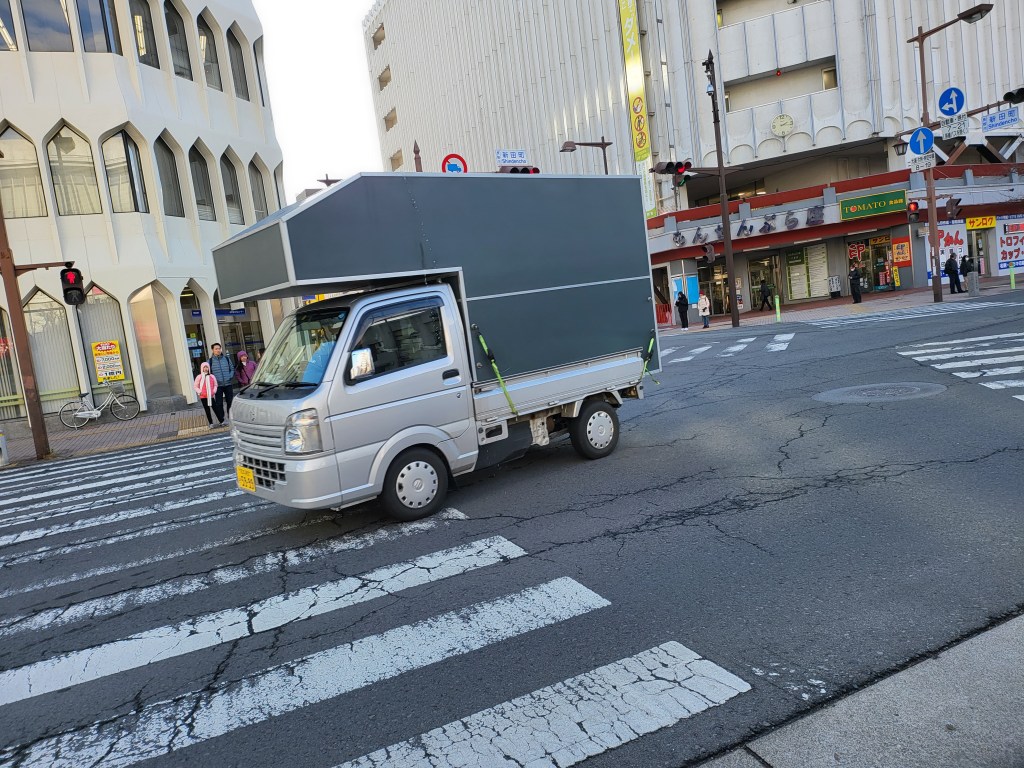
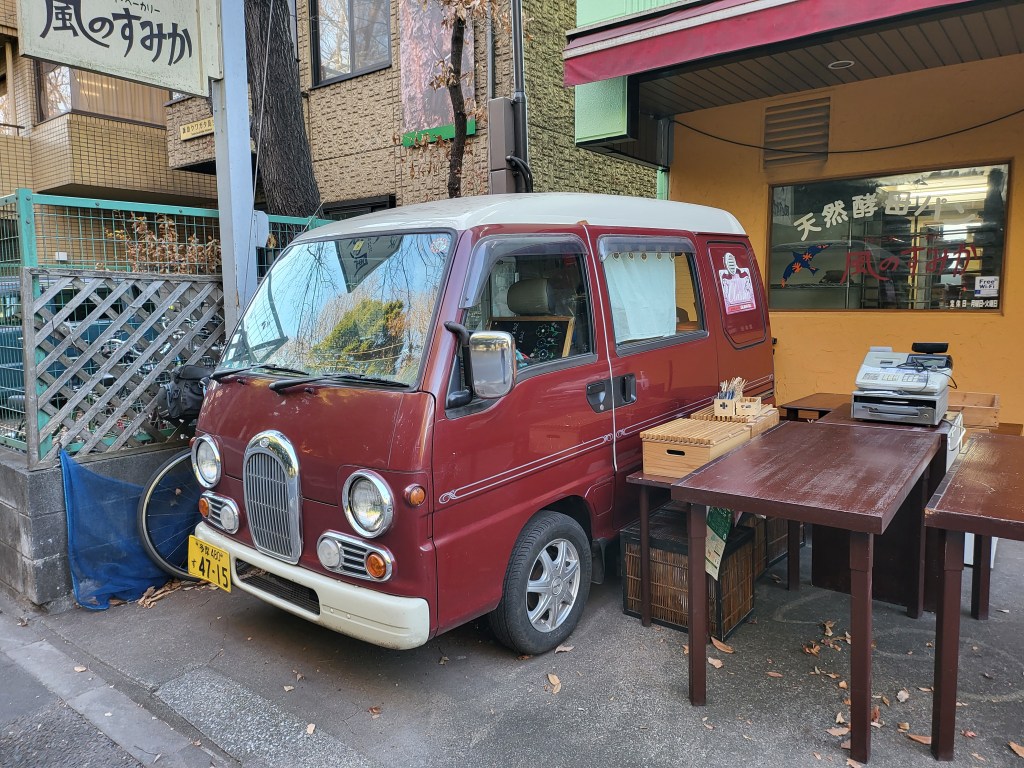
The mini velo bike culture is super prevalent in Japan. With Tokyo and cities being predominantly high density and quite crowded, space is at a premium.
Mini velos offer similar bike feel and fit to full size bikes, but with smaller wheels. They take up way less space than full size bikes, and are much more maneuverable and portable in tight environments. This type of bicycle and the culture around it is something I’ve been super interested in recently, as you can see from my previous posts.
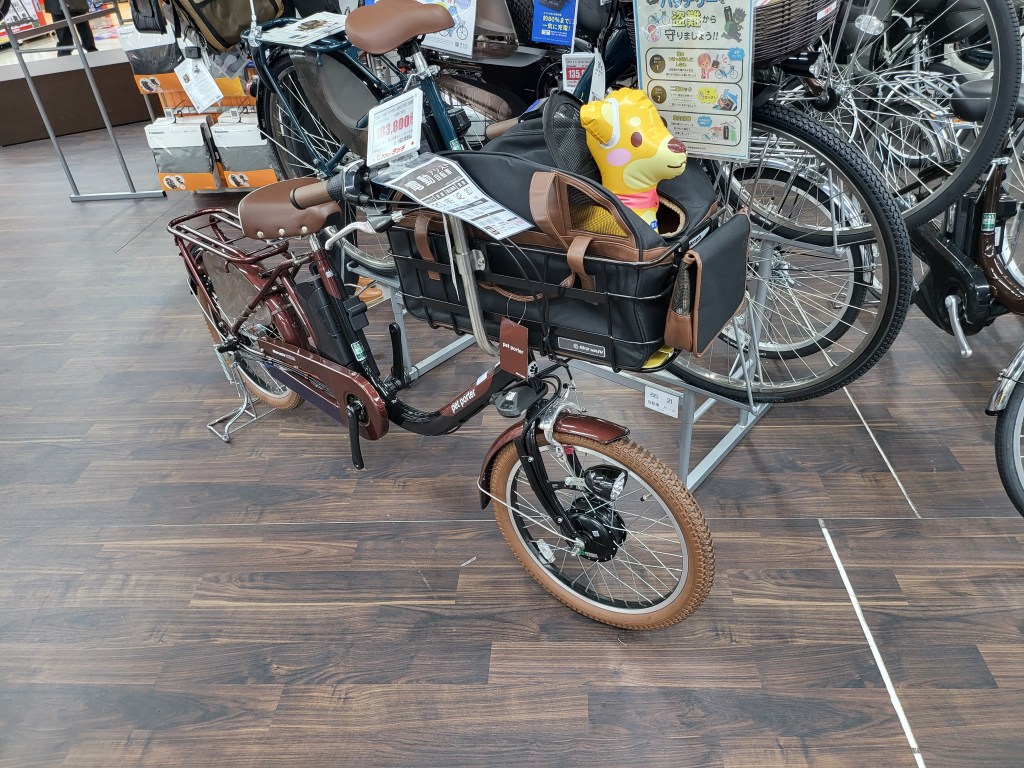
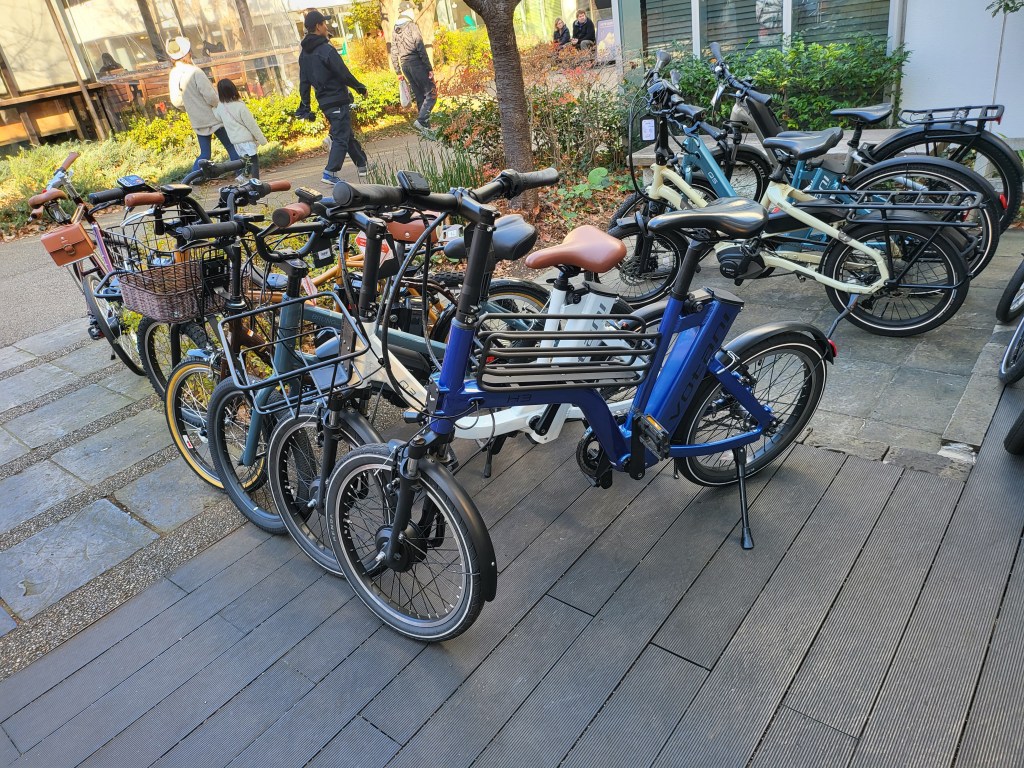
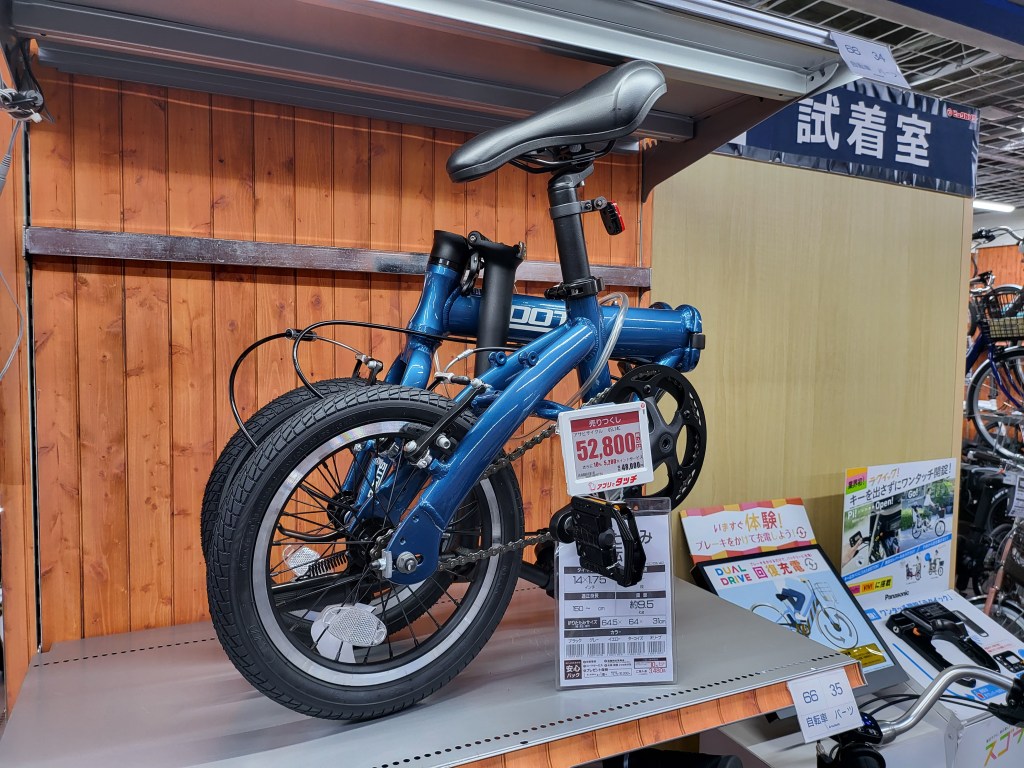
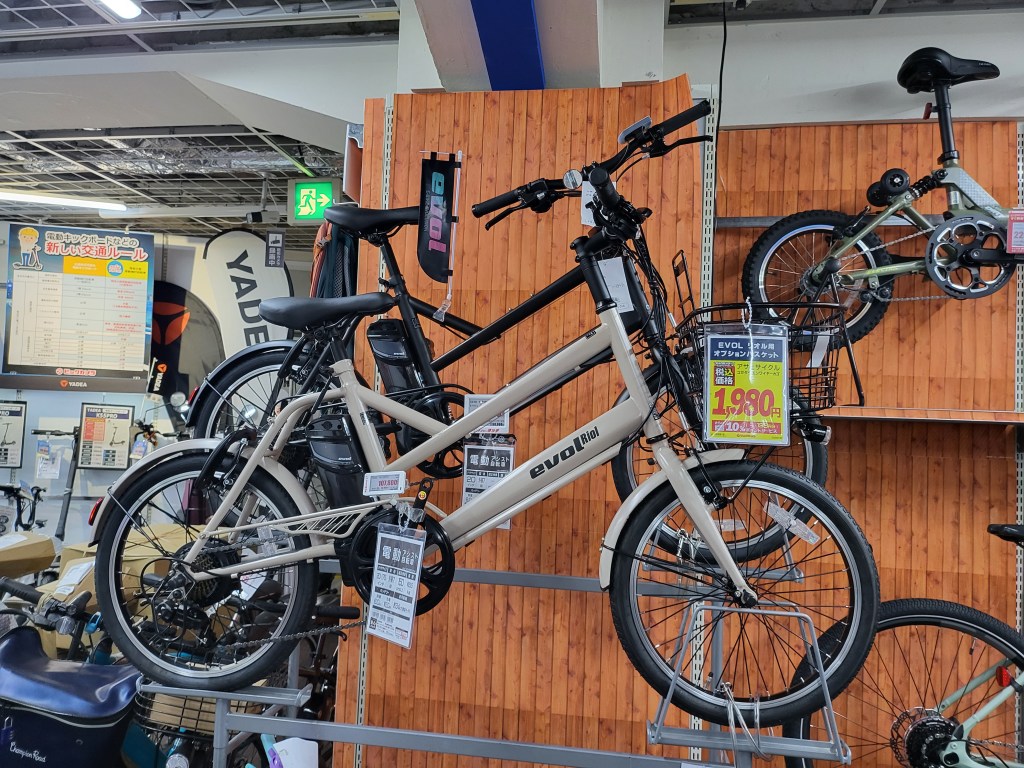
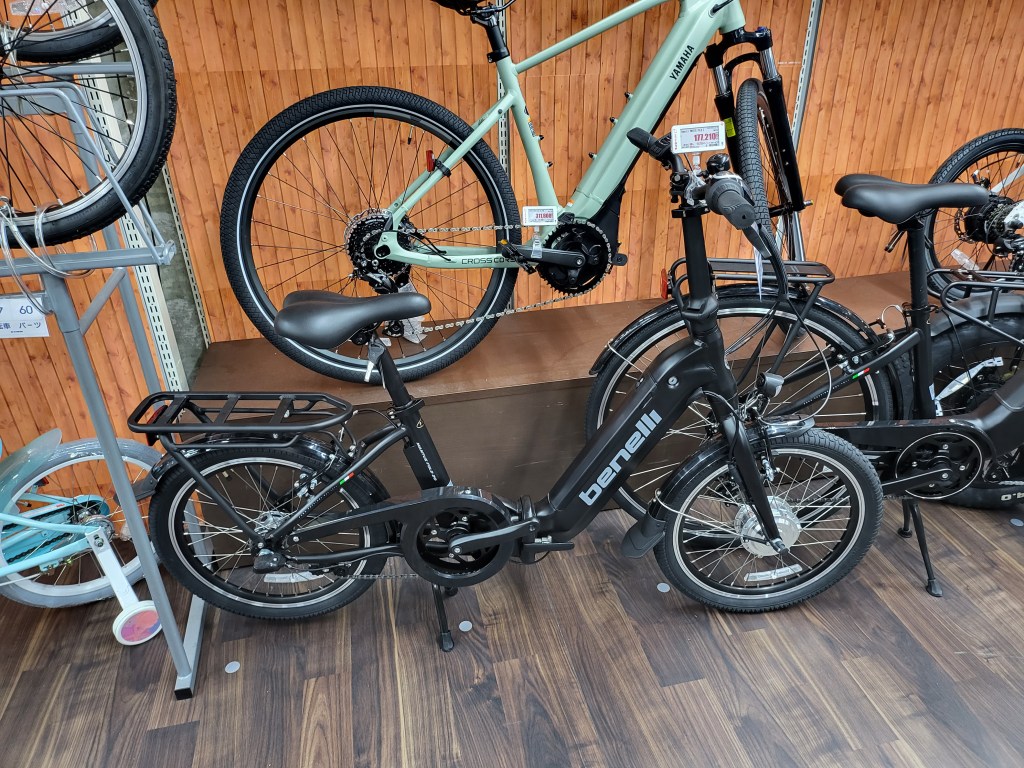
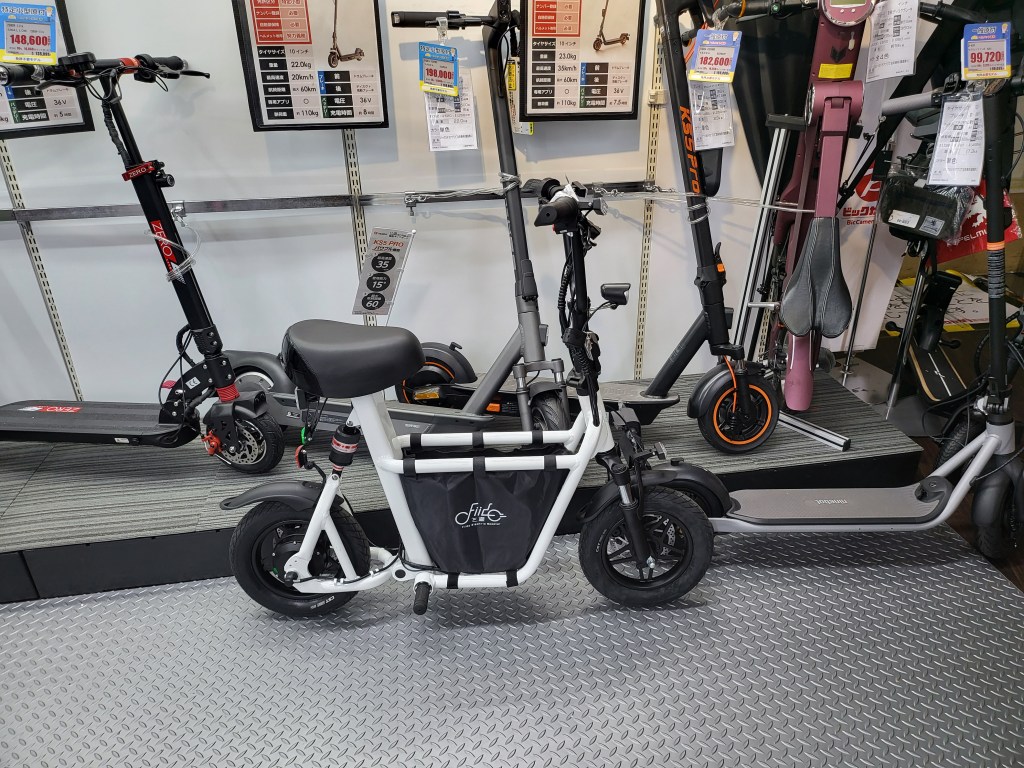
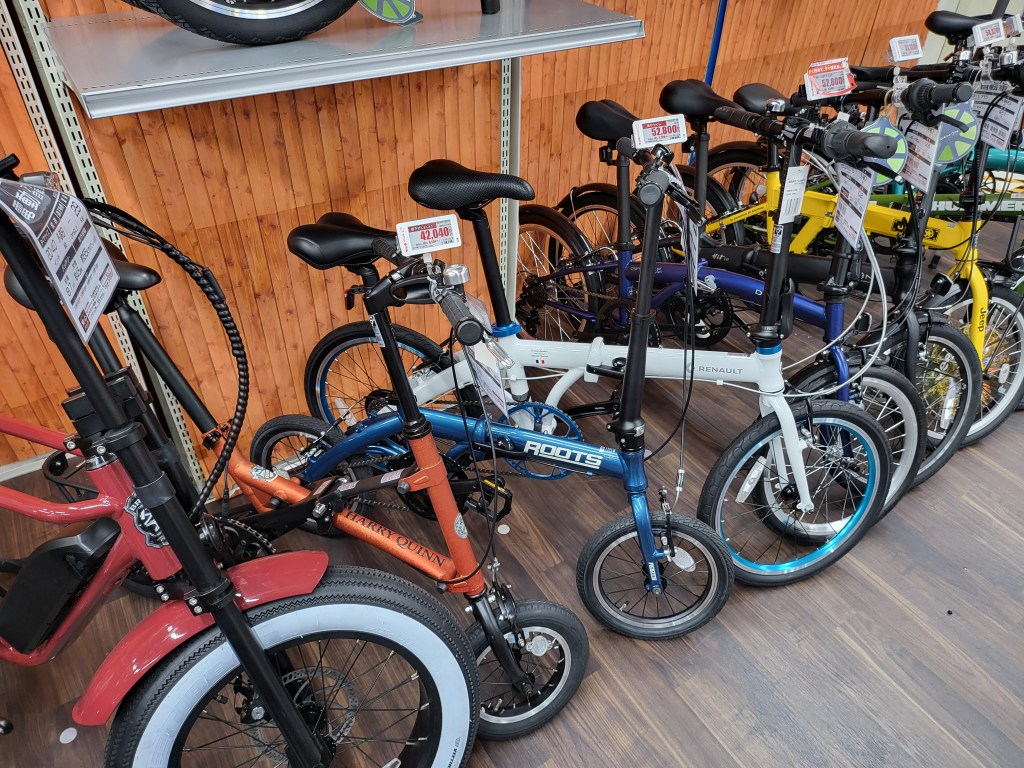
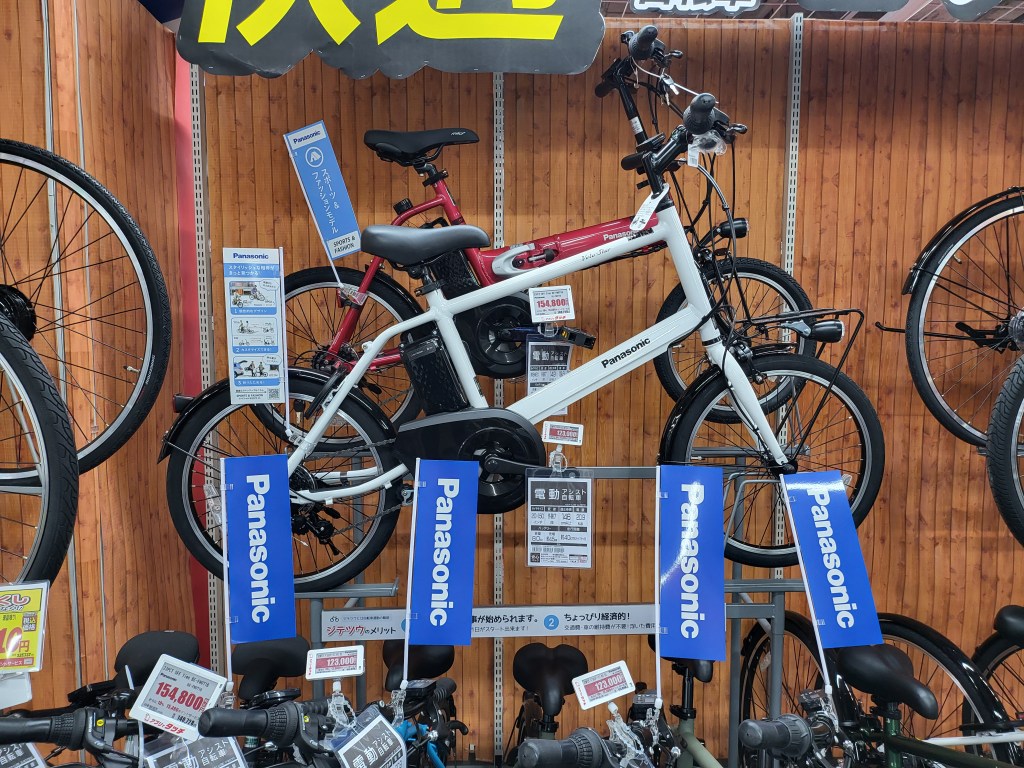
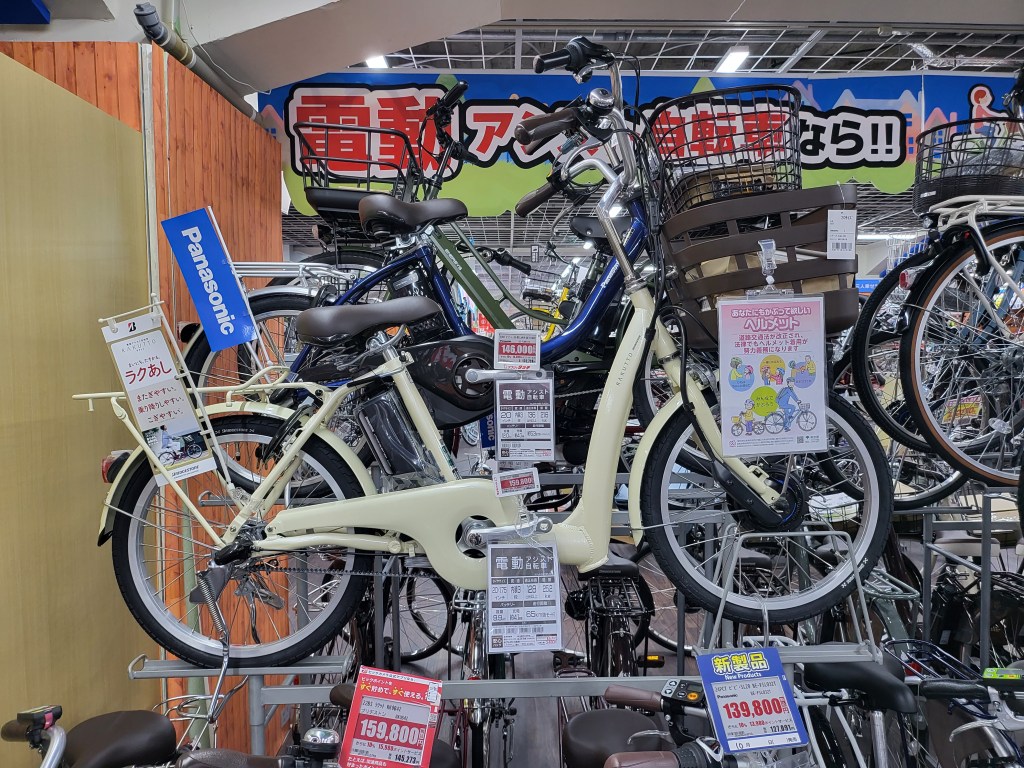
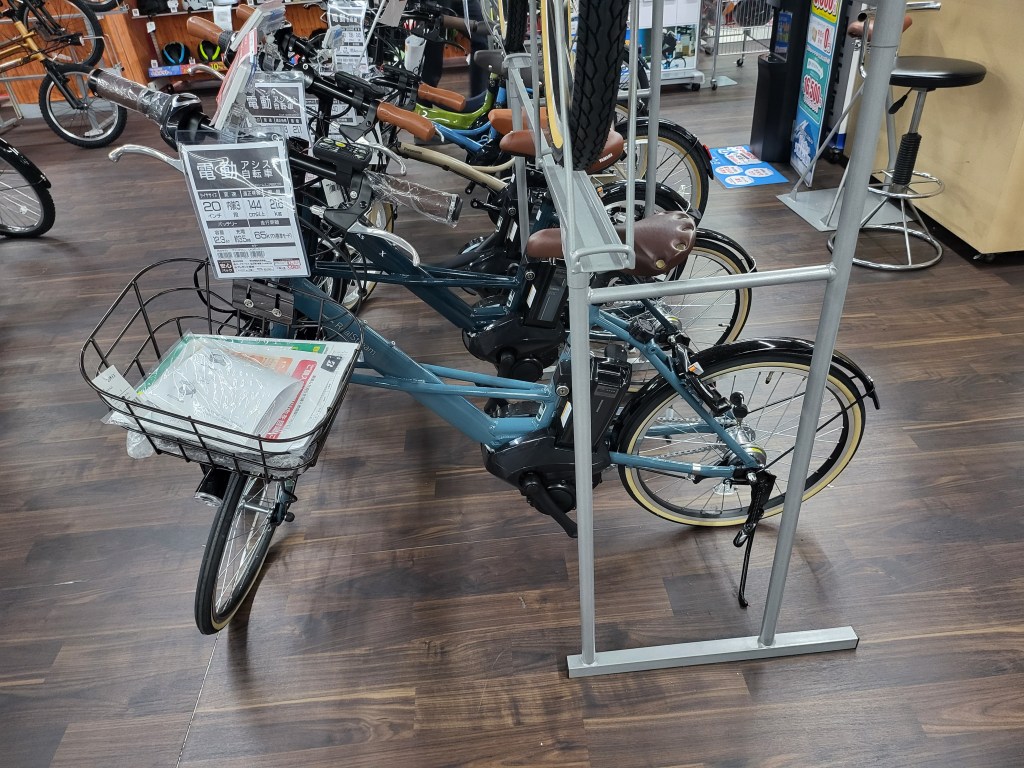
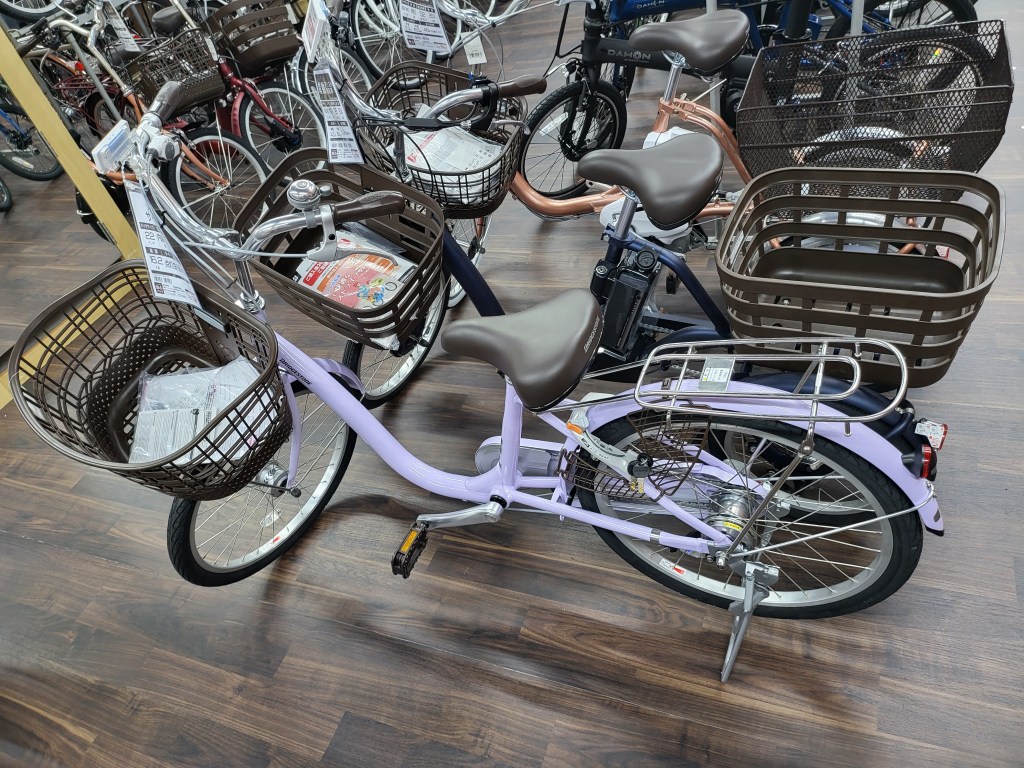
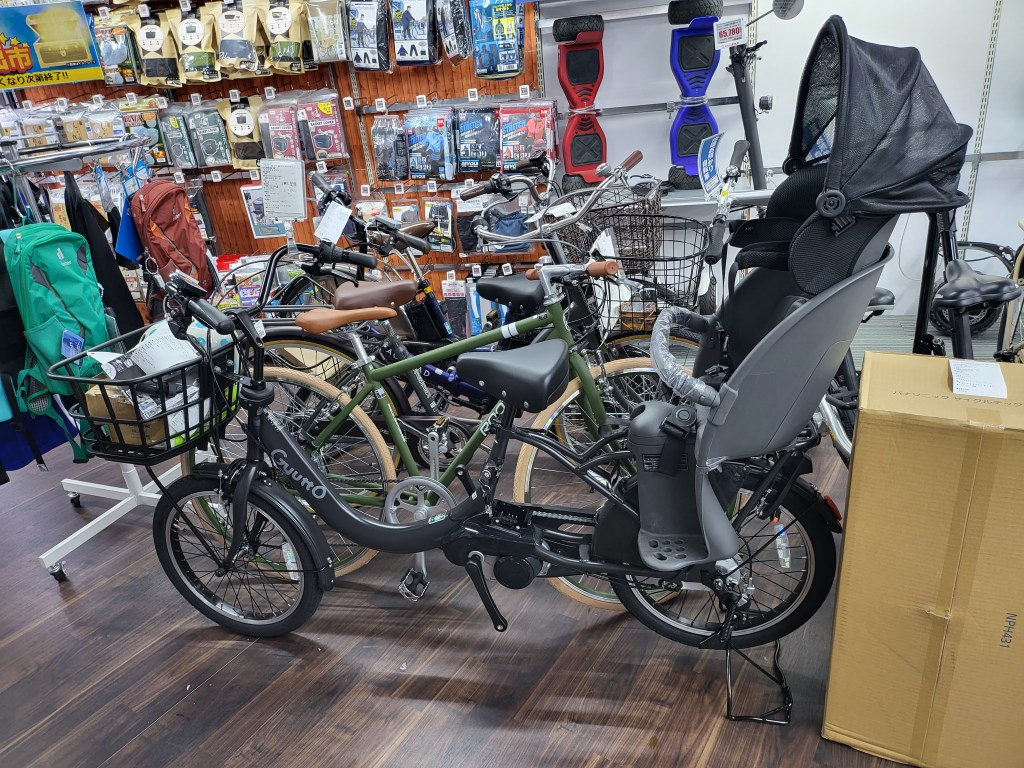
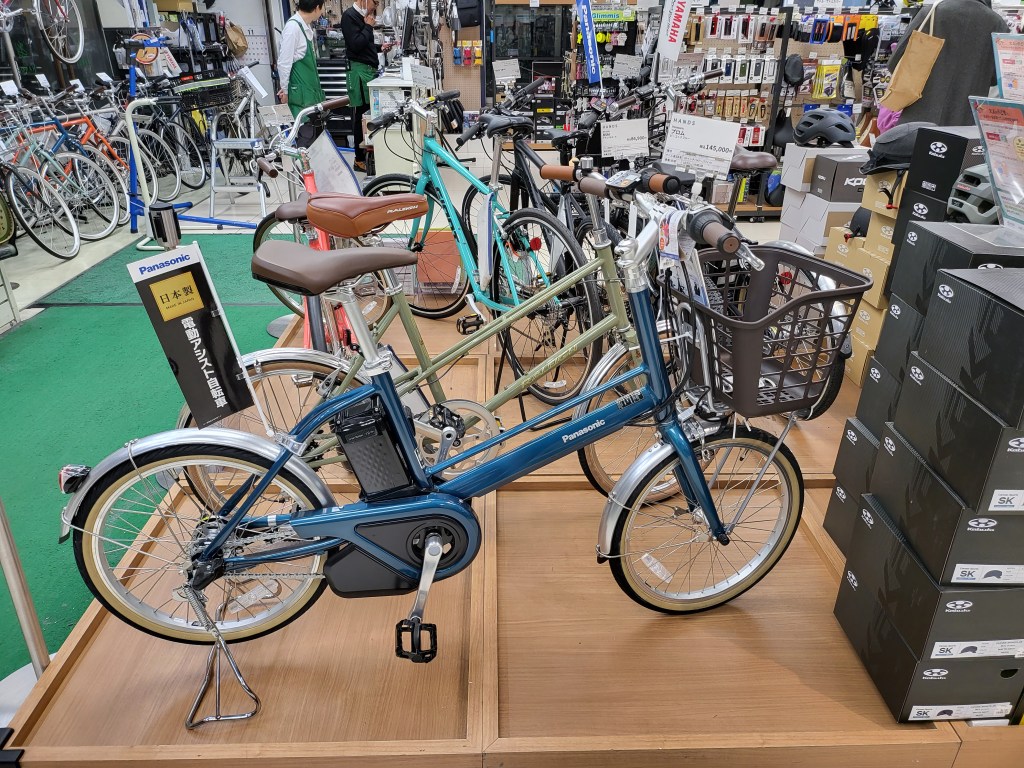
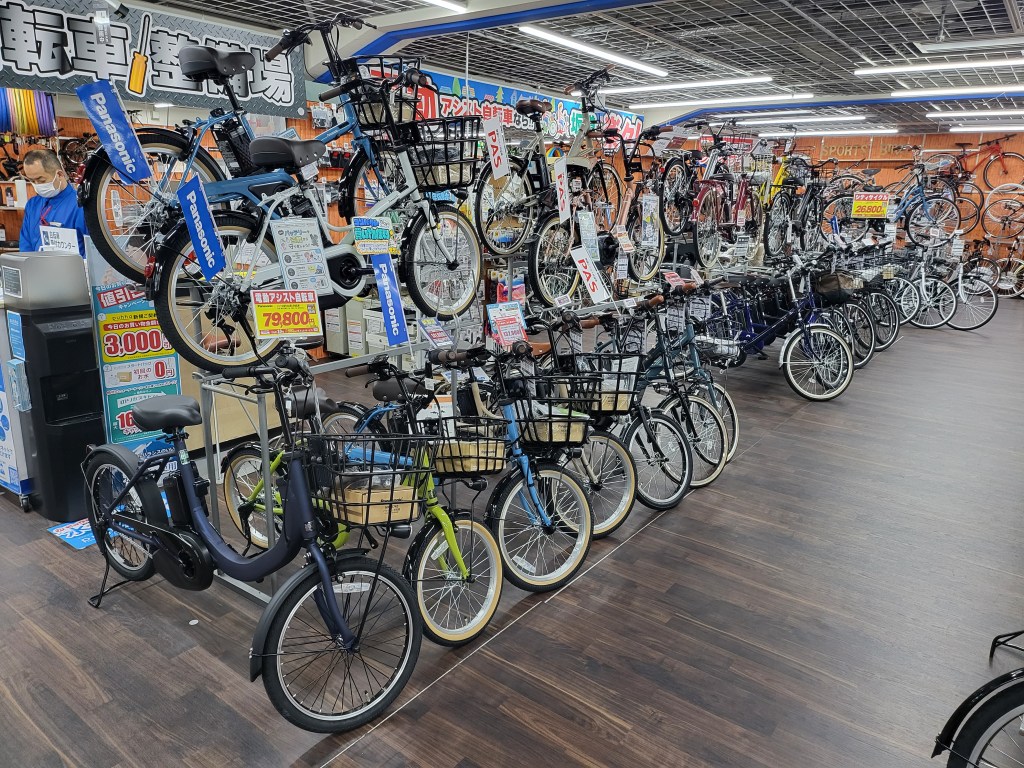
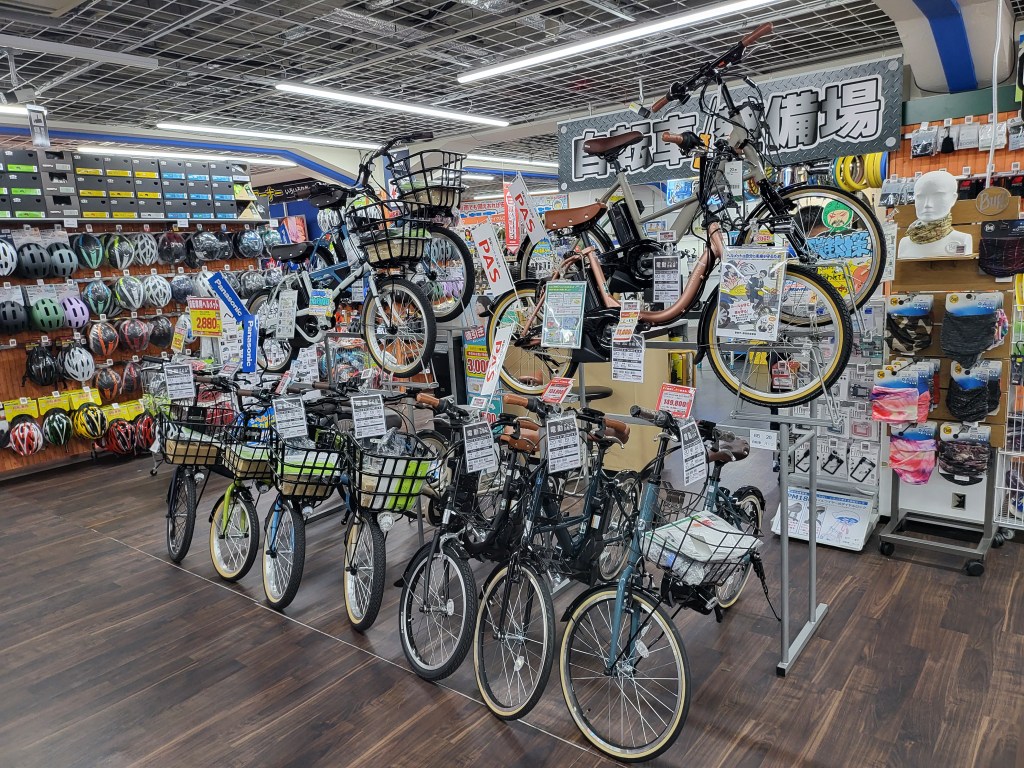
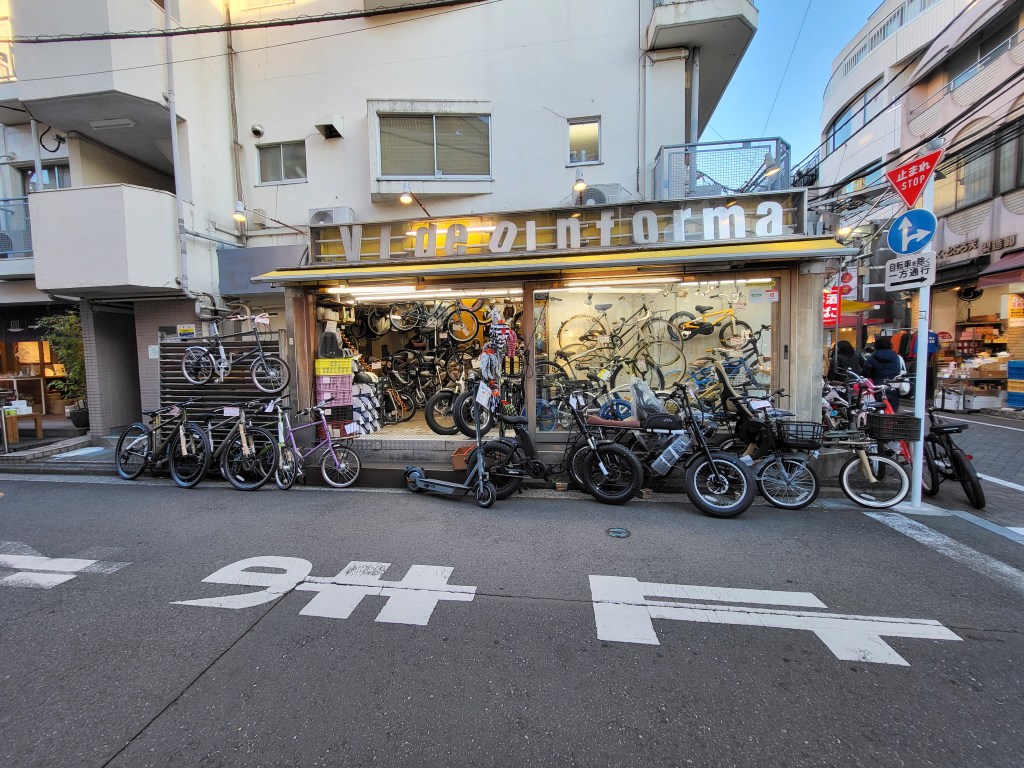
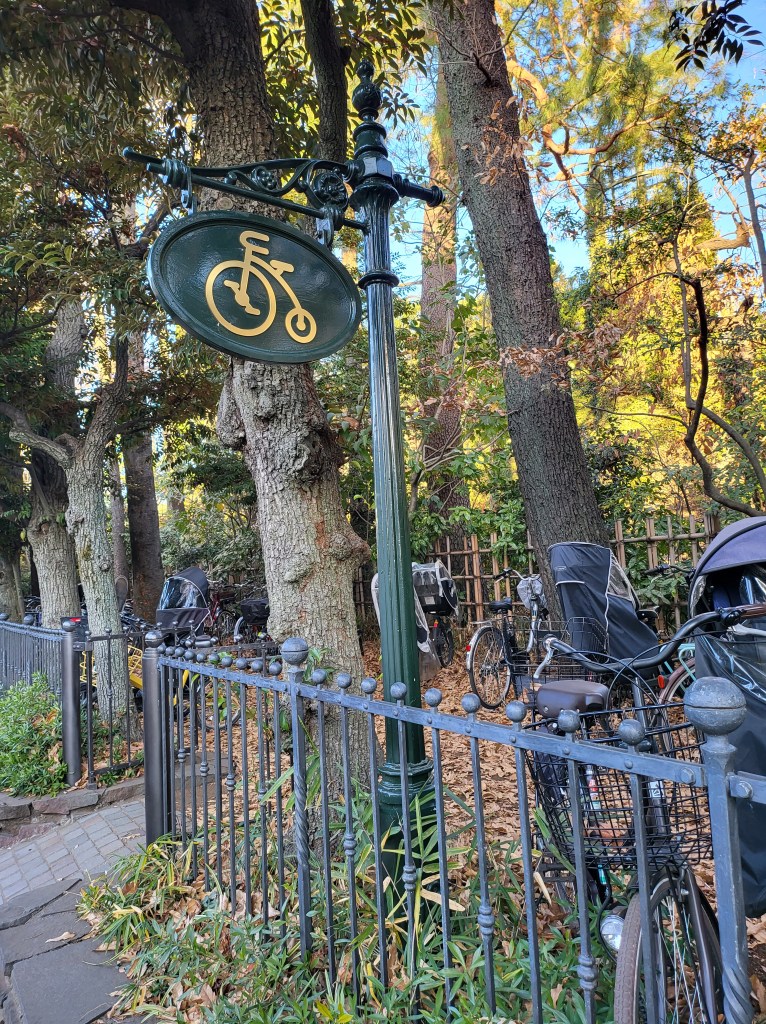
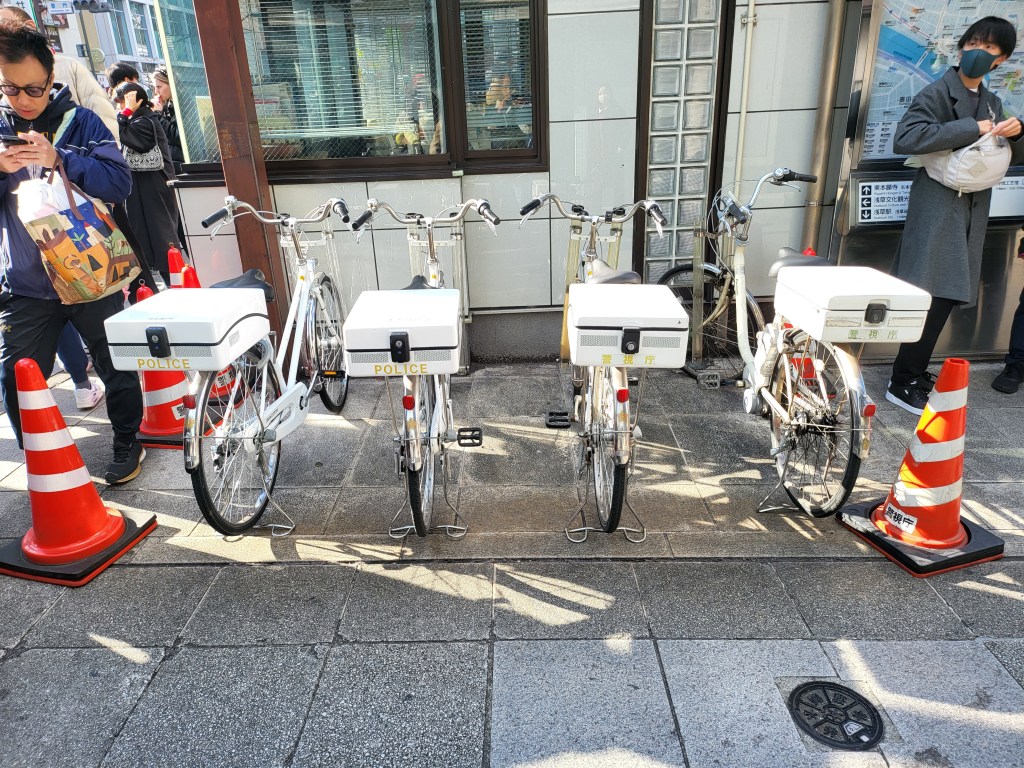
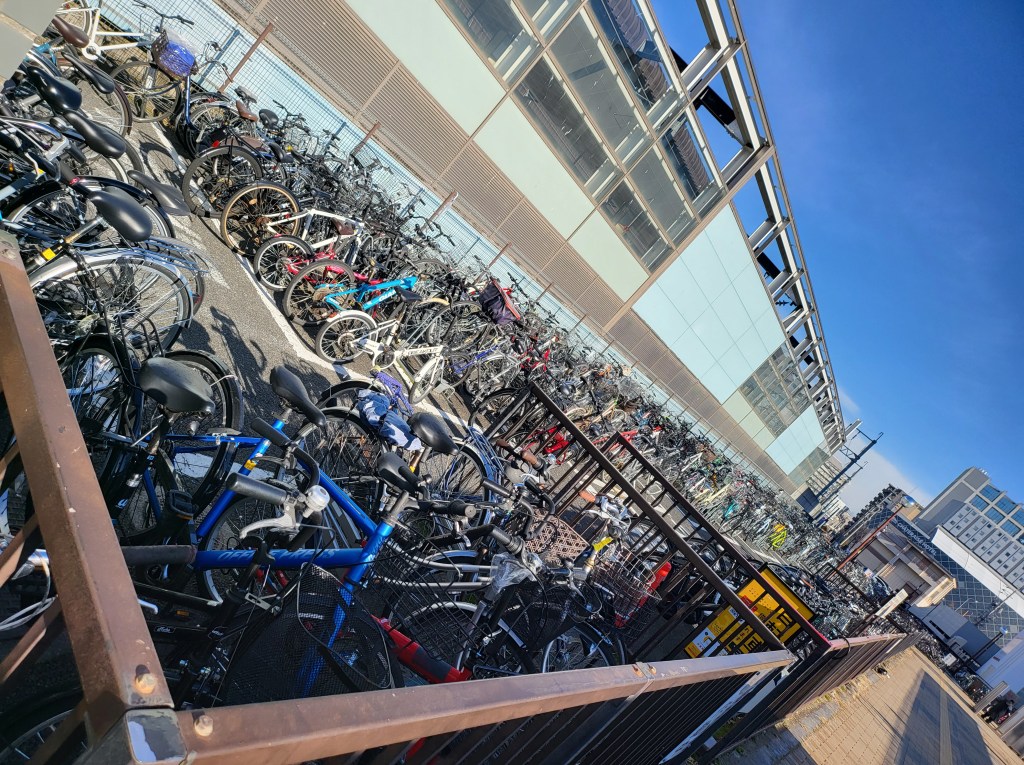
I took a trip to Japan this past winter, and suffice to say, these bikes were everywhere. Here’s a compilation of some that I saw.
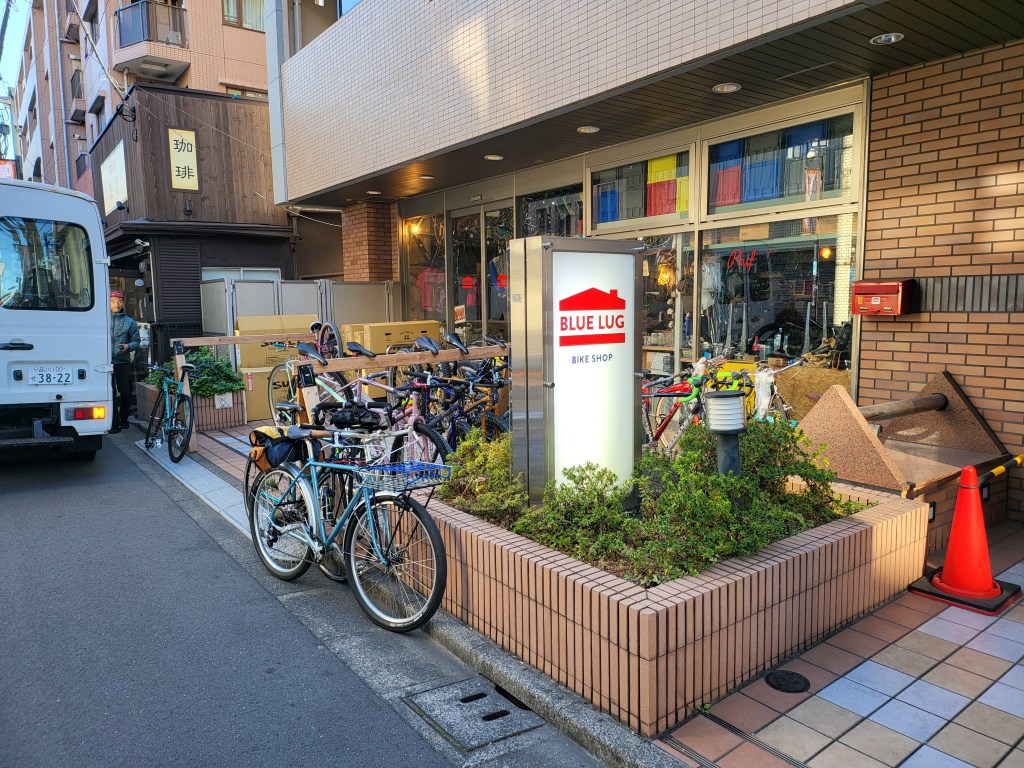
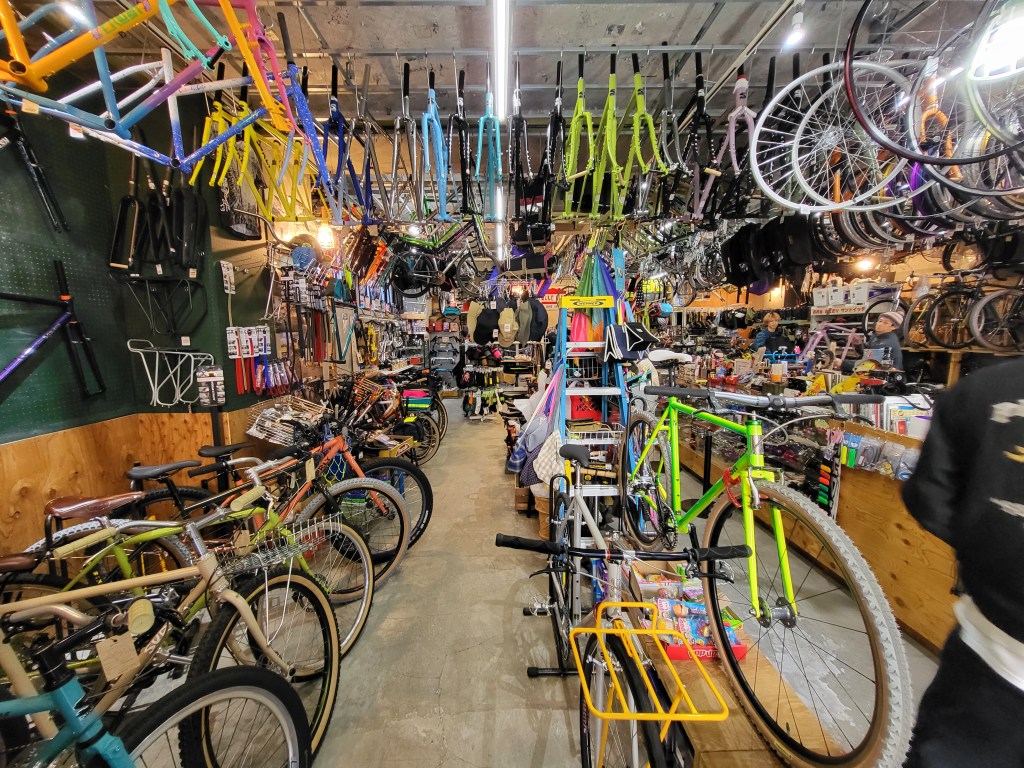
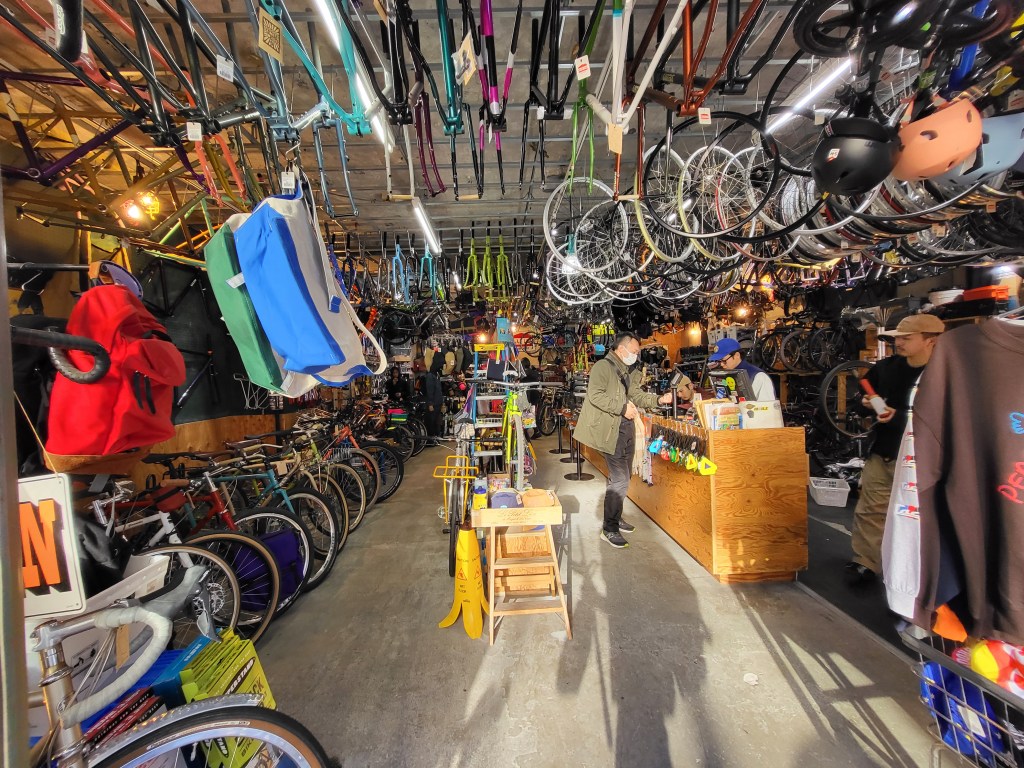
And of course, some photos of Blue Lug and other bike shops:
In particular, mini-velos have held a soft spot in my heart. The idea of small wheels and portability while offering near-normal bike fit/geometry and functionality is just kind of cool, for whatever reason.
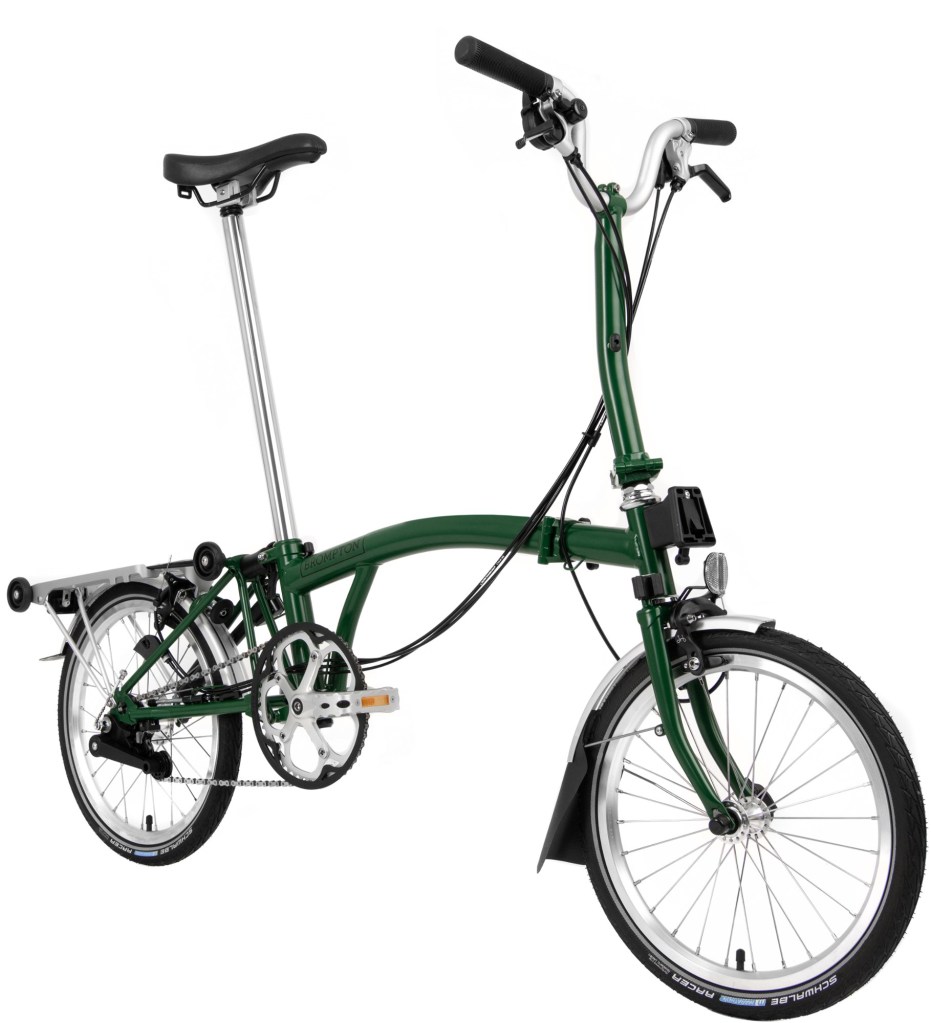
I’ve tried and researched countless variations of mini-velos currently available on the market, from the Velo Orange Neutrino (I have one, see the previous post), to Bike Friday, to Brompton, to more obscure/no longer made bikes such as the Mercier Nano, Orbea Katu, and Cannondale Hooligan.
All of them have a pretty glaring flaw for what I’m looking for, which is that the geometry is kind of terrible for any relatively aggressive mountain biking. They’re all designed around riding around in the city, meaning they have steep head tube angles, shortish reach/slackish seat tube angles, and front end geometry that’s not conducive to supporting a proper front suspension fork, like really long head tubes, and short fork axle-to-crown lengths for 20″ wheels.
All I wanted was a bike frame with relatively modern mountain bike geometry, but adapted for small wheels. So, I made one. Or two, rather, since I had two different manufacturers make me a frame with the same geo.
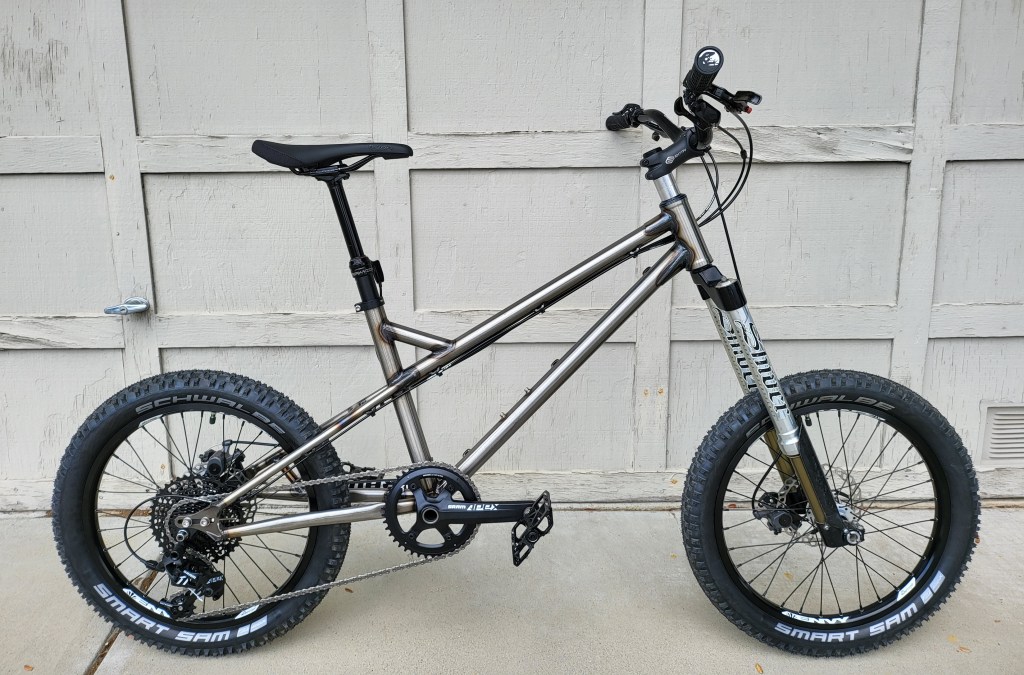
End result(s):
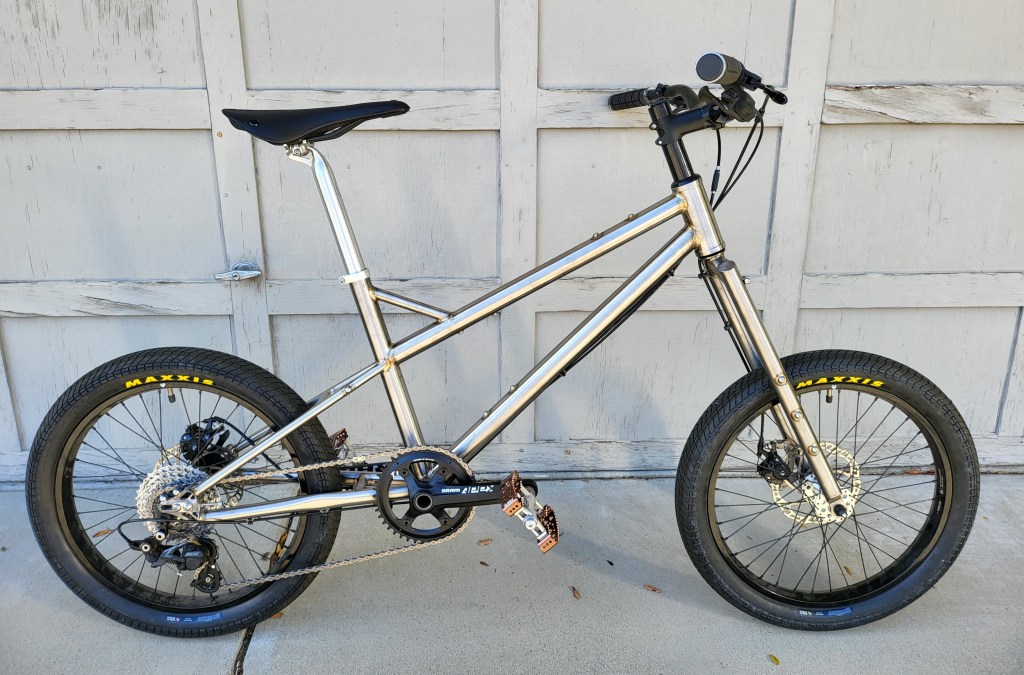
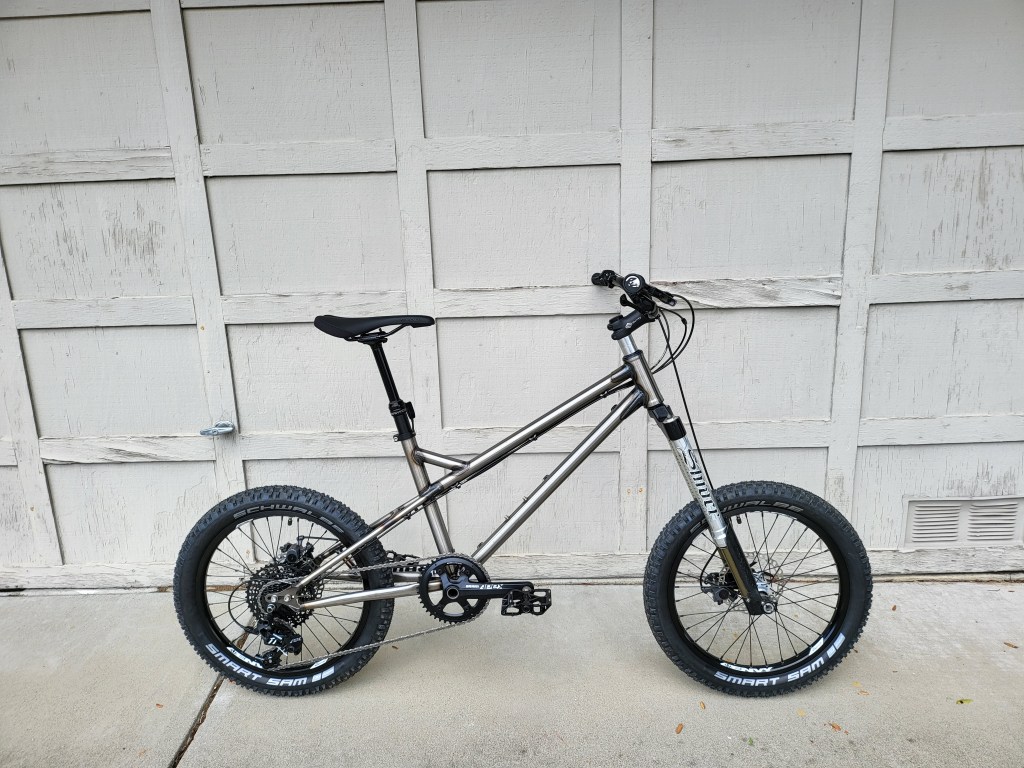
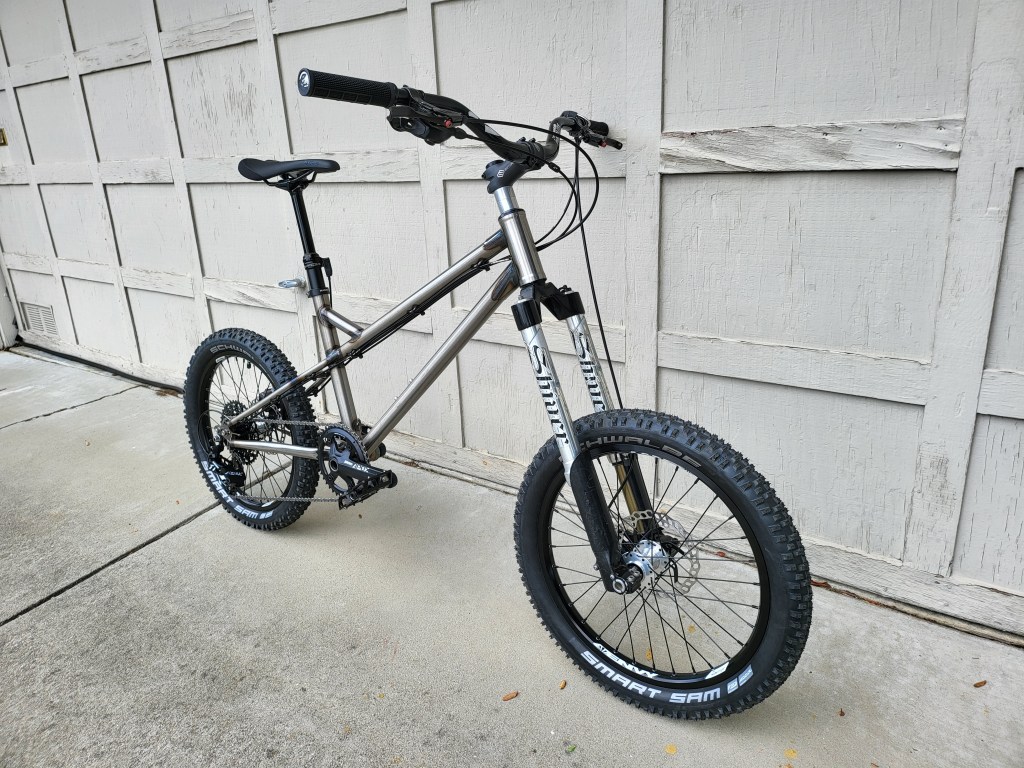
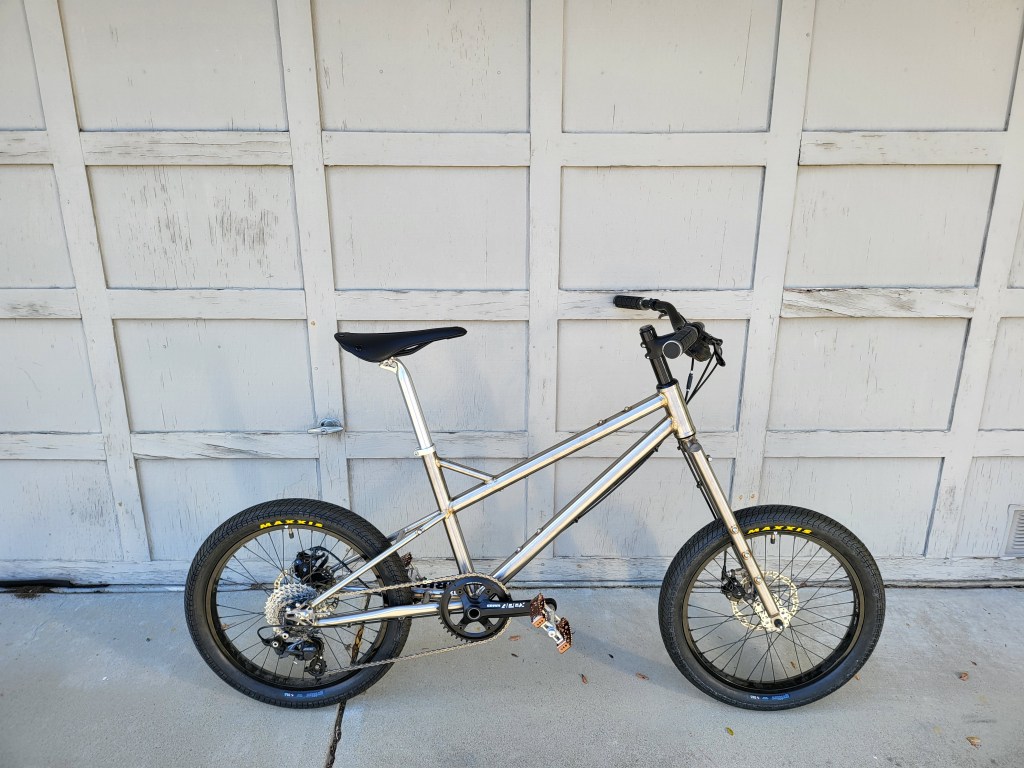
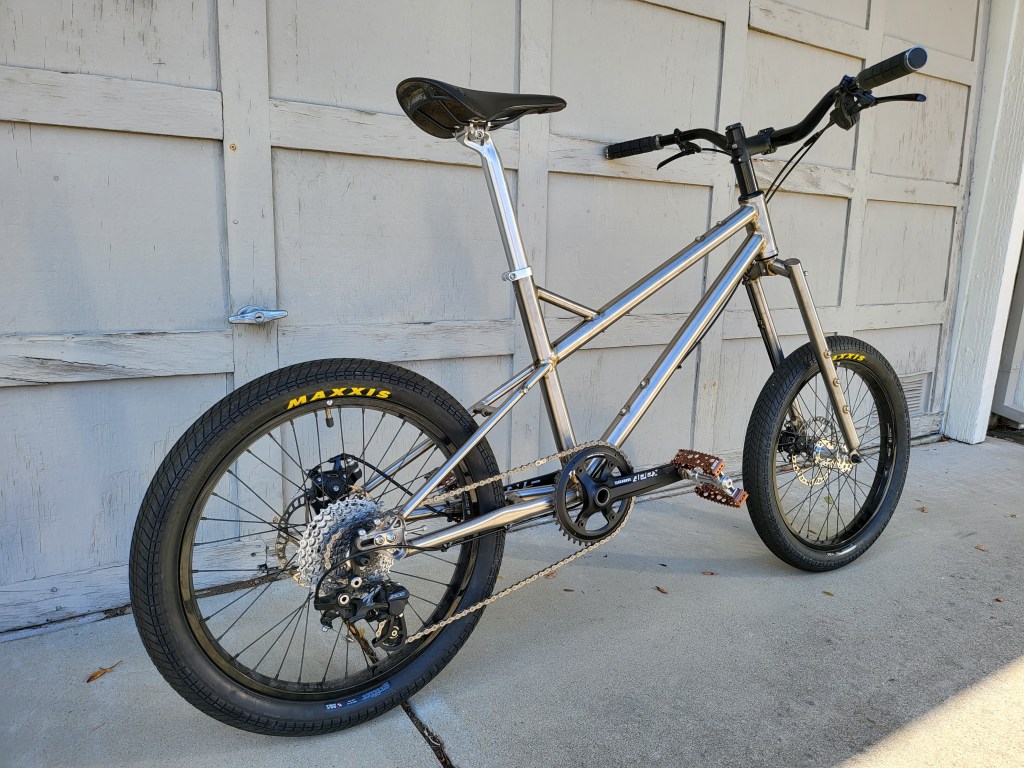
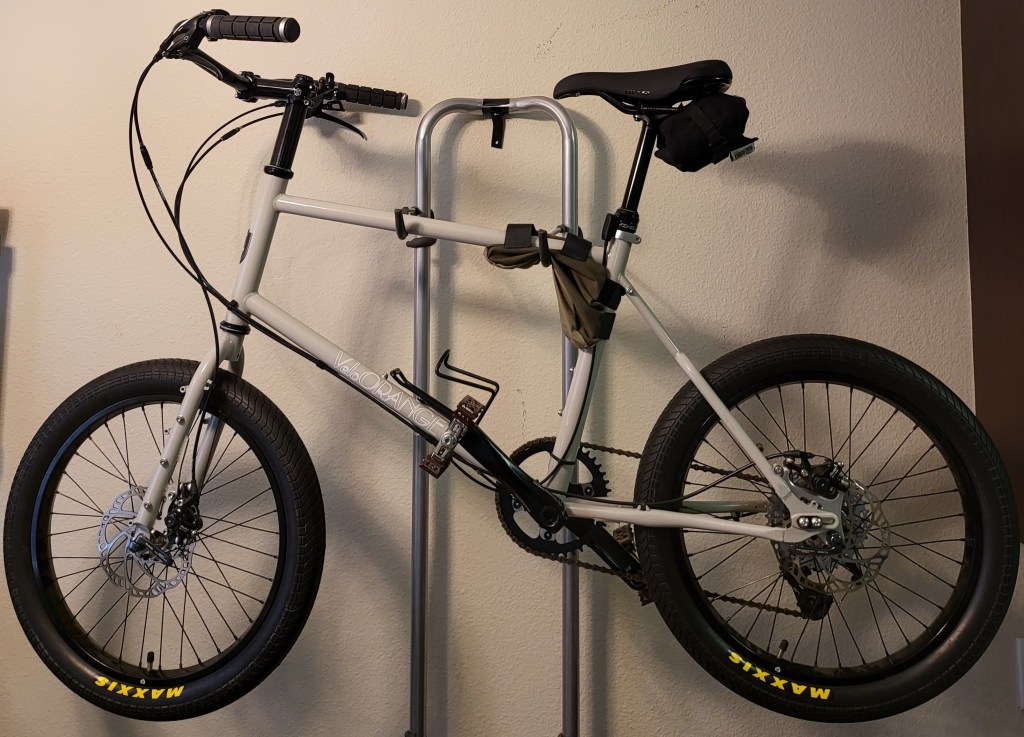
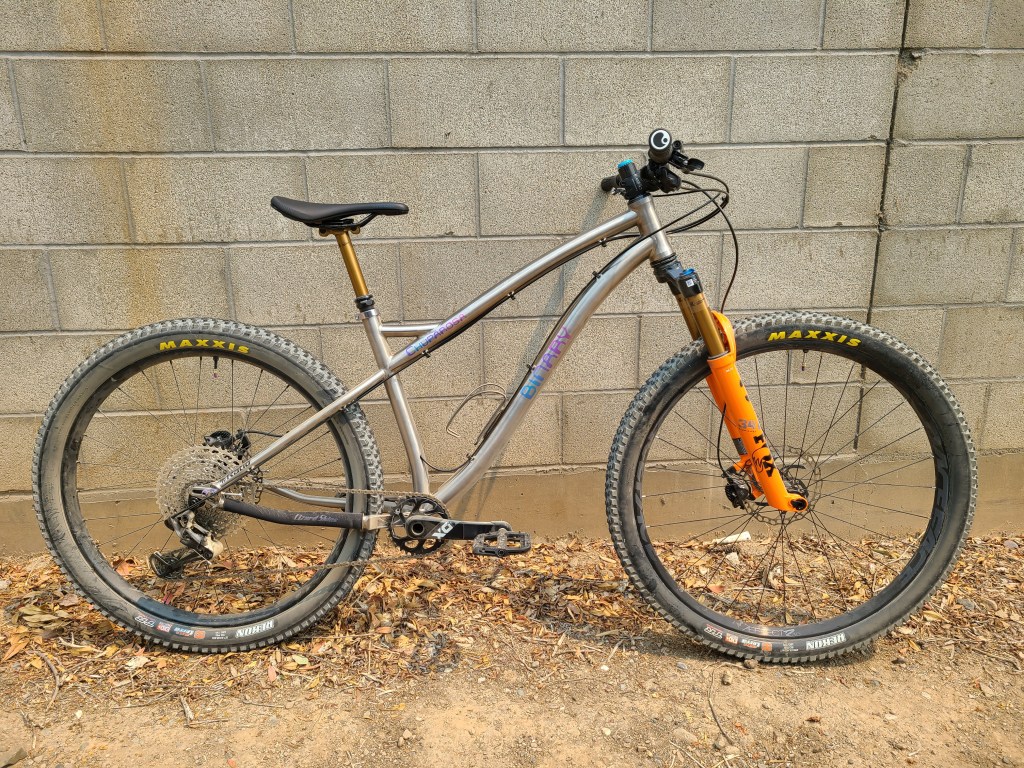
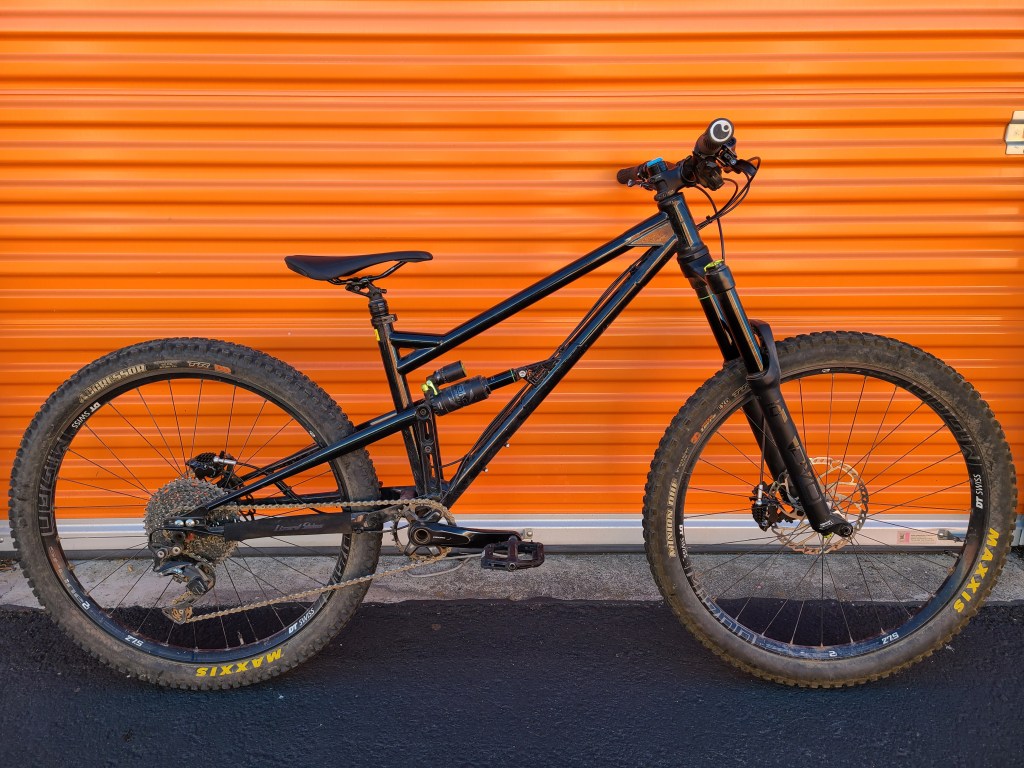
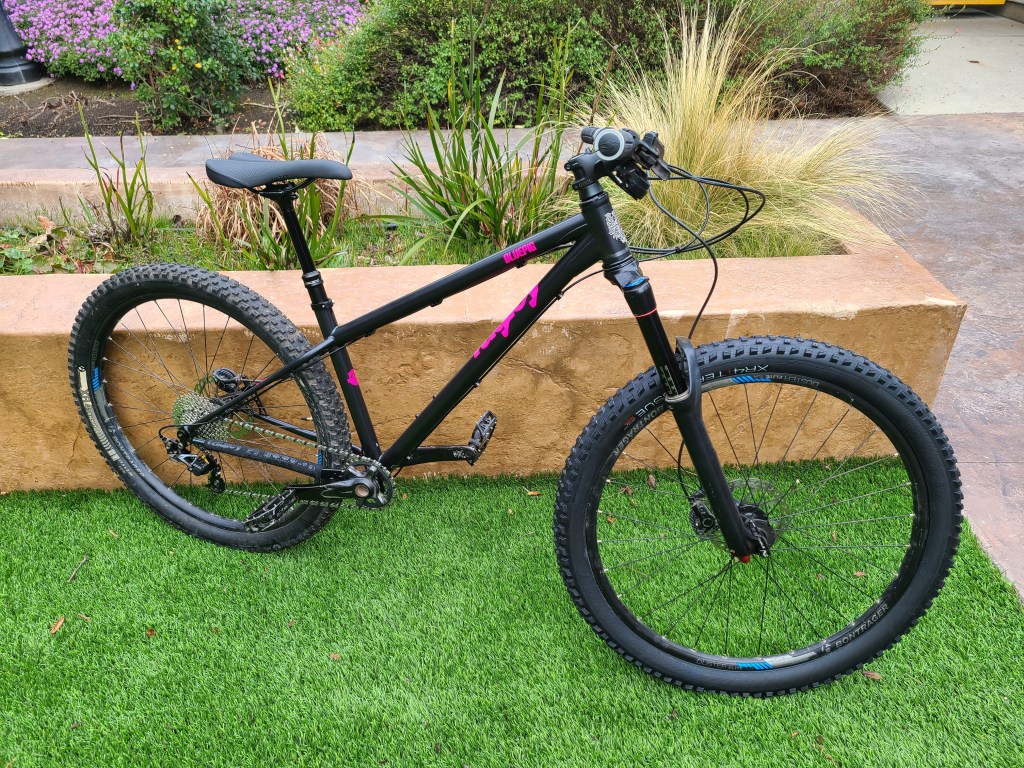
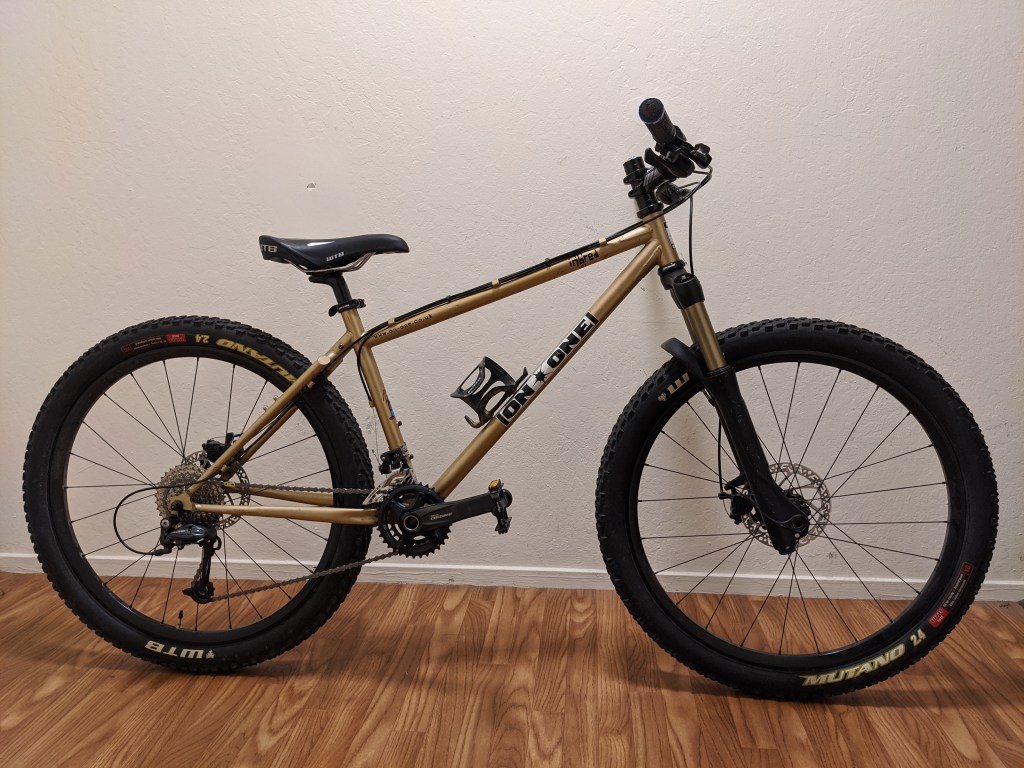
Two custom bike frames designed by myself, built by two different manufacturers (one in Peru, one in China), with the same geometry, set up for different purposes.
The top one is set up like a normal hardtail mountain bike, with a chromoly steel frame, knobby tires, a dropper seatpost and front suspension. The front fork is actually quite retro and cool in itself, it’s an old single crown Marzocchi Shiver from 2002, one of the few inverted single crown fork designs that have ever existed. I chose this fork because there’s just nothing quite like old-school Marzocchi, and inverted single crown forks don’t have the lower crown, so it looks much more like it was designed for this bike from the beginning. I did have to build the wheels for this bike specifically to accommodate the old 20x110mm non-Boost axle standard used on this fork, using Hope Pro4 hubs and Sun Ringle Envy rims.
The bottom one is set up more for simplicity, light weight, and travel. It’s a titanium frame as opposed to the steel frame on the mountain bike variant, with a rigid fork and seatpost, lots of mounts for strapping on cages and bags, and semi-slick BMX tires. All of these parts I stole off of my Velo Orange Neutrino, which is sadly now stripped down to the frame. That bike was just too twitchy to ride for my preferences.
The geometry and CAD design that I created that was used to make these frames:
To sum up, this is a relatively average modern “medium” sized mountain bike geometry, with average head tube angle at 67 degrees (much much slacker than the super-twitchy 73 degrees on the Neutrino), average-ish 74 degree seat tube angle (compared with 72 degrees on the Neutrino), effective top tube of 580mm, and reach of roughly 430mm (compared to 406mm on the Neutrino). Generally, the steeper seat tube angles on modern mountain bikes necessitate a longer reach, and vice versa on older/more traditional road-oriented frames, in order to maintain the same relative feel between the saddle and the handlebars.
The main difference on this bike is the bottom bracket rise of 20mm, compared with more typical bottom bracket drop of roughly 50mm on normal 27.5/29″ mountain bikes. This is to raise the bottom bracket to a normal ground height with the much smaller 20″ wheels used. The chainstay length is also relatively average, at 410mm-425mm adjustable, which matches relatively well with the reach measurement for balance.
The frame was designed around a fork axle-to-crown (A-C) length of 480mm, which is the average A-C length of suspension-corrected rigid forks on the market. This means that the bike can accommodate suspension forks designed for normal 27.5/29″ mountain bikes with roughly 100mm of travel, something no other 20″ mini-velo on the market is able to do, at least that I’ve seen.
The other numbers are mostly for stylistic choices, I wanted the seat stays to be in line with the top tube, then have a gusset tube for the seat tube so it can extend to a relatively normal length without an extraordinarily long seatpost.
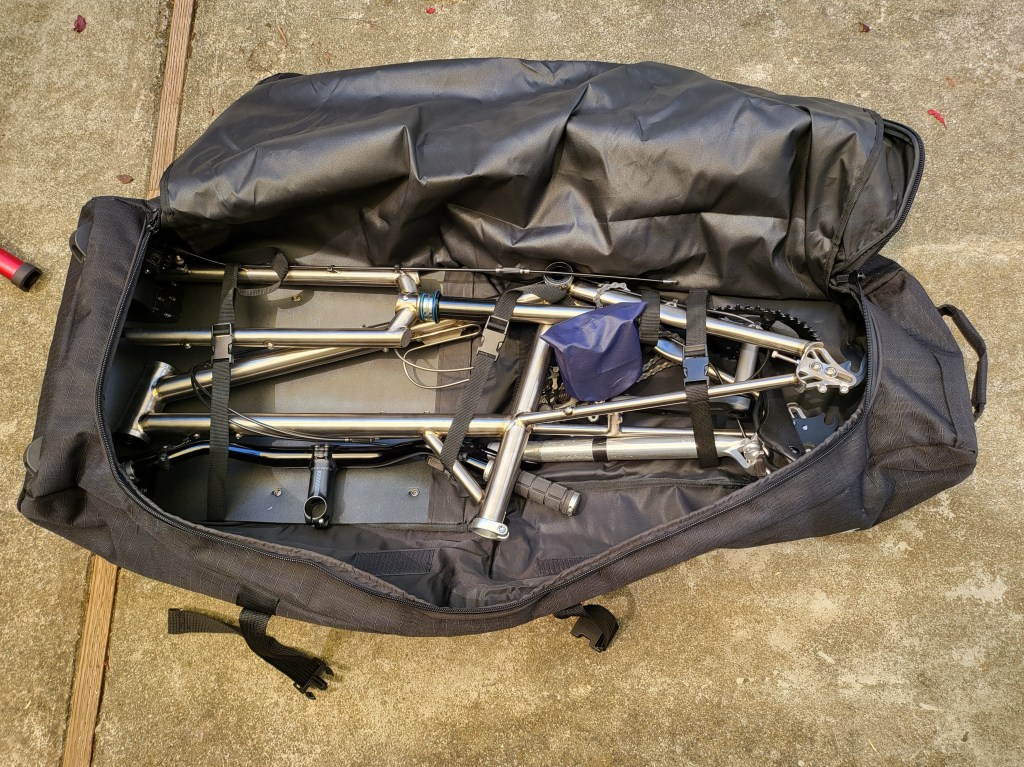
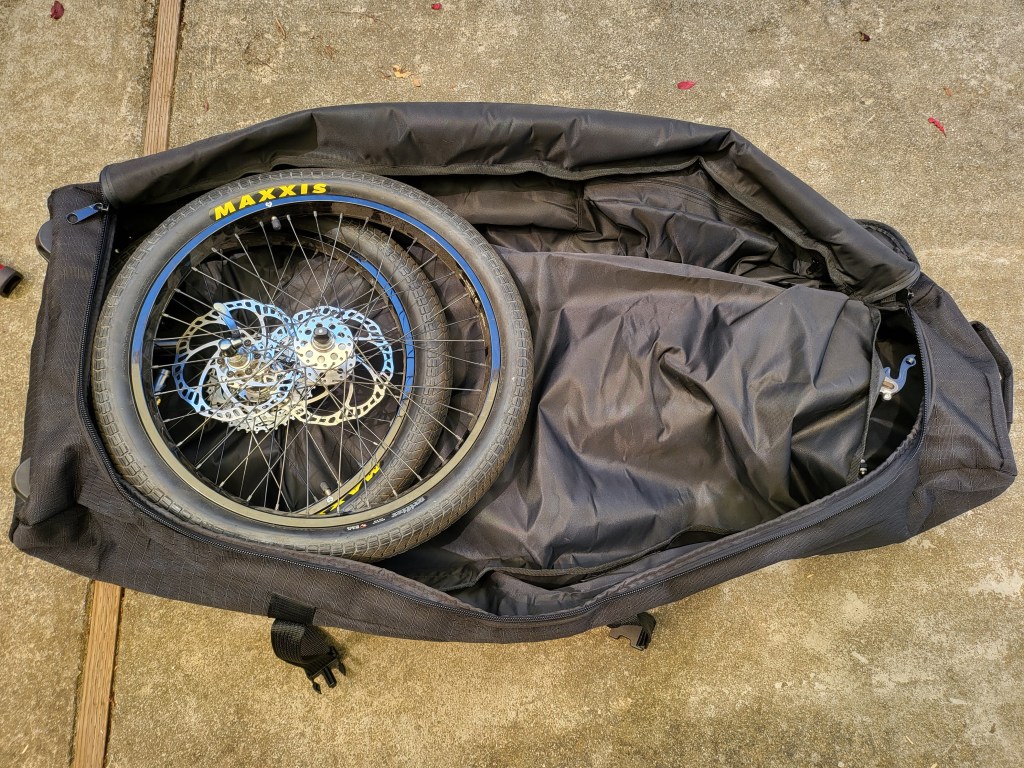
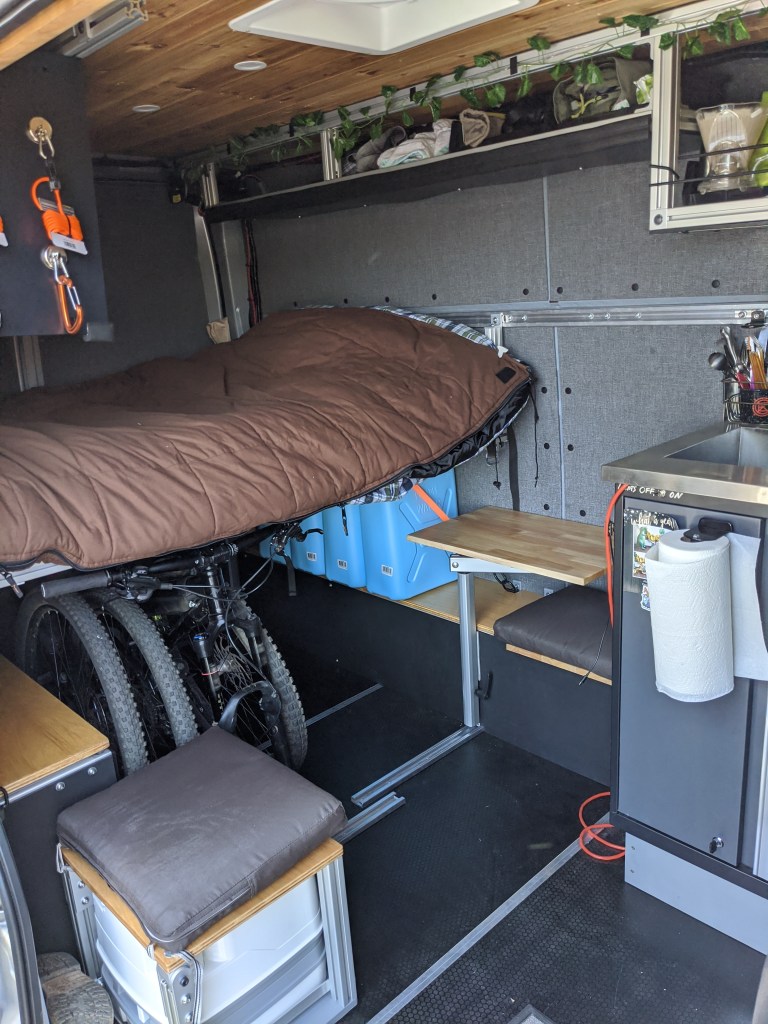
Ultimately, this design lends itself to being able to be packed into checked luggage, with the smaller wheels, and narrow frame dimensions (in the vertical plane), which means I can bring this bike with me much more easily when traveling than a full-sized bike. The whole thing can be put together with a standard bicycle multi-tool.
As you can see, it fits with plenty of extra space for padding, protection, and even clothes and helmet.
I’m pretty excited to use this bike a bunch in the future, it absolutely shreds on the pump track and around the neighborhood. Can’t wait to see how it does on trails and on trips.
Ended up selling the motorcycle, the Surly Krampus, and the red DJ bike recently, all bikes that I just did not ride as much as I wanted to. The motorcycle especially was struggling in storage, the fuel (despite being treated) was not aging well and the bike was getting hard to start. It needed someone who would ride it.
However, silver lining, with these bikes gone, I had room to build more bikes.
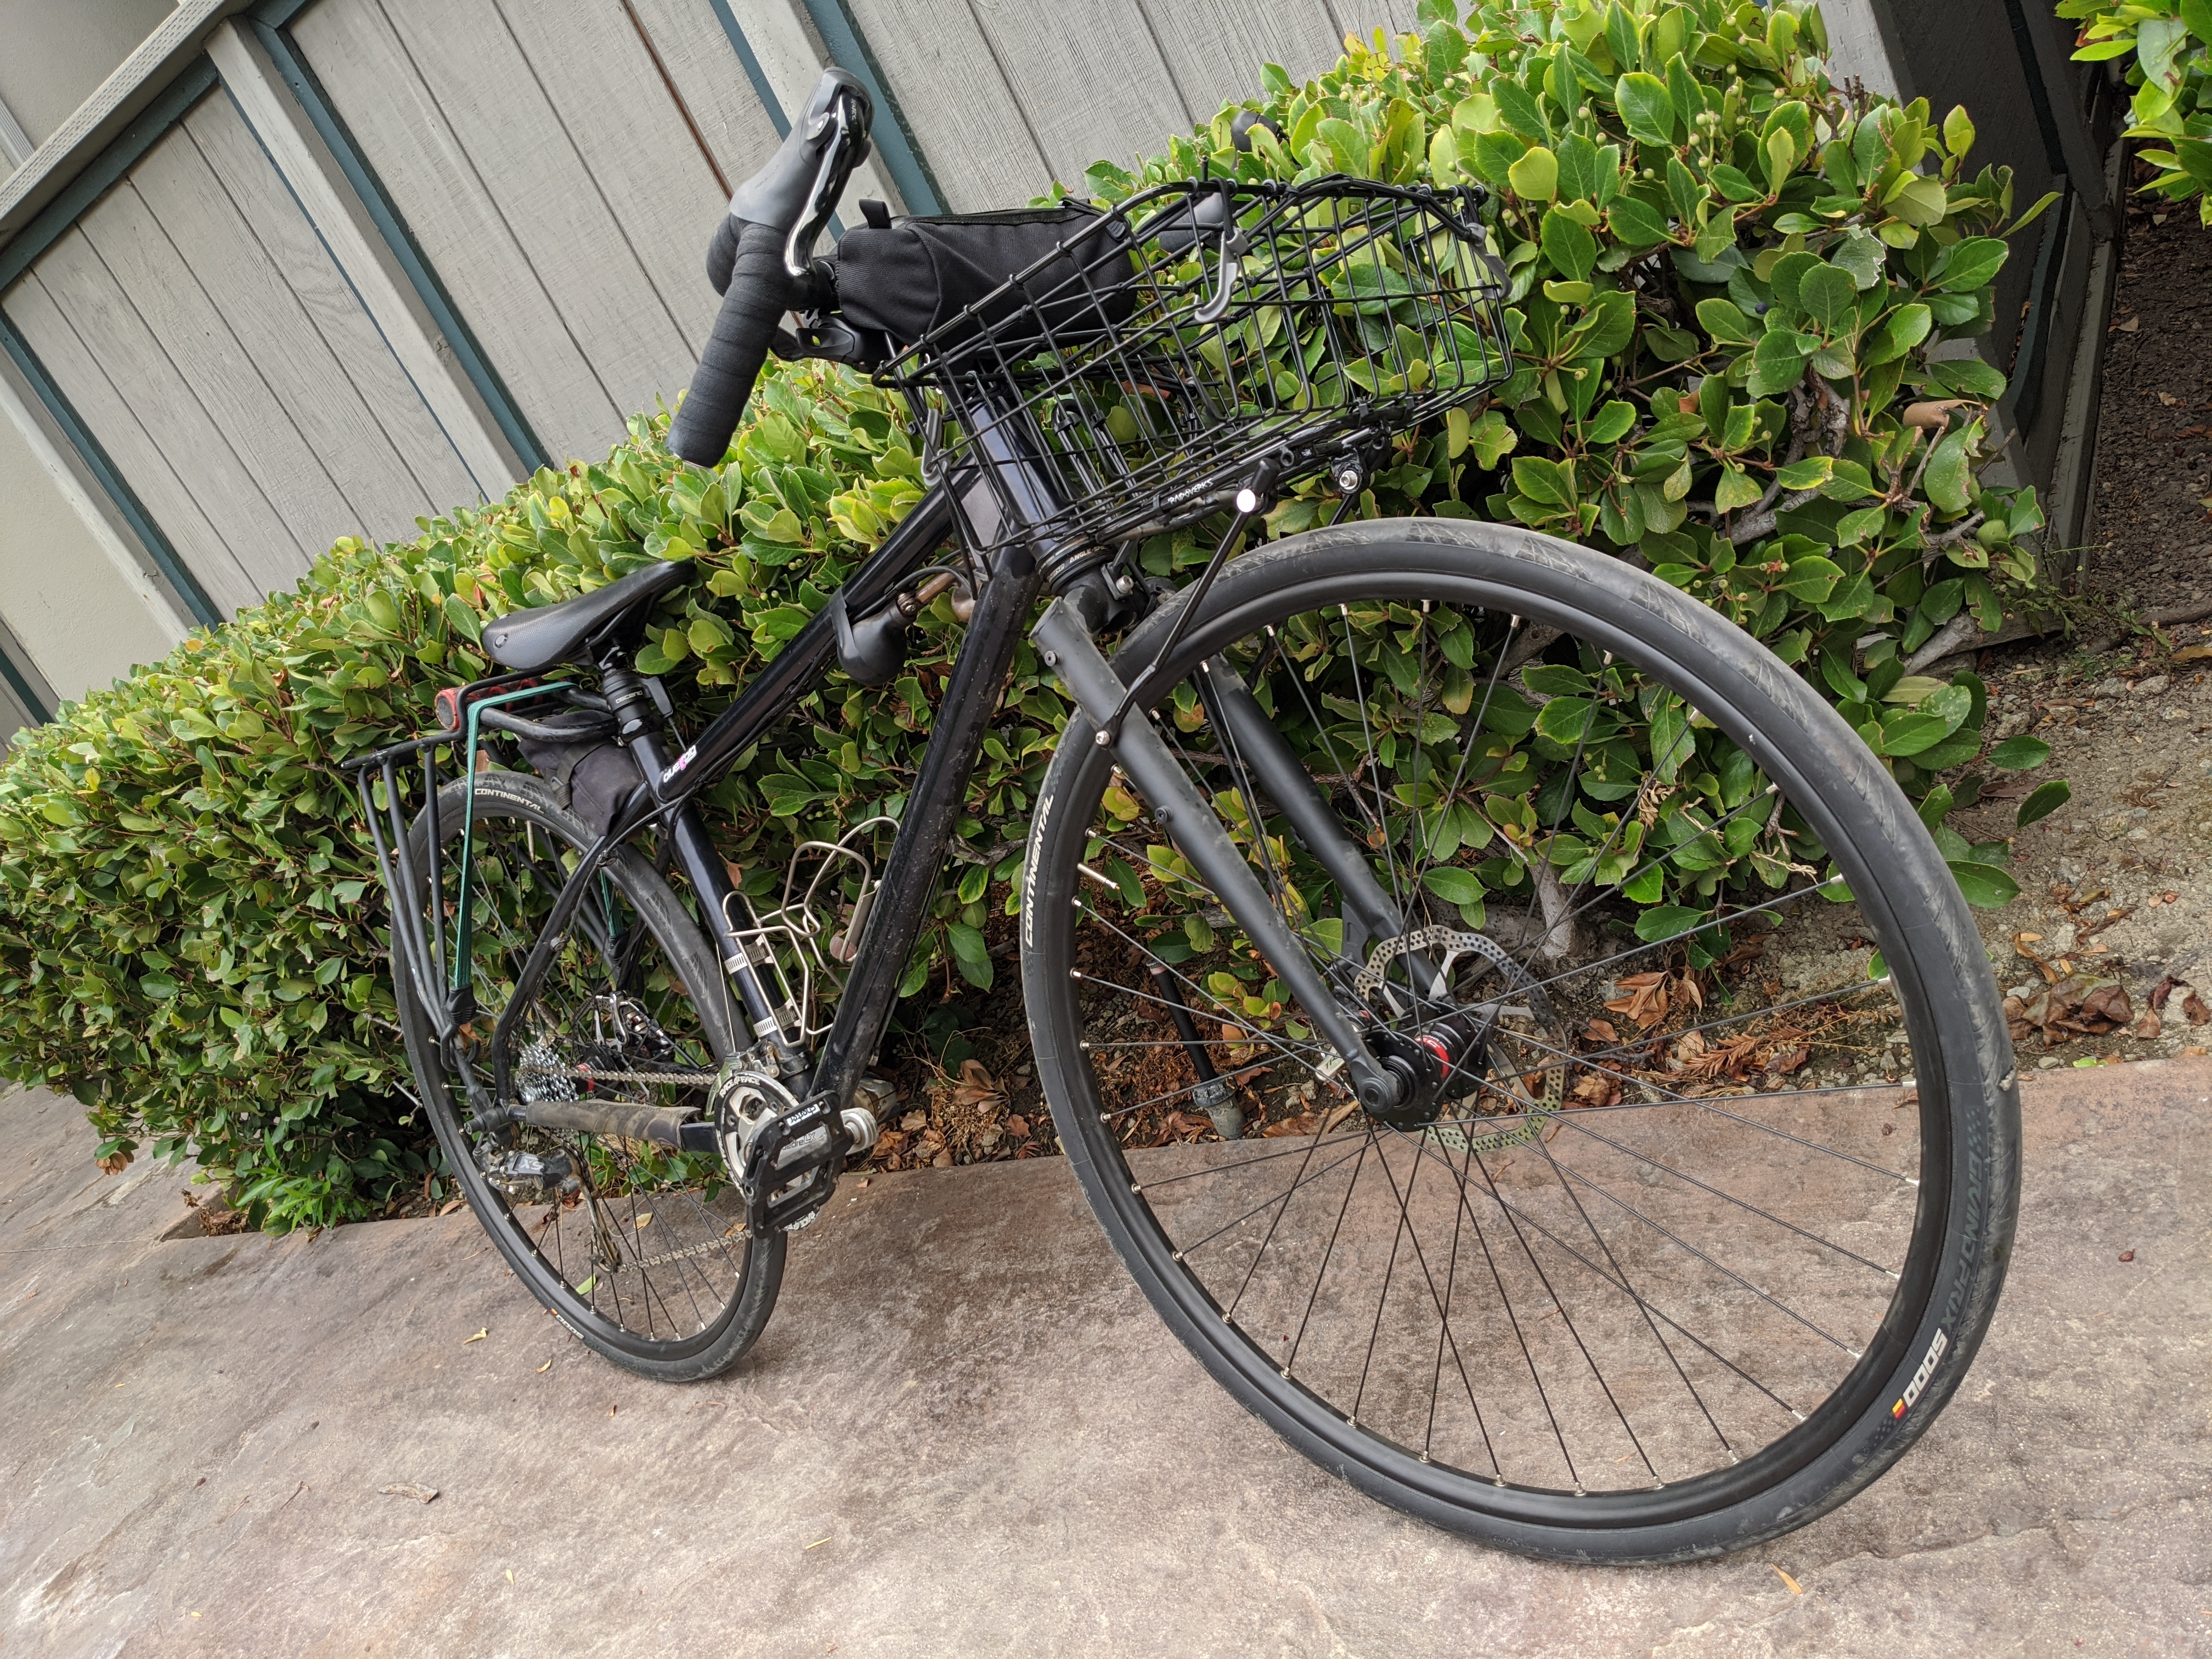
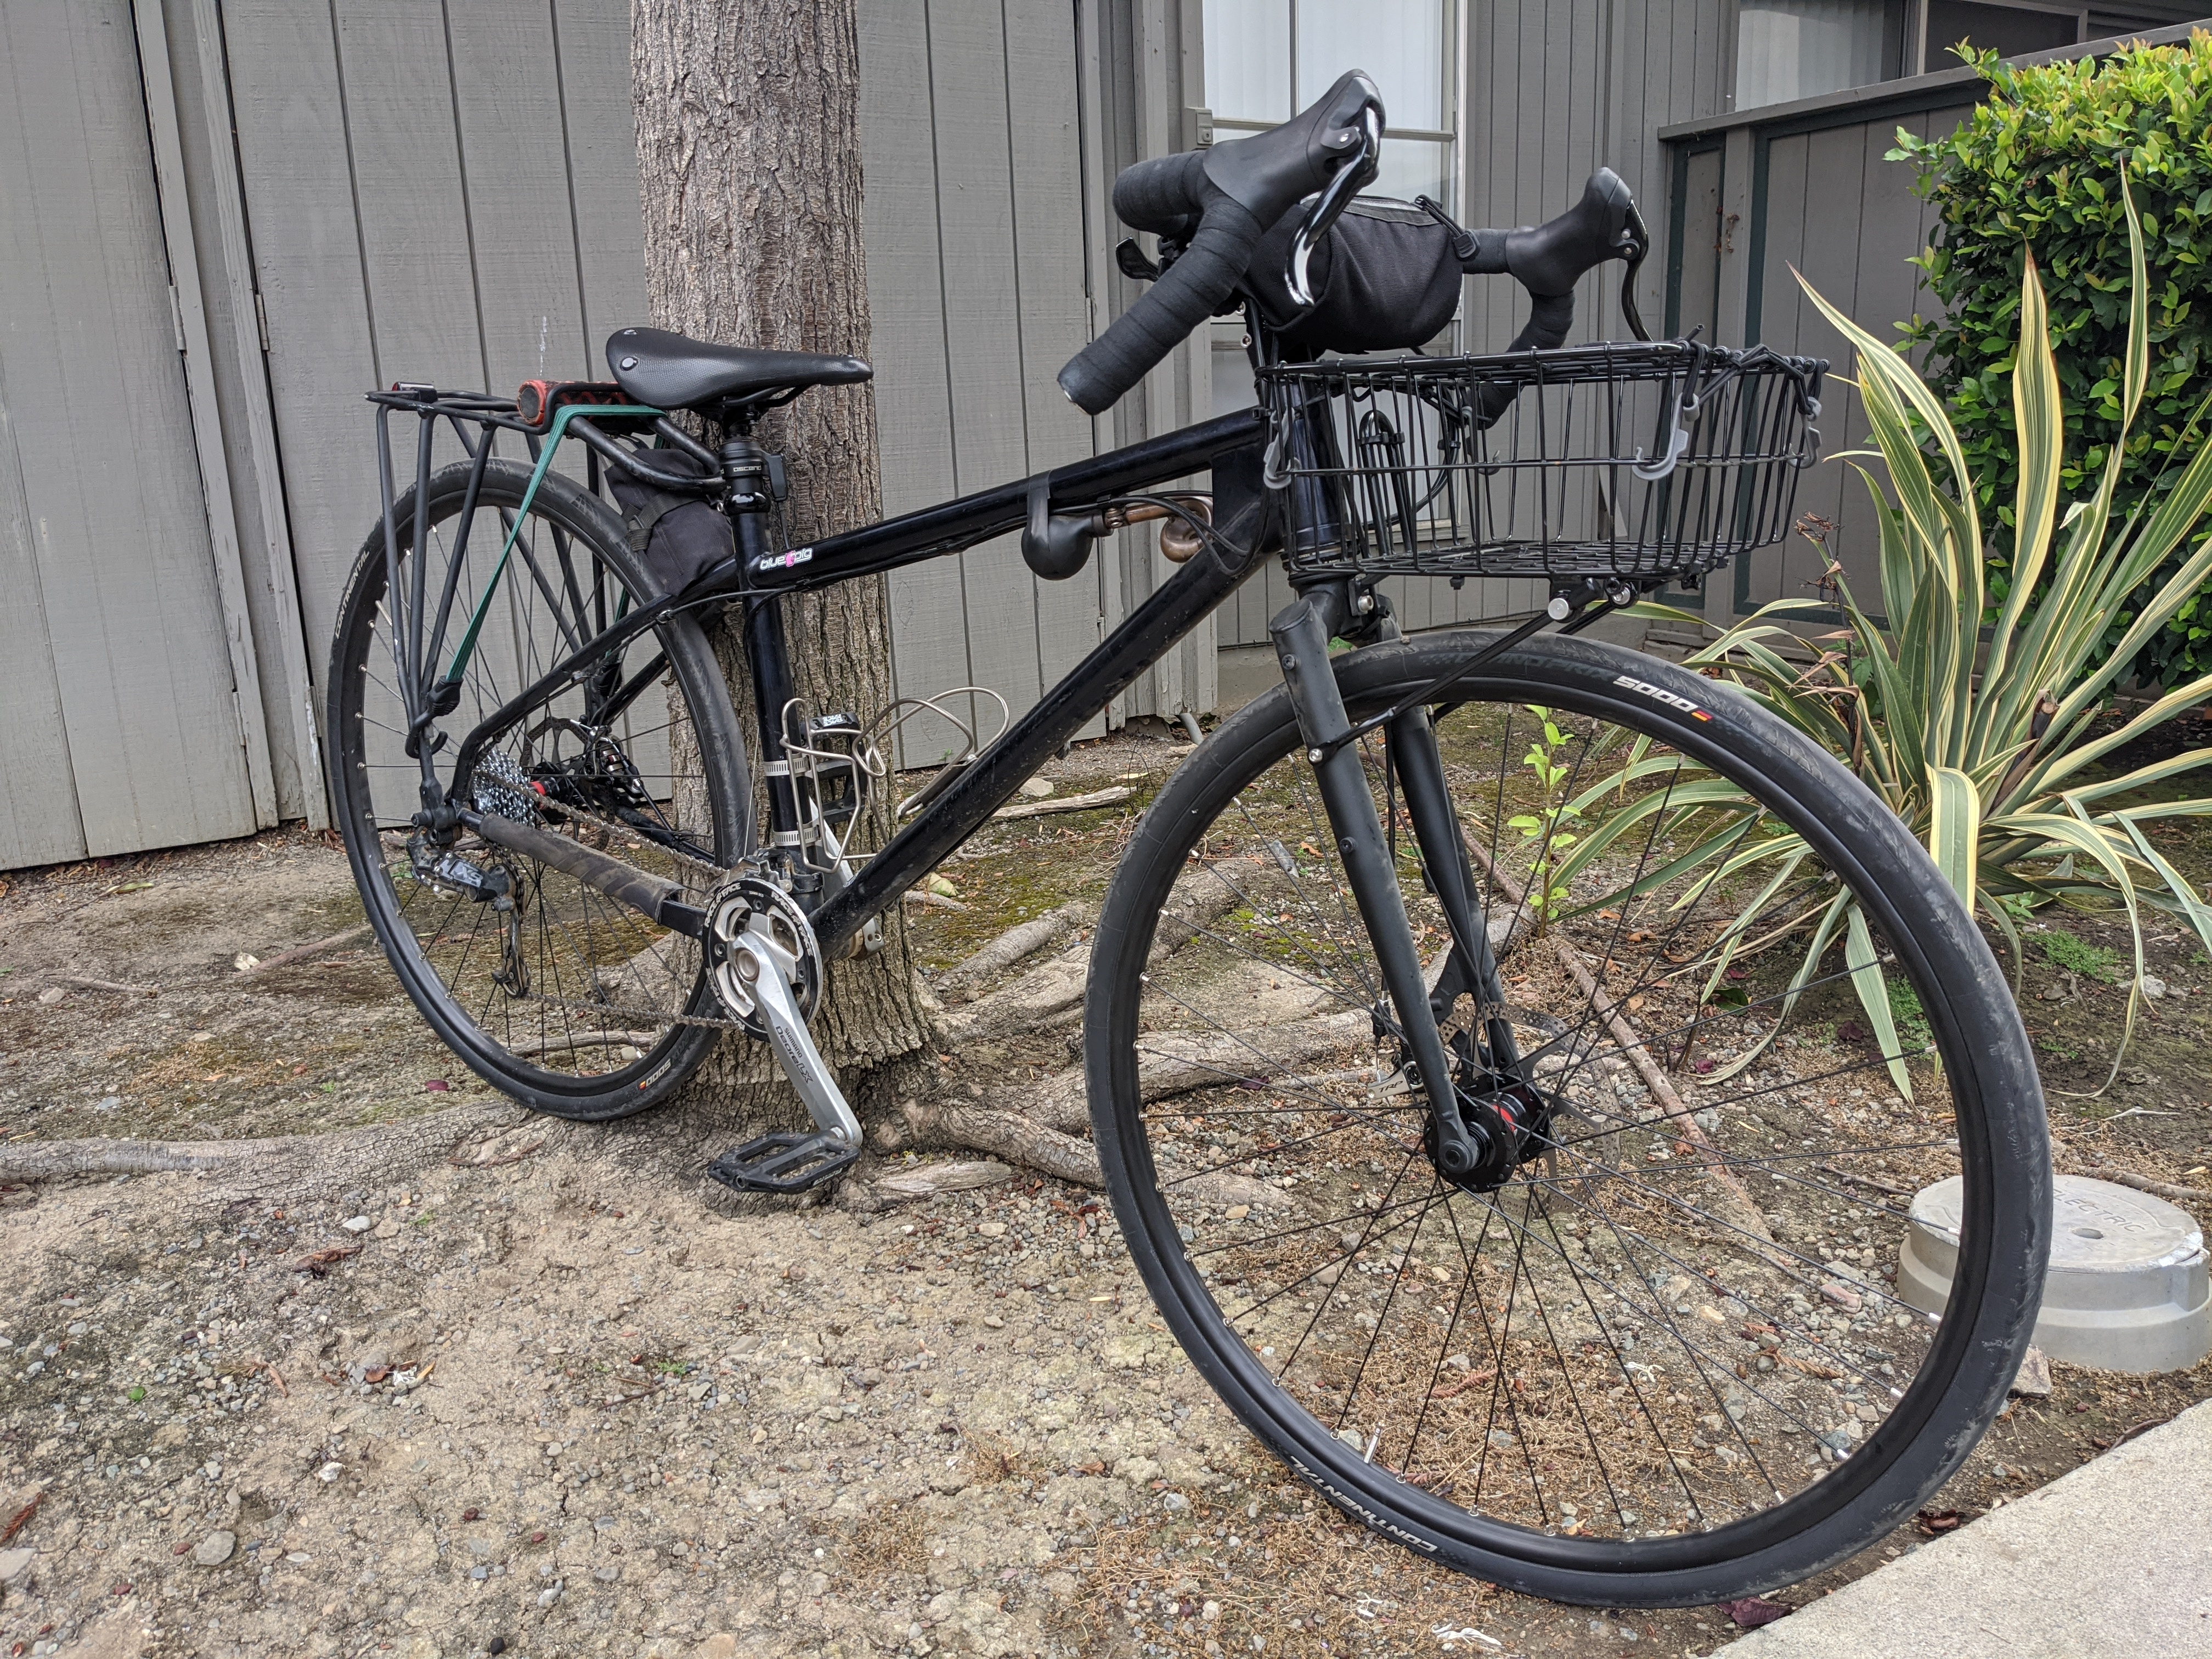
Starting with this one, the most successful basket/townie bike yet:
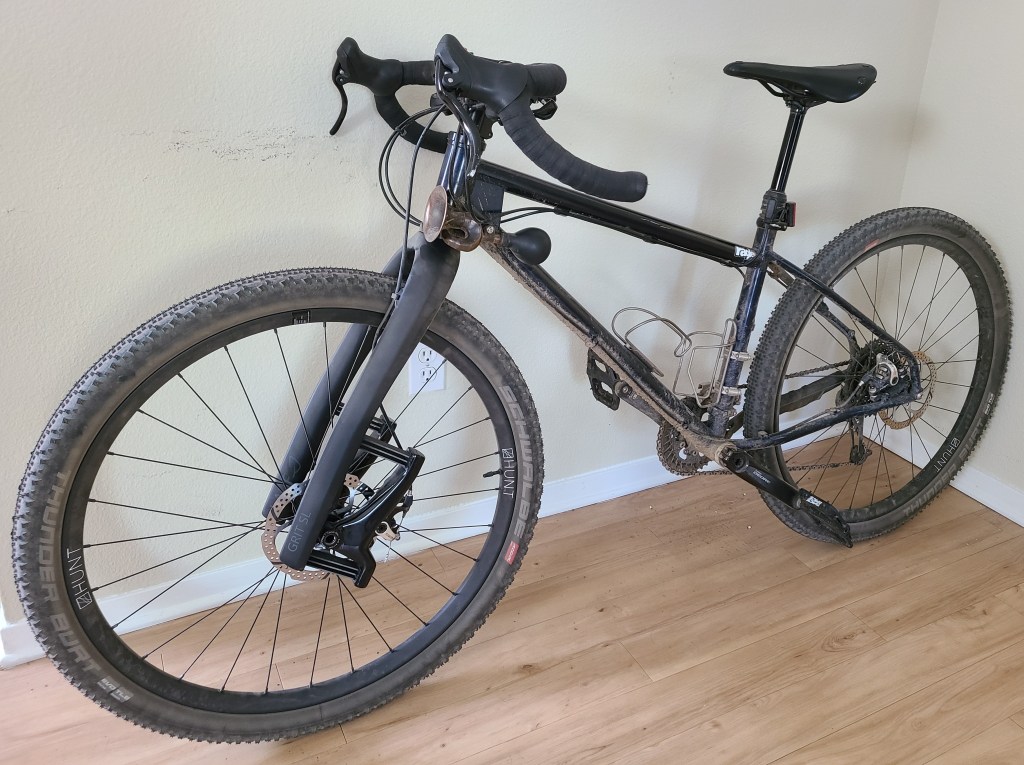
Scored a really cheap Marin Four Corners frame to use as the base for this. Covered up all the frame logos with stickers, including a large black reflective vinyl for the downtube (to increase visibility on the street). This frame is supposed to be a drop bar tourer/gravel/adventure bike, but it has a longer reach than is standard for a similar drop bar bike of its size, which means it works well for a flat bar conversion.
This Marin frame also generally is a bit more heavily built, with thicker tubing, which means it’s stiffer and should handle better when loaded down with some weight. This was the biggest issue with the previous Soma Wolverine build, which turned out to be a bit of a noodle when loaded down, just flexing everywhere.
I used an All-City Gorilla Monsoon fork, again another adventure bike. Comes with a 12×100 thru-axle, mounts galore, and again is more heavily built compared to the Wolverine. Plus, the aesthetic of curved fork blades is a nice little retro touch, I think.
This frame originally was meant for 700c gravel wheels/tires, but I ended up mounting fatter 650B Panaracer Gravel King tires with full fenders from Portland Design Works. The bottom bracket height is dropped maybe 1/2″ as a result, ending up at 10.5″. A little bit low, but not crazy low. On a casual cruiser like this one, it works, adds a bit more stability and ease of mounting/dismounting around town.
The wheels are some cheapish FSA set, but they came with end caps for 12×100/15×100/QR, 12×142/QR, which is super convenient for adapting the wheels to pretty much any older bike.
The cockpit consists of my old Brooks B17 Narrow saddle that I first acquired all the way back in college, with Soma Dream handlebars cut down to 760mm. These bars have a nice rise and swept back position for a comfortable and upright riding posture.
Brakes and drivetrain are nothing special, more or less a parts-bin mash-up of Hayes MX-2 mechanical disk brakes, Avid FR-5 levers, SRAM Rival rear derailleur, NX 11-42T 11-speed cassette, SRAM S700 shifter, Shimano Deore 30T crankset, Race Face Chester pedals.
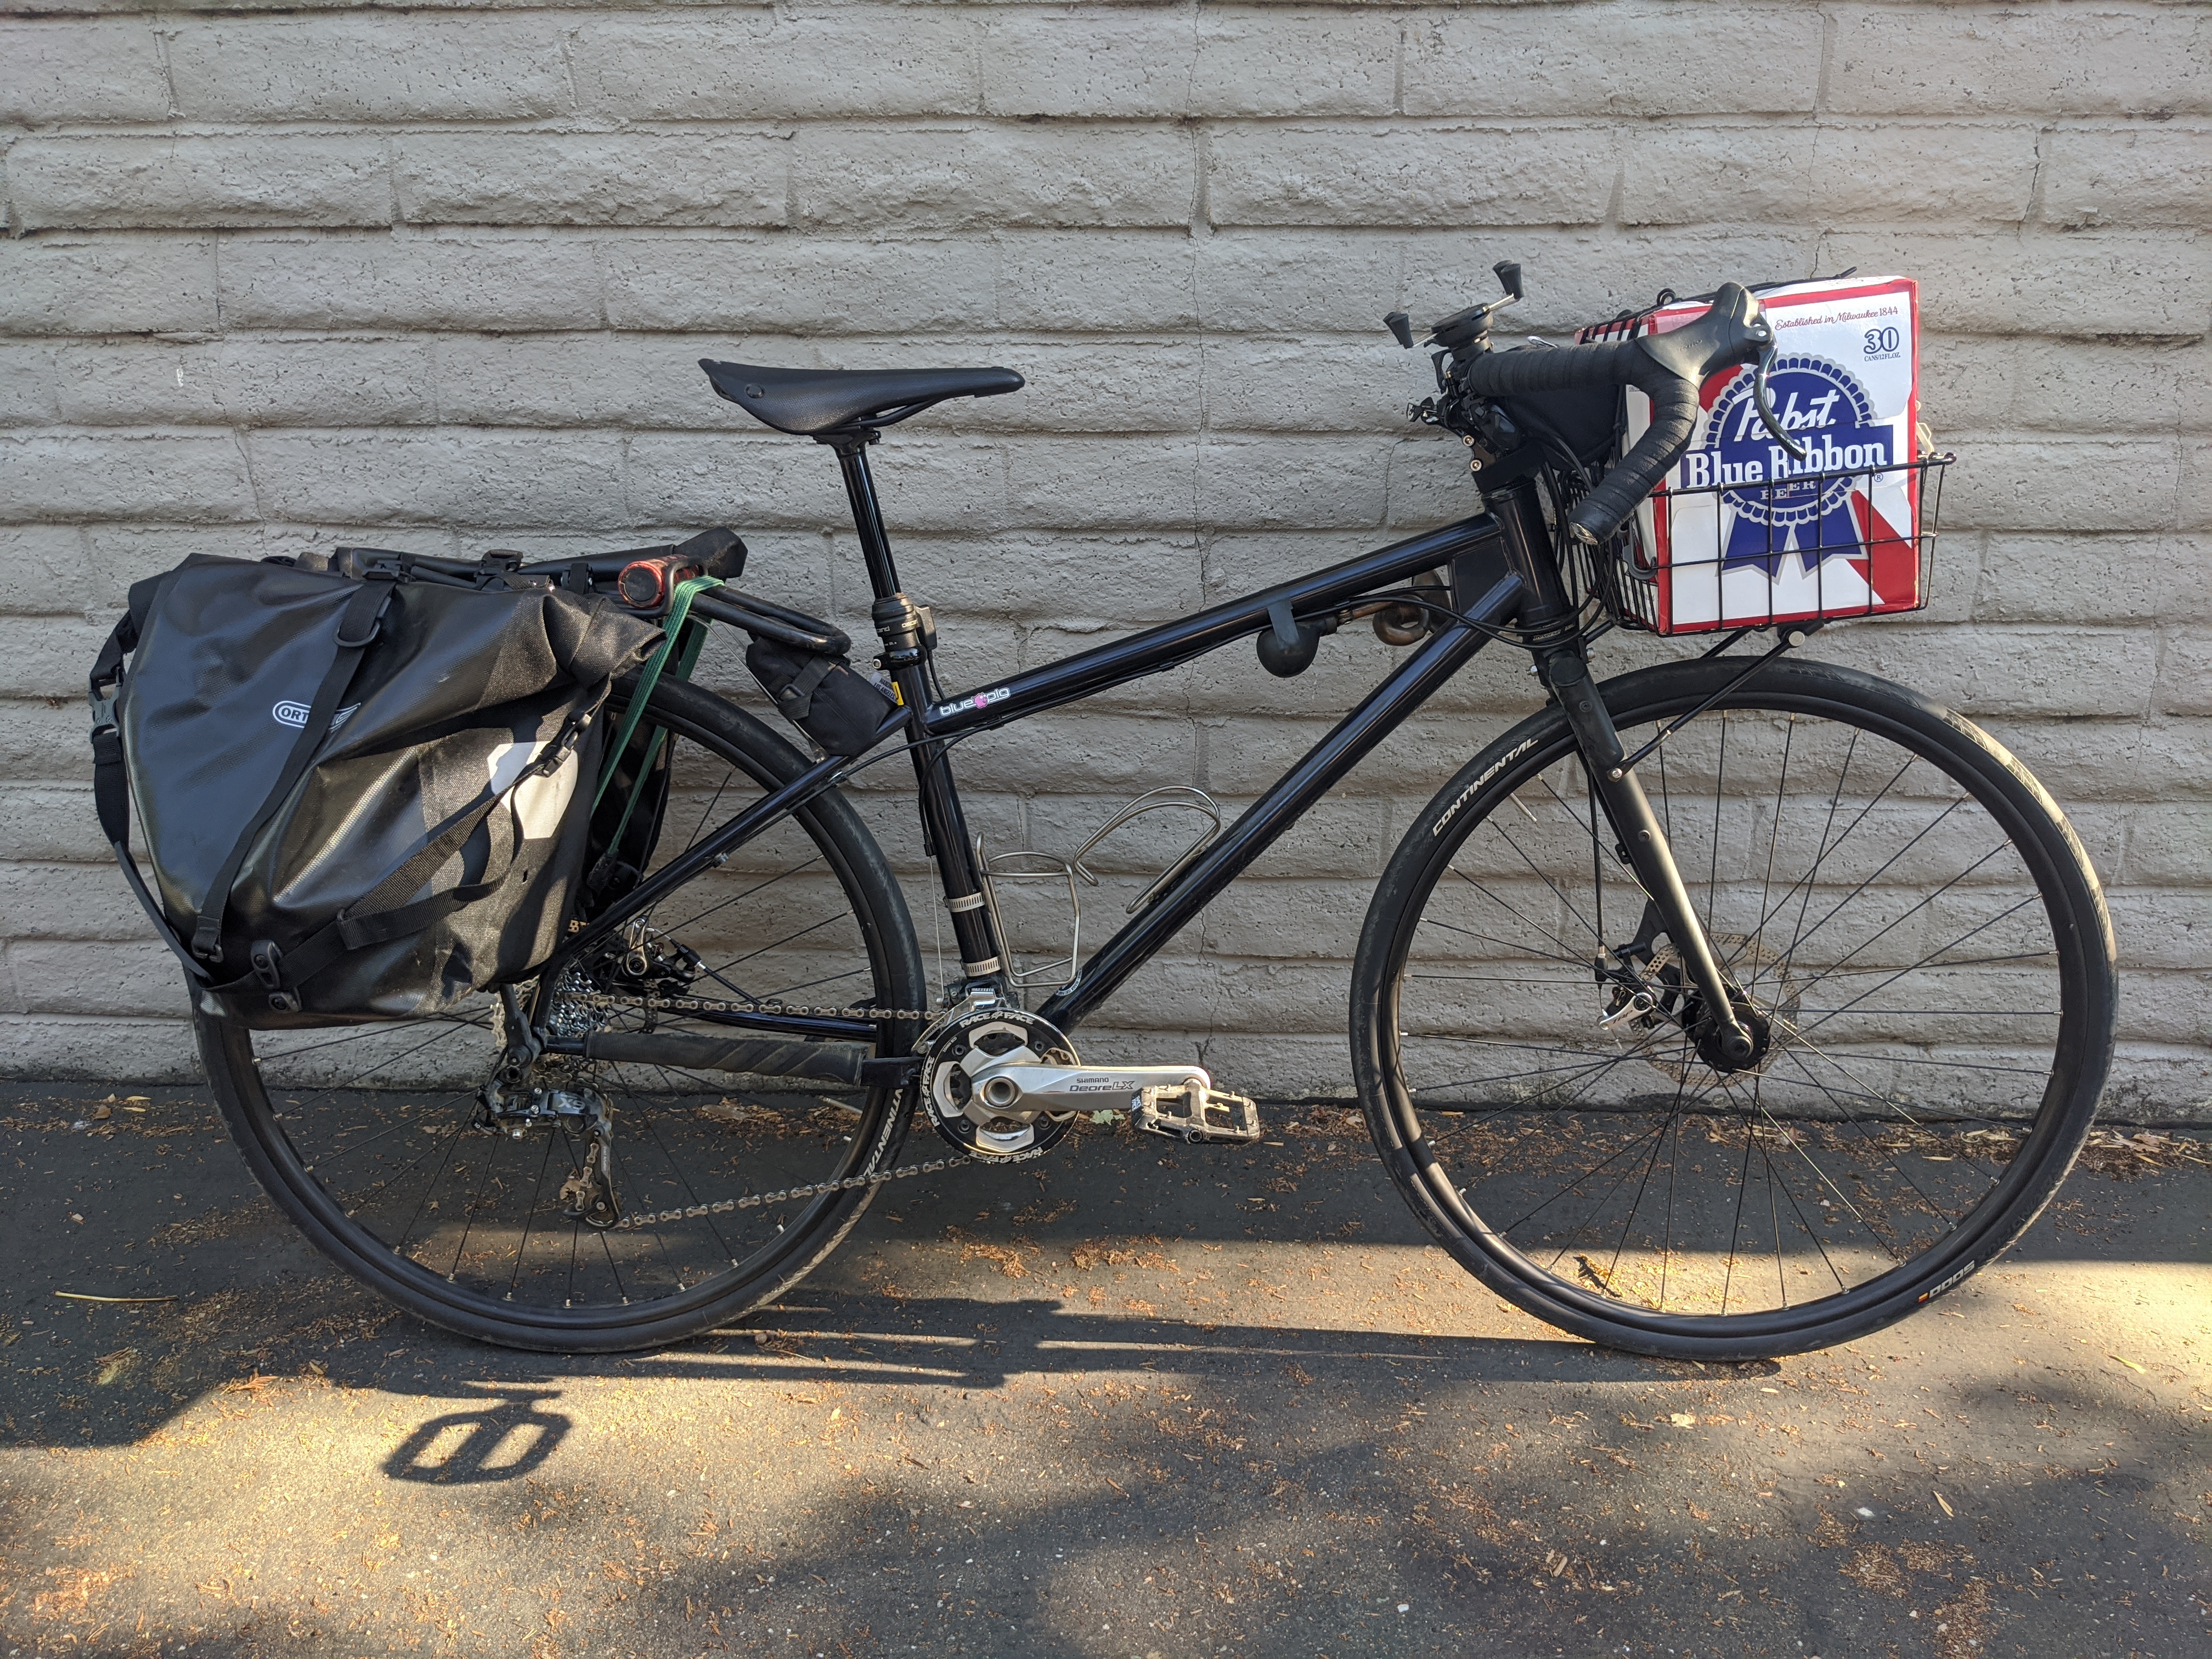
The accessories and rack/basket/bag setup really work well together this time. Swift Zeitgeist bag with a Carradice Bagman cradle, Tumbleweed T-rack on the front with a Wald 137 basket, Outer Shell stem bag, and two King Cage titanium cages with Voile straps to accommodate massive water bottles, or anything else that needs to be strapped in. There’s a little trailer mount on the left side of the rear axle too, for pulling a small cargo trailer if needed. And can’t forget the kickstand! A Pletscher two-legged thing that all folds up to the left side of the bike. It’s really nice to be able to have the bike stand on its own to load without the front basket flopping to one side.
This is the first bike that has really felt comfortable to ride while fully loaded down with a bunch of weight in the front and the back. The front end is actually stable, and the bike doesn’t flop around everywhere. I may keep this one.
The next bike is a move towards the opposite side of the spectrum, somewhat:
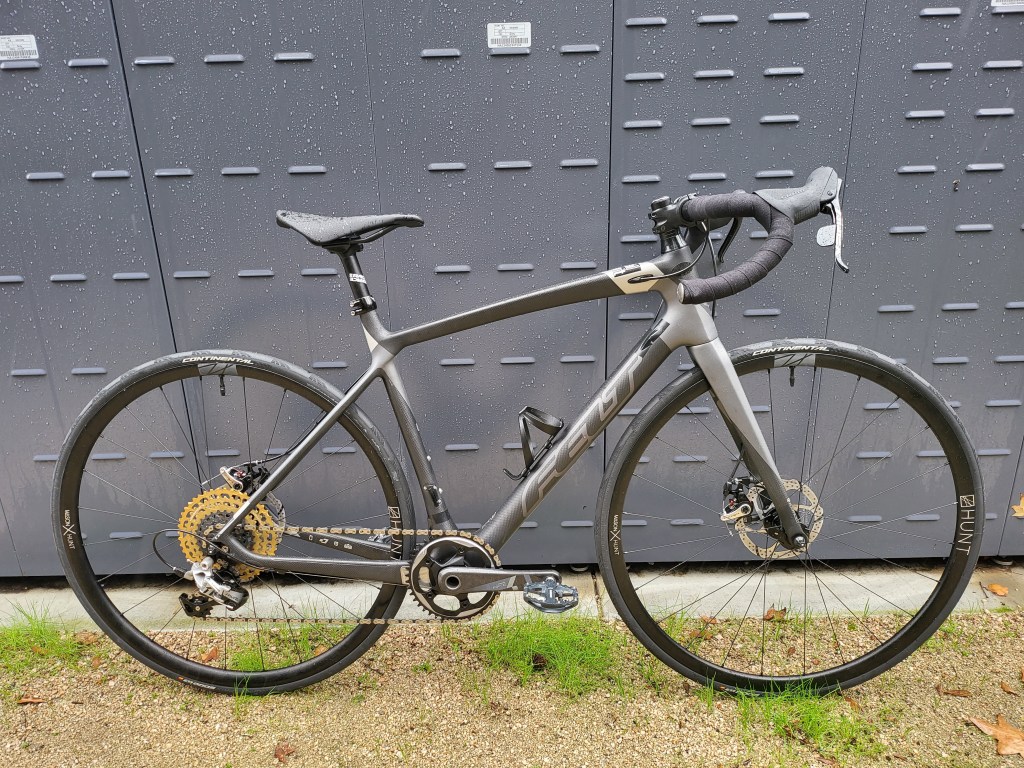
Scored a Felt ZW C frameset for what I thought was a decent deal, wayy cheaper than any modern carbon road bike frameset. It’s technically a women’s frame, but what is gender, anyway? The color scheme is simple and looks nice, and I’m a smaller person.
Used a bunch of leftover parts, combined with some select new ones. It’s got a Hunt gravel wheelset with Continental GP5000 700x25c tires set up tubeless, TRP Spyre Brakes, SRAM 1x Force/Rival/Apex drivetrain with a 9-42T Leonardi Racing cassette, and a mixed parts bin cockpit. The stem is super short, but this is mostly just me not liking the super long and laid out positioning on road bikes, I prefer to be a little more scrunched up with bent elbows to get low and aero.
Came out to just over 18 lbs. wet, without any particularly lightweight parts on it. Should be pretty fast.
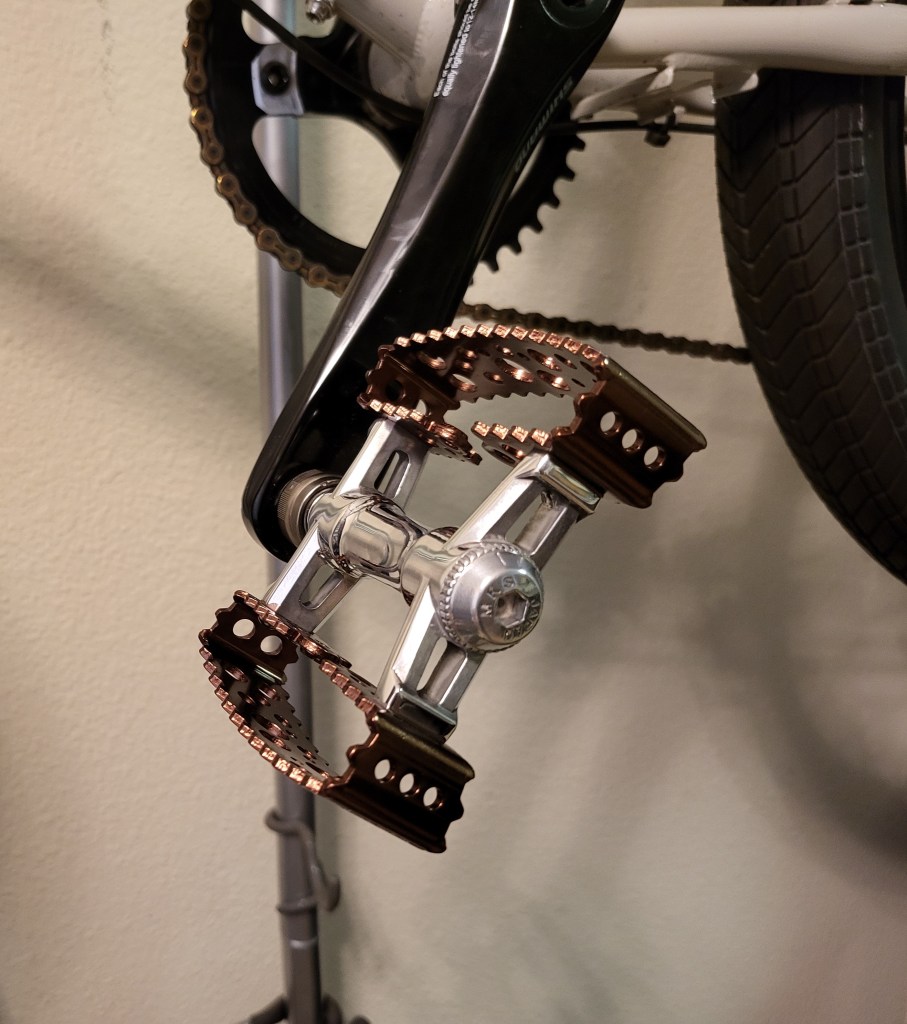
The next build is more just a slight modification to the Velo Orange Neutrino, swapped the Soma Clarence handlebars for the even more casually swept-back Soma Oxford. I just like being comfortable, these days. Then added some blingy pedals, the SimWorks Bubblys, which have a slick quick-detach system, keeping in line with the bike being small and meant for ease of transport.
Lastly, of course after coming home for the holidays, the first thing I did was build the bike I shipped back home, in case I feel like riding in the middle of winter in Michigan:
I went a little crazy building bikes during the last two years as a way to keep my hands busy. Most of these bikes I’ve sold, a few I’ve kept. Most are weird builds, just because I like to try different things.
Starting from my current bikes that I’ve kept:
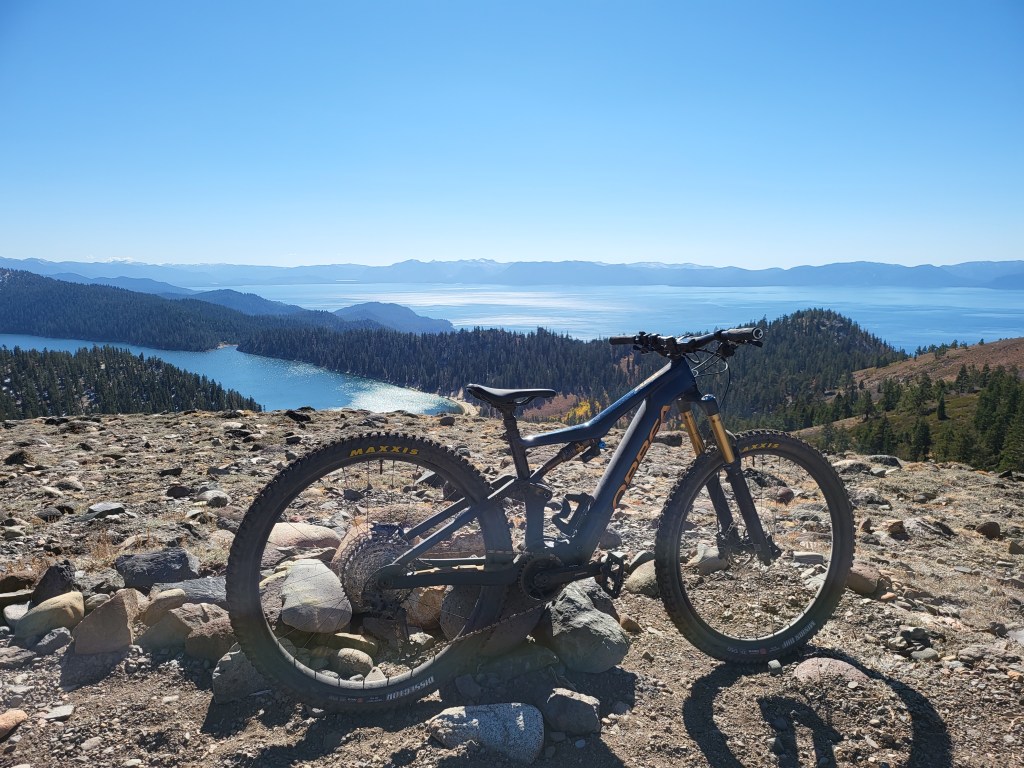
Orbea Rise, eMTB. Electric mountain bike, a ton of fun. Makes doing big elevation rides a lot easier. My current main ride.Binary Bikes Chuparosa. Titanium hardtail, 29″ front, 27.5″ rear wheel. Keeping it, I just can’t stop looking at it.Franken-Pig: 2011 Ragley Blue Pig Mk II, 650b drop bar monstercross conversion. I’ve had this frame since new. So weird, I love it. Most of the history of this bike has been documented here: https://liuandrew.com/bikes/Velo Orange Neutrino, 20″ mini-velo that fits and rides almost like a normal bike. Lives in the van.
Now onto the bikes that I’ve built and since sold, from the most recent:
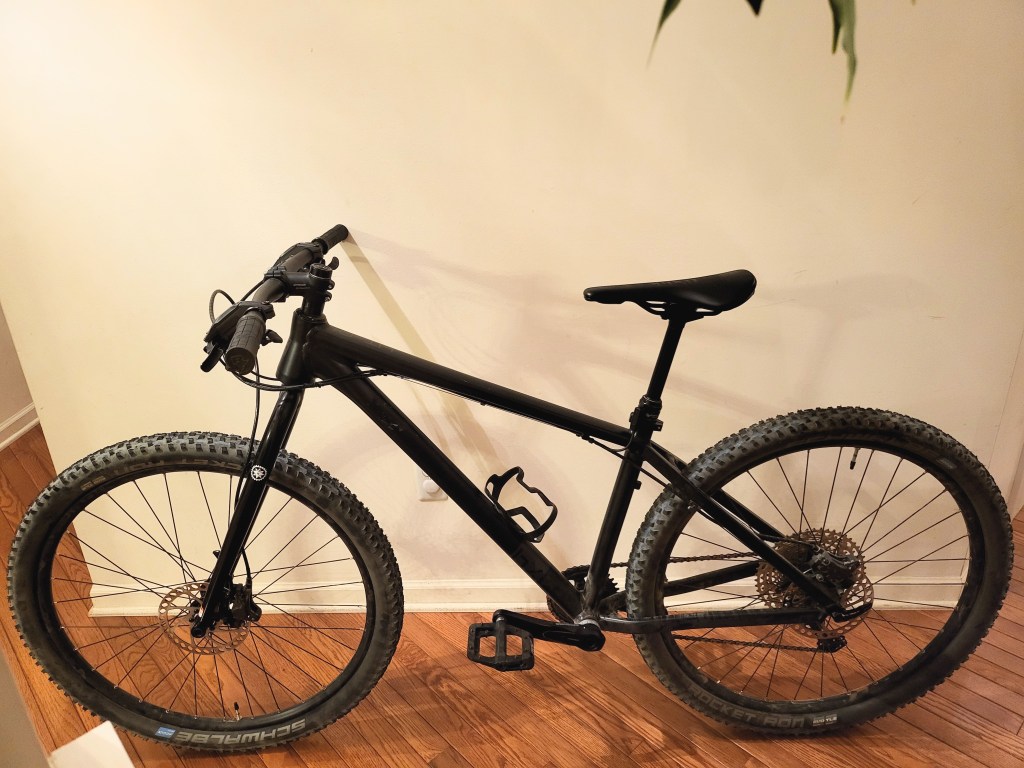
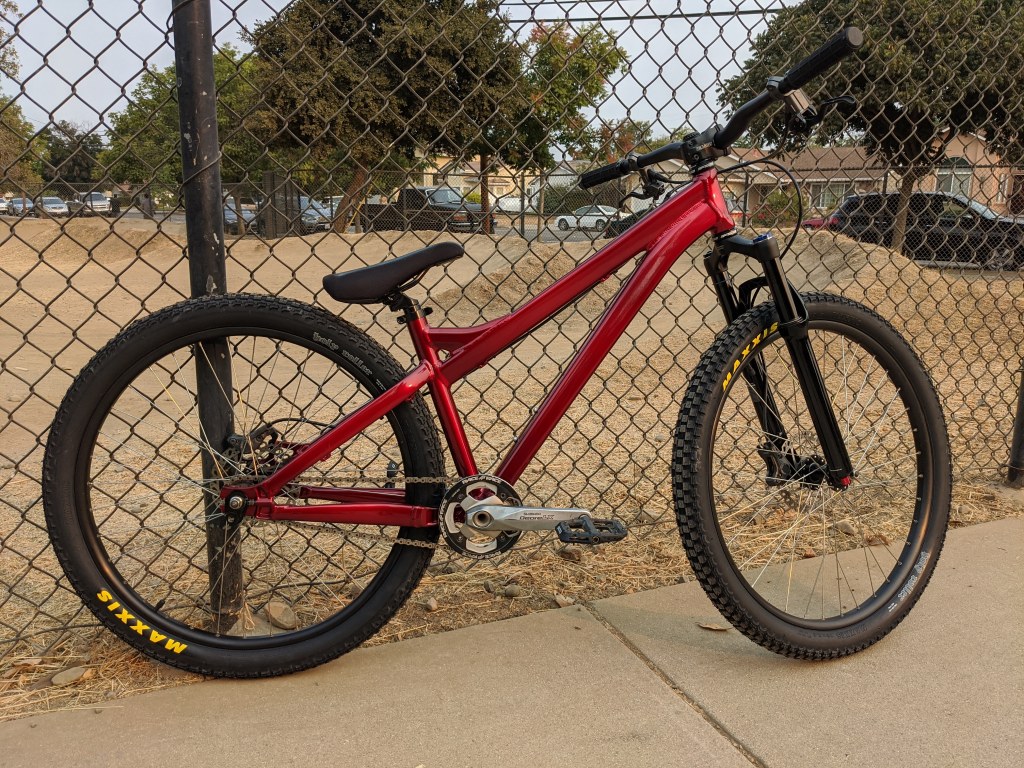
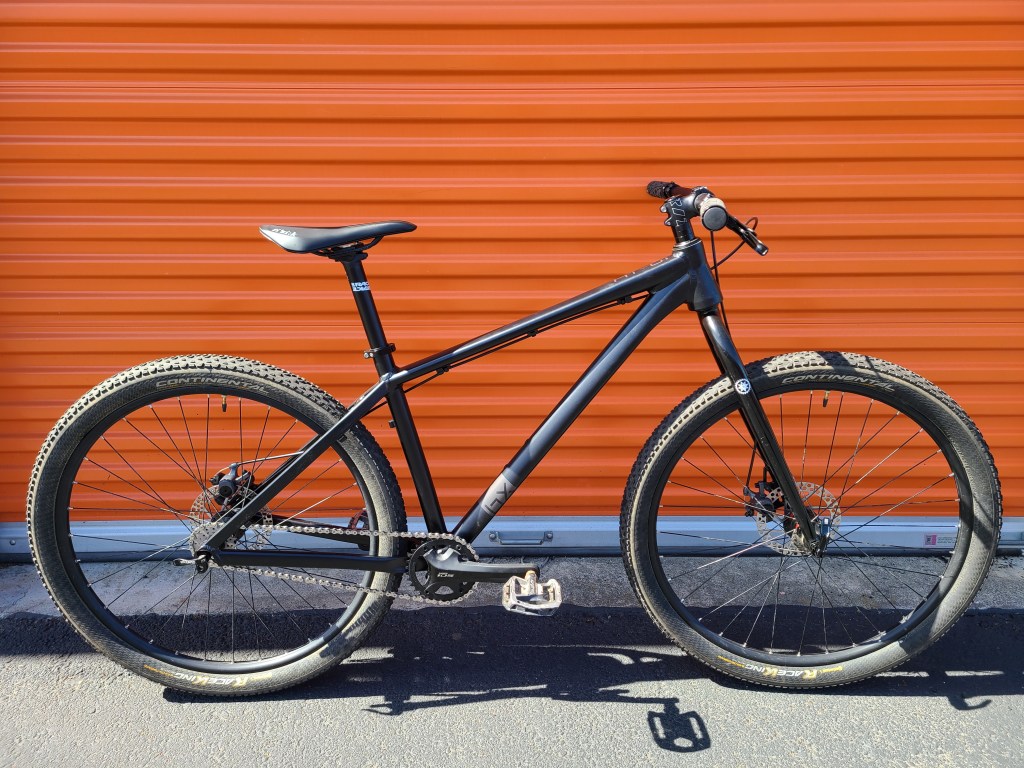
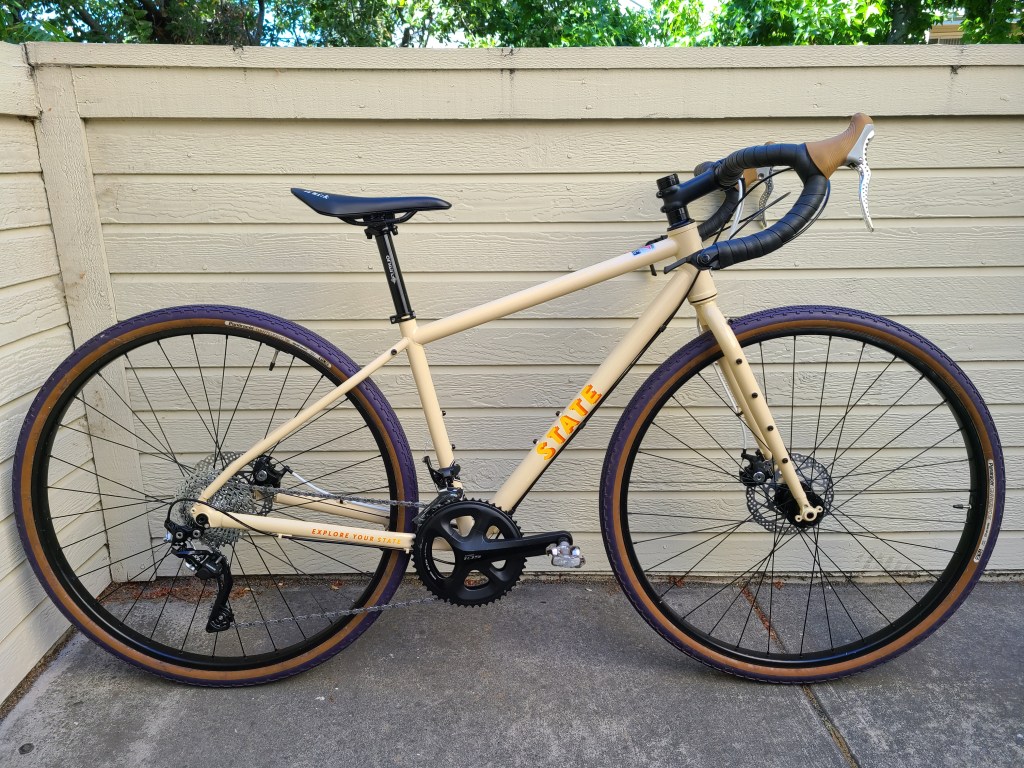
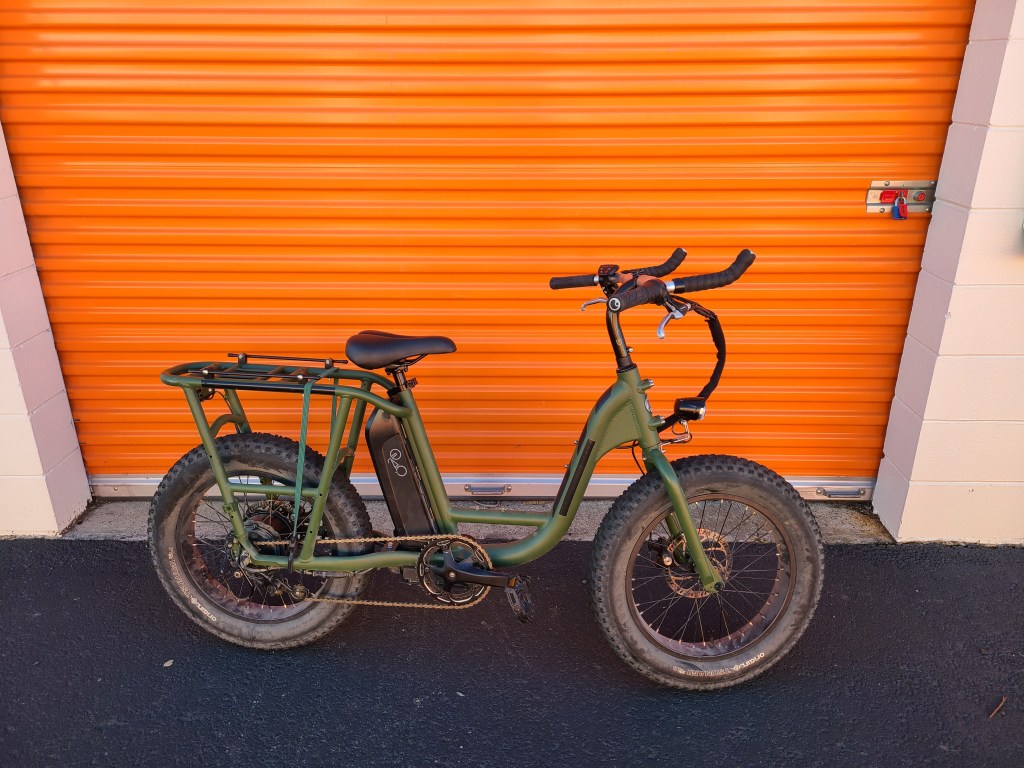
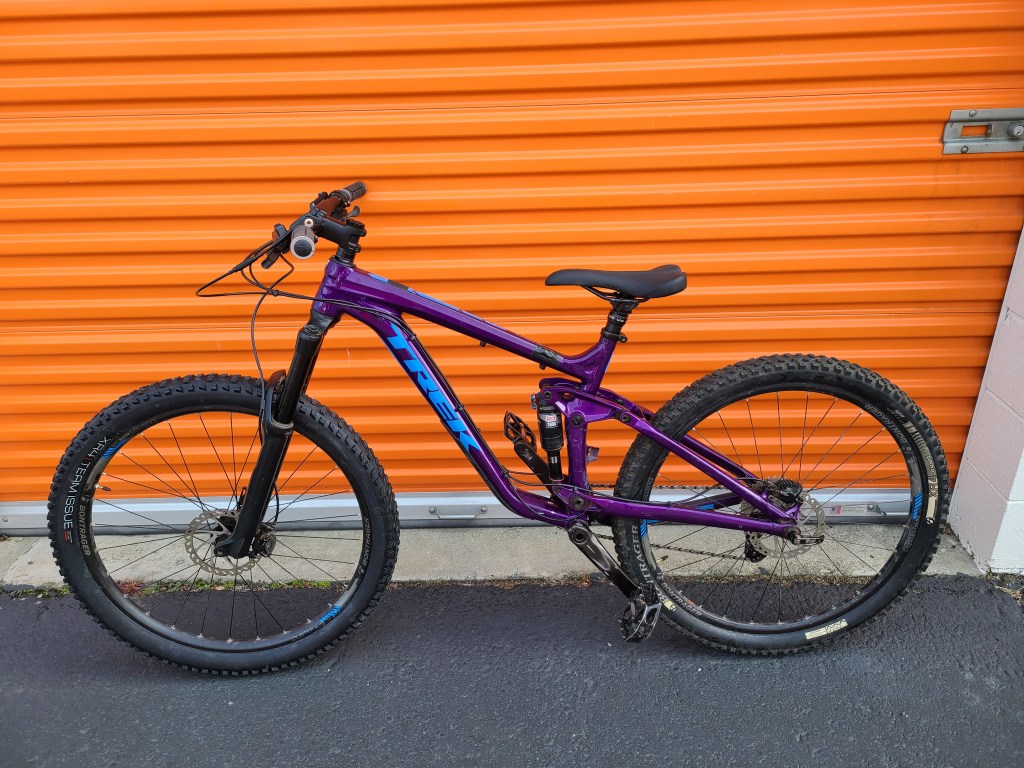
Specialized P2. Dirt Jumper. Candy Apple Red powdercoat, looks amazing.Surly Krampus. Gotta have a rigid singlespeed, and the paint has red glitter in it that sparkles in the sun.BrandX hardtail, parts bin build. I actually shipped this home to Michigan so I can ride when I visit 🙂Ferrum Bikes LV. Steel full-suspension trail bike, a little heavy, just not for me.Soma Wolverine V2. Pretty cool bike, but too flexy.State 4130 All-Road. Small size, purple tires.Specialized Sequoia, with albatross bars. Weird, but not much need for this one. Sold it in Portland during my visit.Rad Bikes RadRunner. Cheap eBike. Just so weird. And heavy.2016 Trek Slash 7. My old mountain bike, geometry was getting a bit dated.2019 Ragley Blue Pig. Sold the frame. Didn’t have the magic of the 2011 one.Soma Double Cross. Got the frameset for a steal, pretty slick ride.Raleigh Clubman. $50 frame, spare parts build. Not bad, all things considered.Traitor Cutlass. I had the frame since college, but never really clicked with it. Built the rear wheel around a Sturmey Archer 3-speed hub.On-One Inbred, another parts bin build. This bike was tiny in real life.
It has been one year since I last logged in to this site. I decided to change the domain to my name. Maybe I’ll clean it up and streamline things a bit too.
A few other things have changed as well, but largely, with COVID and all, not much is different.
The van has gone through a few iterations, as has Franken-Pig. I moved apartments but still live in the Bay Area.
Starting with the van, pretty quickly after it was built, I switched the bed to that garage/high-bed layout:
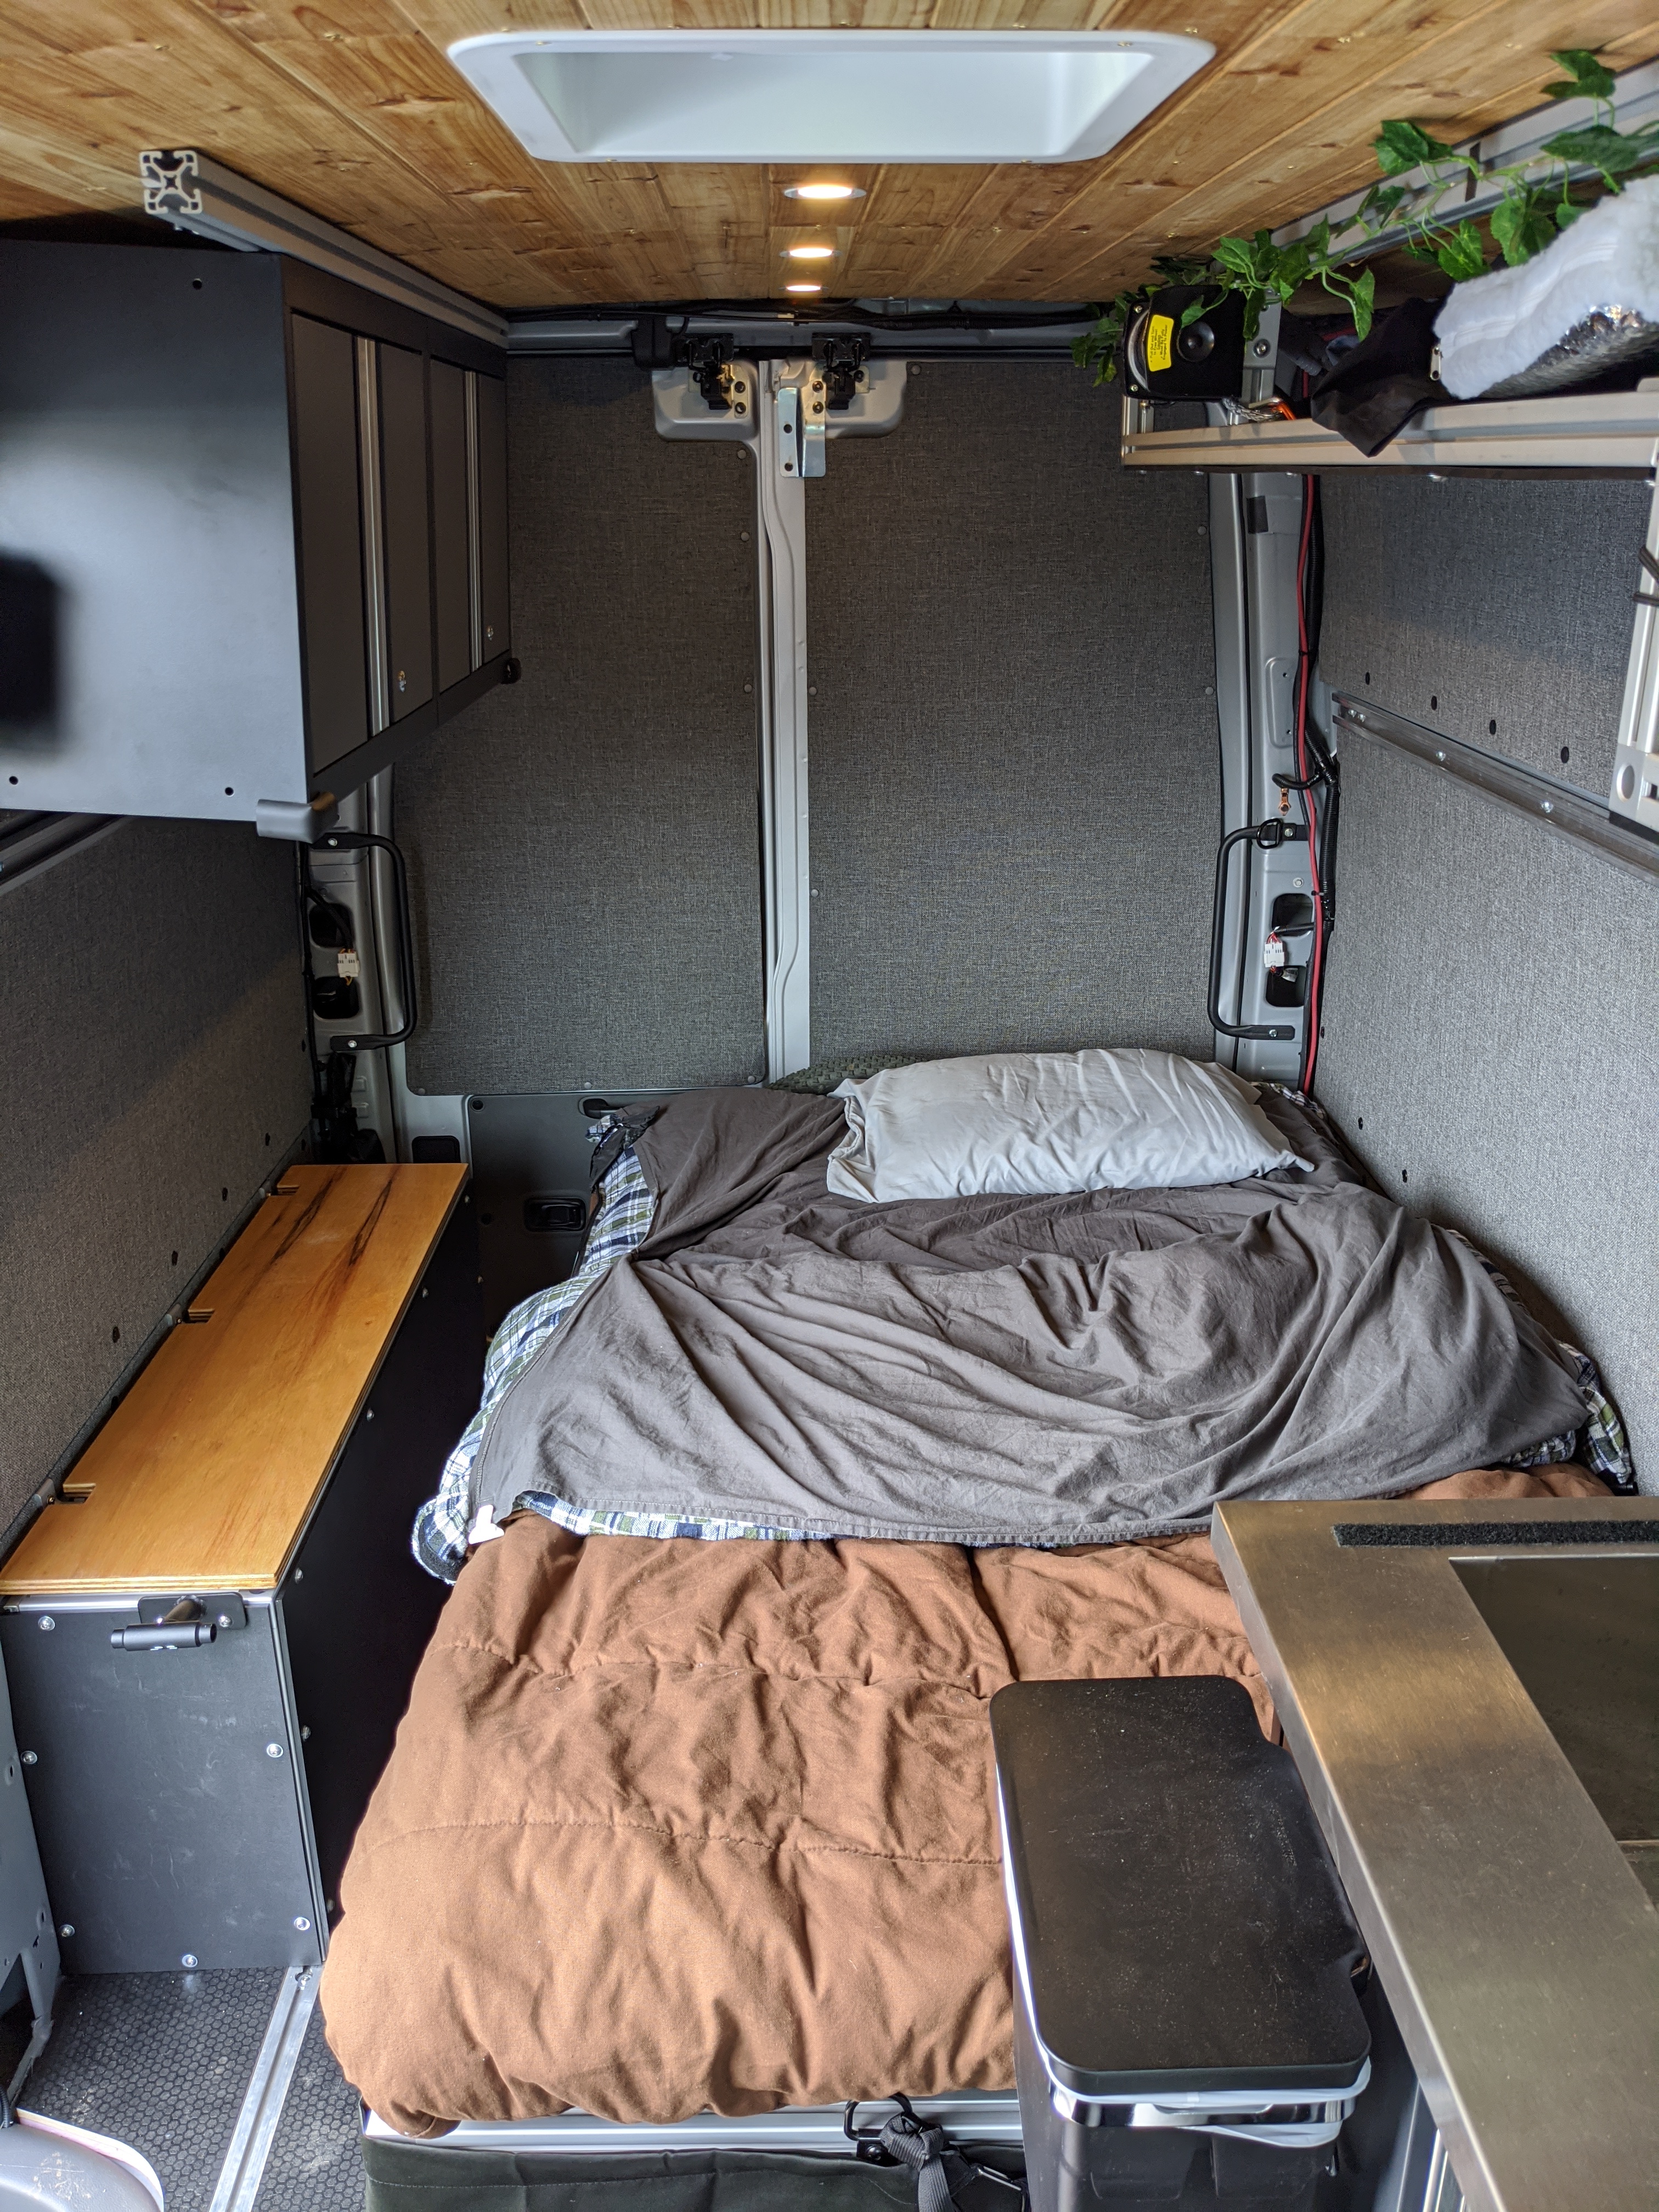
Then a few months later, decided to switch it again to a convertible futon:
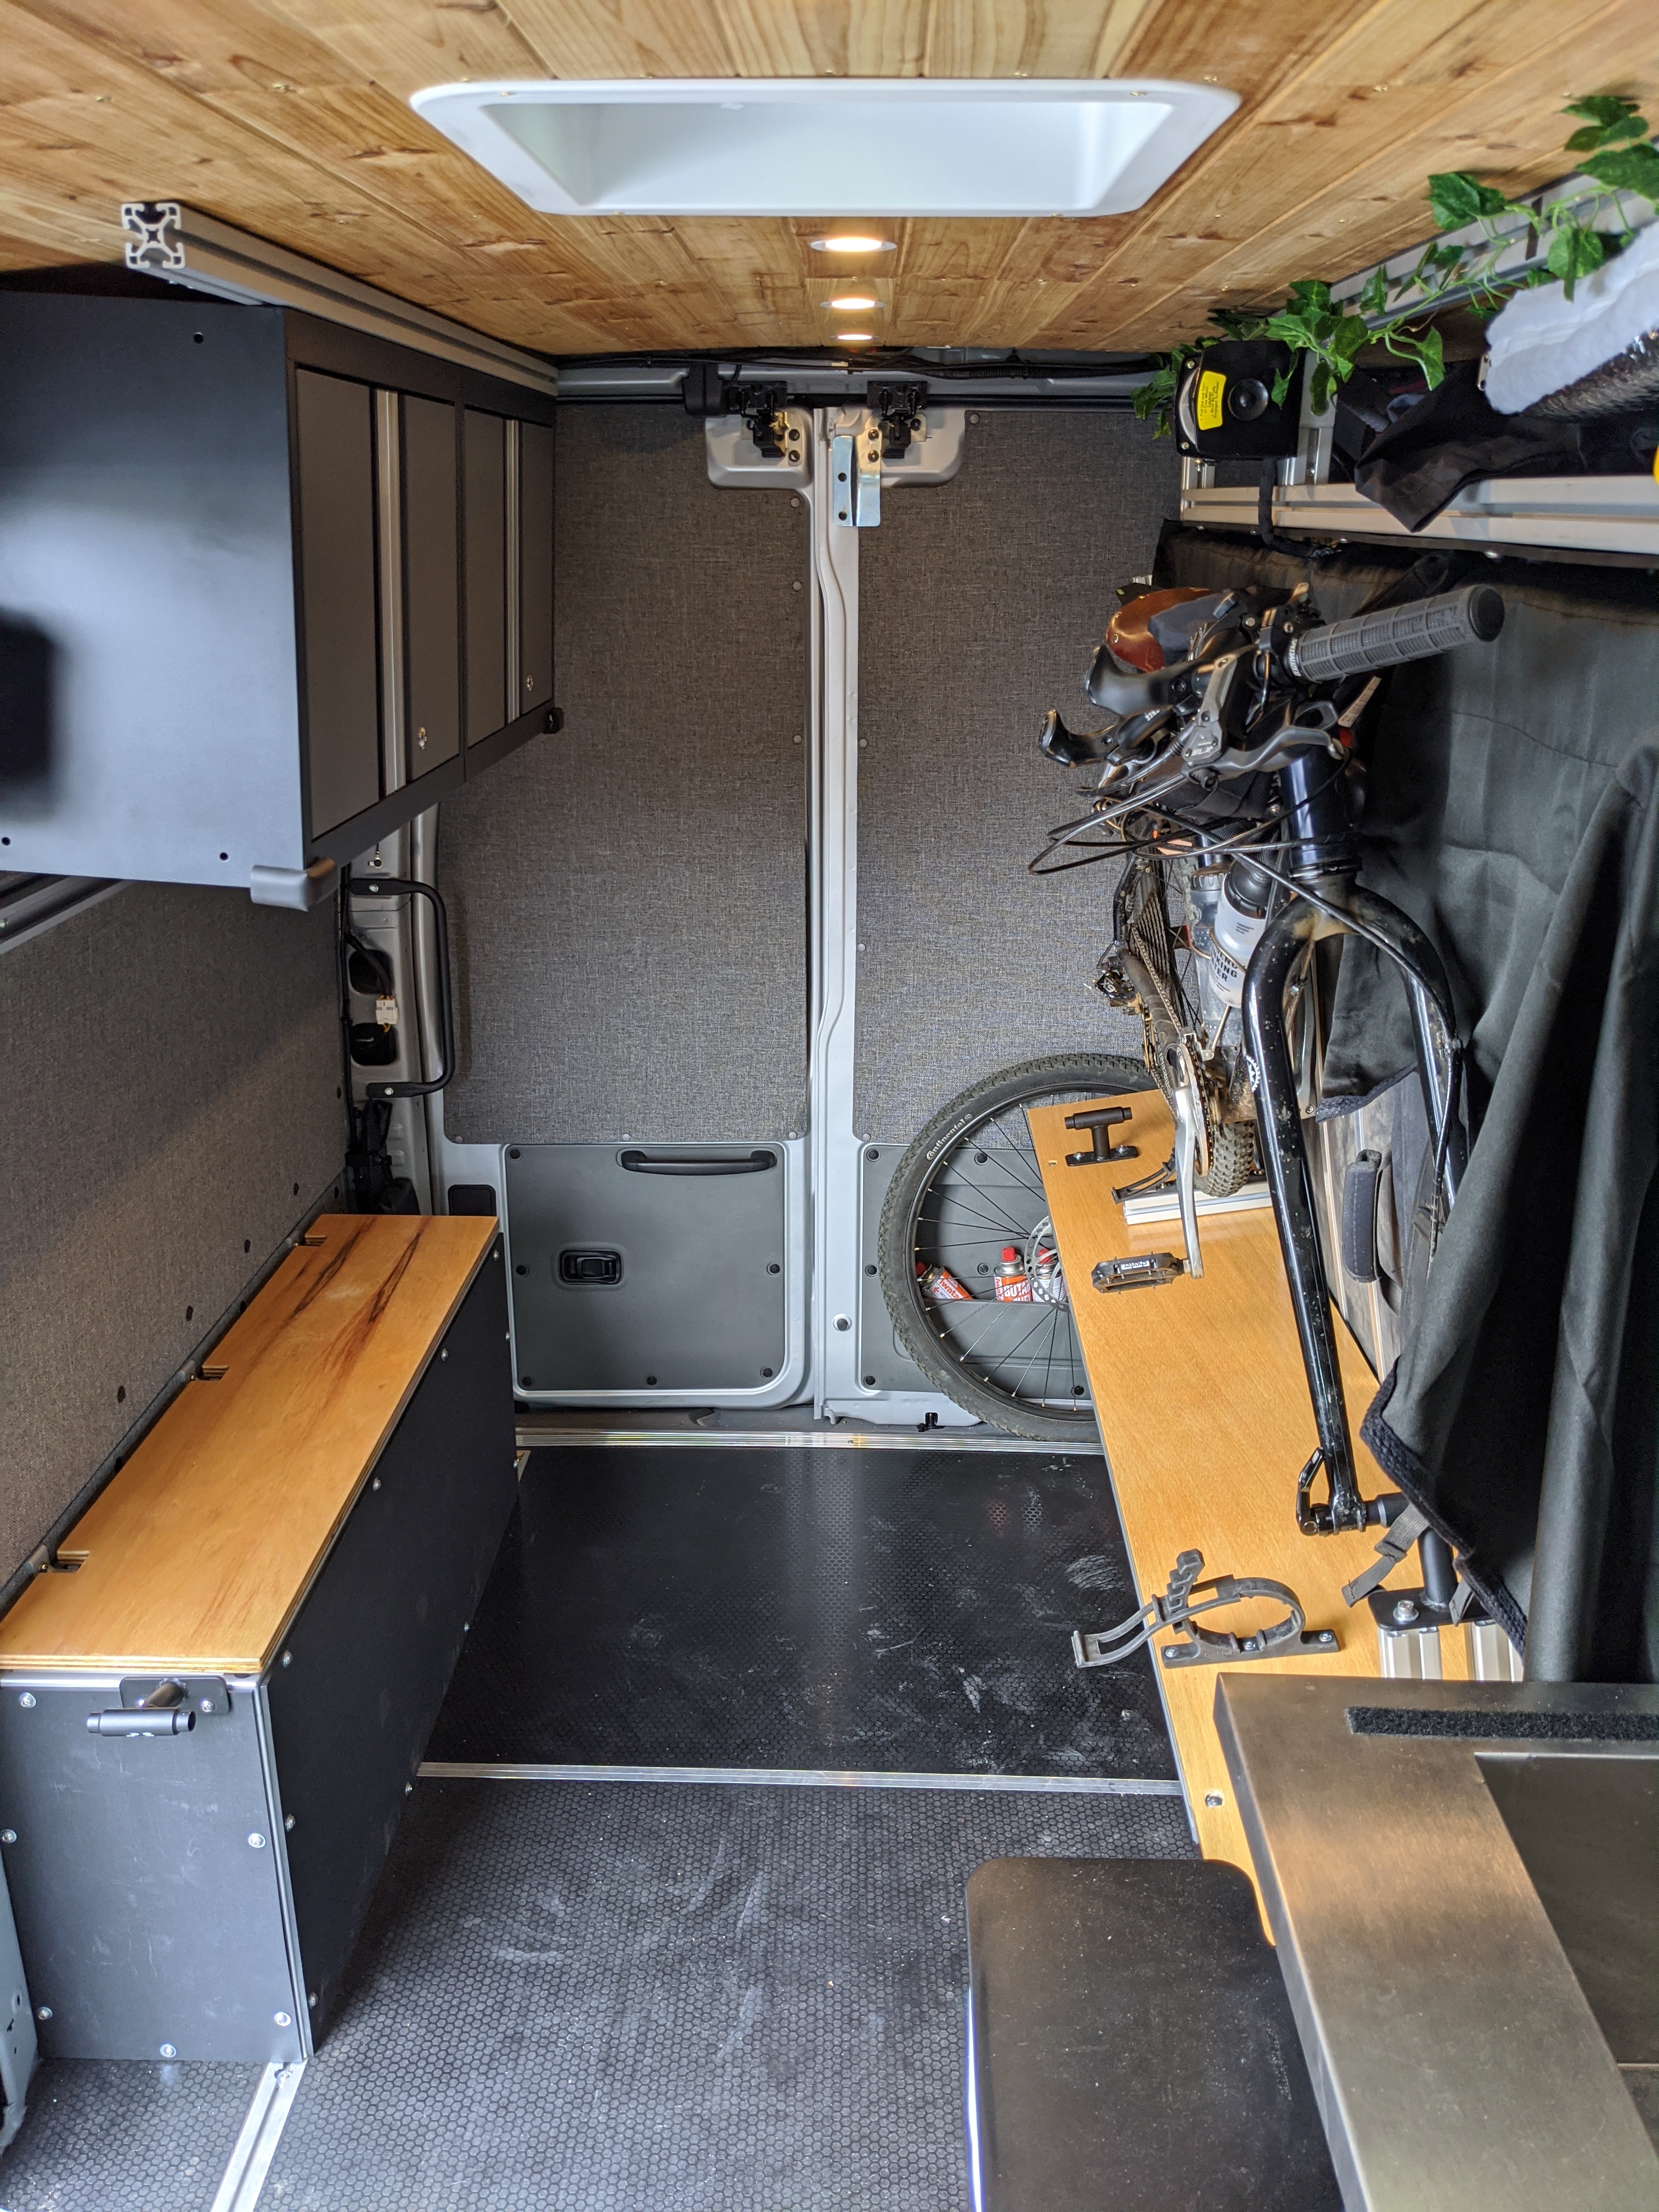
Floor space makes the van more useful. Being able to flip the original bed up from the first iteration was great, but when folded down took up too much space. Having the garage is nice for keeping bikes, but there isn’t much space to walk around and stretch out, and it doesn’t do great at carrying cargo with a giant frame hanging halfway down the space. The convertible futon is kind of the best of both worlds.
I’ve since used the van to move apartments, carry the motorcycle and multiple bikes inside, etc. It still has the convertible futon and I think it’ll stay that way.
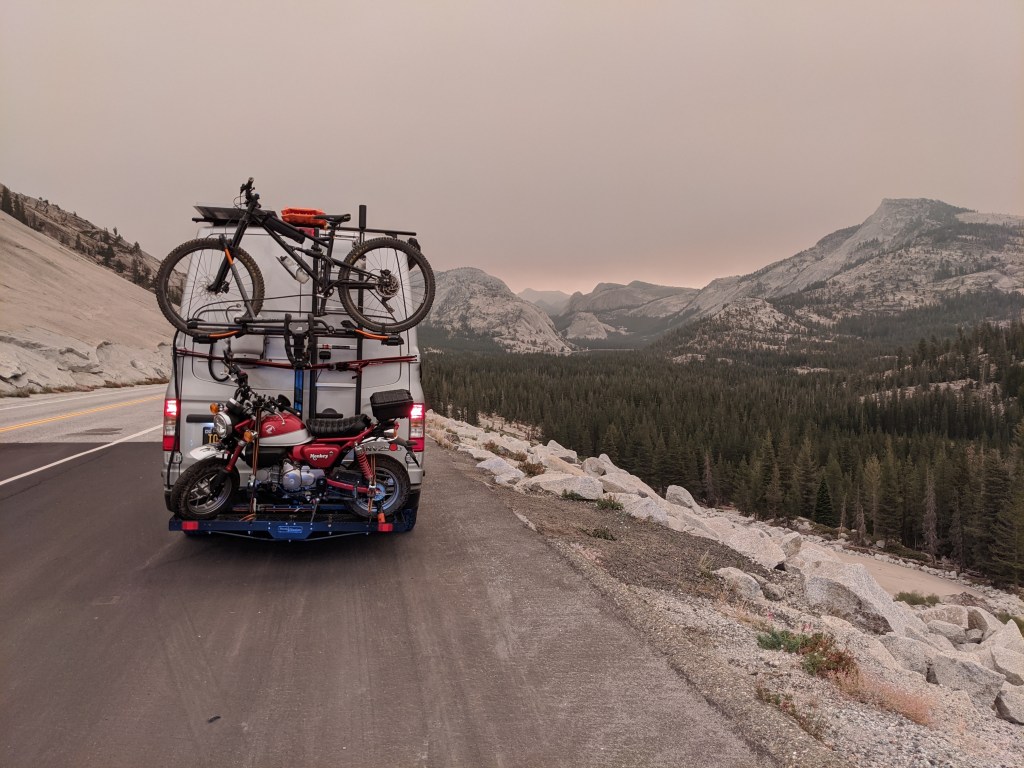
I also made a double decker rear rack setup to hold both a motorcycle and my bikes, which is pretty sweet (if I do say so myself):
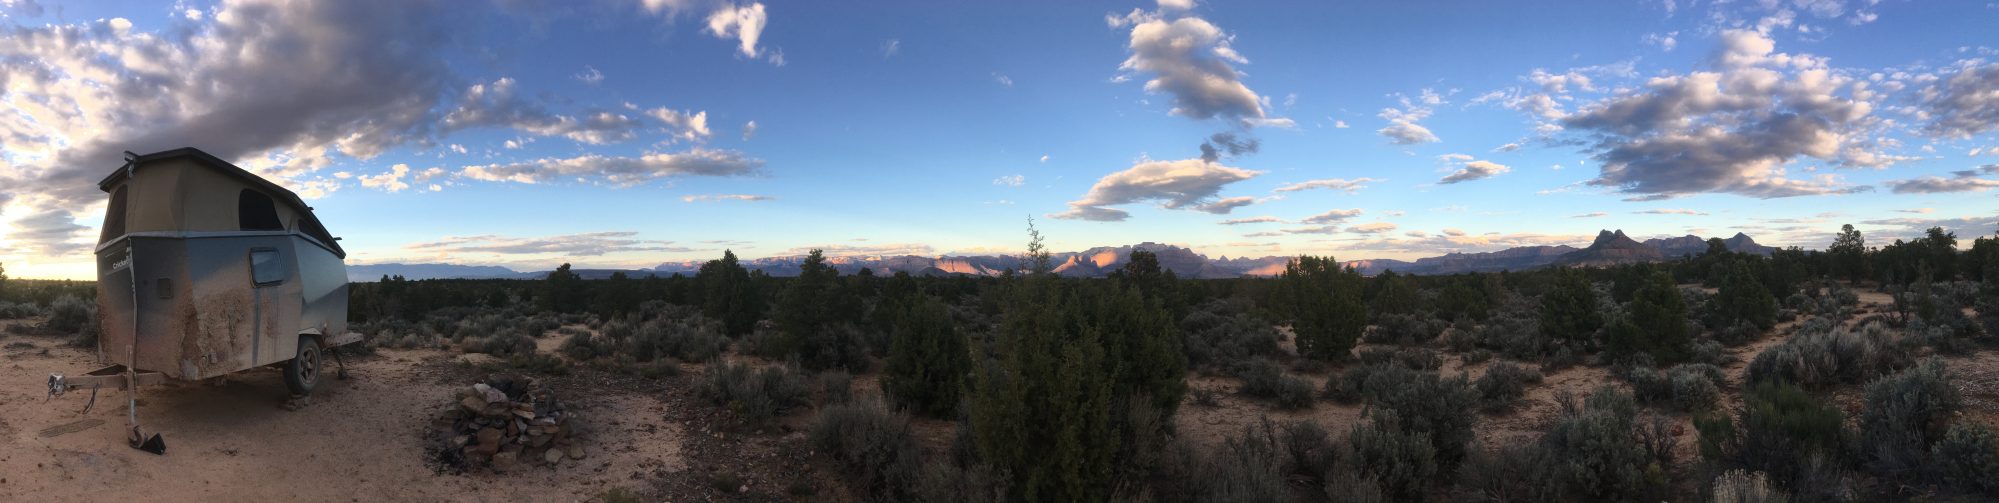
The van has been to Salt Lake City, Wyoming/Utah via Yellowstone/Grand Teton/Arches/Canyonlands, Portland, Crater Lake/Lava Beds in the last year, but outside of these 4 or so trips, has largely sat unused.
It still works fine though!
Bikes have been a large part of the last year in keeping my hands busy and me sane. I’ve built so many bikes, and sold most of them, kept some of them. That will come in a future update.
For now, Franken-Pig first got new drop bars and 650B carbon wheels, then got a carbon Lauf fork, and carbon cranks with a 1×11 SRAM Rival drivetrain replacing the 2×10 before. The basket was replaced by a more bikepacking-esque setup, with a Swift Paloma handlebar bag, Rogue Panda tank bag, and Fairweather saddlebag. This has been the configuration of the bike for the last 800 or so miles, and I’d dare say it’s pretty much perfect now.
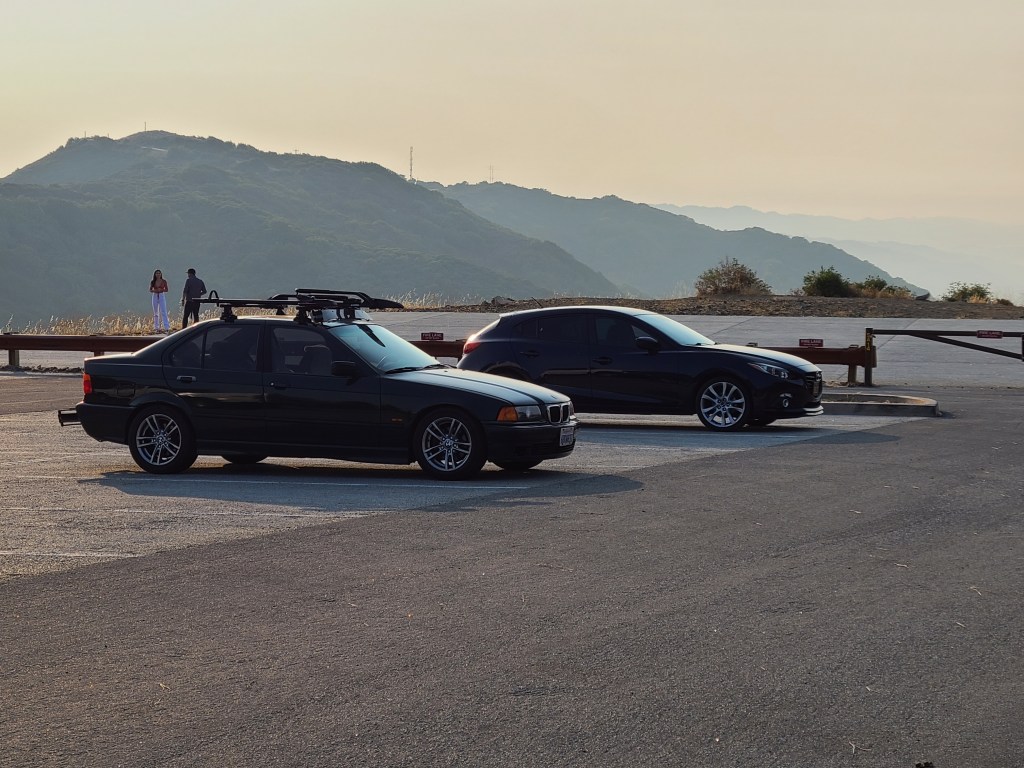
The old green BMW is still my daily driver, and has largely been completely fine, with no breakdowns or major mechanical issues. Just getting old, bumps and bruises from small dents, sun-damaged bubbling paint, etc. It’s almost at 200k miles now and still runs great.
I think that’s pretty much all for now. Big list of bikes I’ve built to come.
This bike has been a labor of love, and has undergone many different iterations, finally ending up in it’s current state with a 26″ frame, 650b fork, and 700c wheels. Thus, the frankenbike was born.
I bought the Ragley Blue Pig frame when I just started college and started working at a bike shop, and have kept it ever since. All of the other bikes that I’ve owned have come and gone, but this frame has stayed. It started out as an aggressive All-Mountain hardtail build, with a Manitou Sherman 130mm fork and fat 26″ tires. The geometry on the bike was quite modern for it’s time, and still holds it’s own even today. Slack head angle, longer top tube, steep seat tube angle. The rear triangle design is great, and can accomodate up to a 700x38c tire, a regular 27.5×2.2″ mountain bike tire, or 26×2.8″ plus bike tire.
Of course, 26″ mountain bikes are dated now, so I originally started by swapping the Sherman with a rigid Salsa Cromoto Grande suspension-corrected 29″ rigid fork, adding some Soma Clarence alt-bars, and swapping to 26″ plus-bike 3.0″/2.8″ tires, just to make things a little weirder. The taller rigid fork was supposed to compensate for the original design of the bike being for long-travel 26″ forks.
Those plus-sized tires were fun in the winter, but just too slow. So I swapped in some 29″/27.5″ front/rear wheels with regular mountain bike tires to try and maintain the original angles. However, that raised the bottom bracket up way too high to be comfortable.
Some time afterwards, I had sold the road bikes that I owned, so in an effort to make this bike more street-oriented, the “97.5” mountain bike setup was swapped to 700x32c road wheels and tires. The issue with the high bottom bracket continued to bother me with this new setup, my feet couldn’t touch the ground at all with the seat up. There wasn’t enough weight on the front either, and the front tire wanted to wash out.
I ended up swapping in the On-One Bootzipper fork, which is much shorter. 483mm Axle-to-Crown on the Cromoto Grande vs 405mm on the Bootzipper. I didn’t want to alter the angles of the frame quite that much, so a +10mm crown race from Reverse Components was added to raise the front up just a little bit.
With the much shorter fork, the bike ended up with a ~71.5 degree head tube angle, still well within modern gravel/cross bike norms, and a 76 degree seat tube angle, a similar seat tube angle to my mountain bike. This increases the relative bottom bracket drop, and makes for a much more comfortable geometry.
However, the shorter fork also lowered the front end a little too much. I also wanted to swap to dirt drops from the alt-bars, so I swapped in the Soma Junebug bars along with an Analog Cycles Discord 0mm stem. This dramatically shortens the reach to compensate for the drop bars, and this stem also has the benefit of raising the front end up as well.
Now the geometry is pretty much perfect for me, and this thing rides sweet. The high-trail design is super stable with and without a load, and the longer top tube with a 0mm stem means no toe overlap issues. The steeper seat tube angle also puts plenty of weight over the front tire to offset the longer top tube. The bike feels very well balanced.
Add in some fancy accessories, like front and rear racks, a Wald basket, and bottle cages, and the build is complete. For now.
Specs:
2011 Ragley Blue Pig frame, size M (originally designed for 26″ wheels)
Ever since seeing how Alex Honnold has a hangboard mounted above the door in his van, I wanted to do the same. Good way to get some training in wherever I might end up.
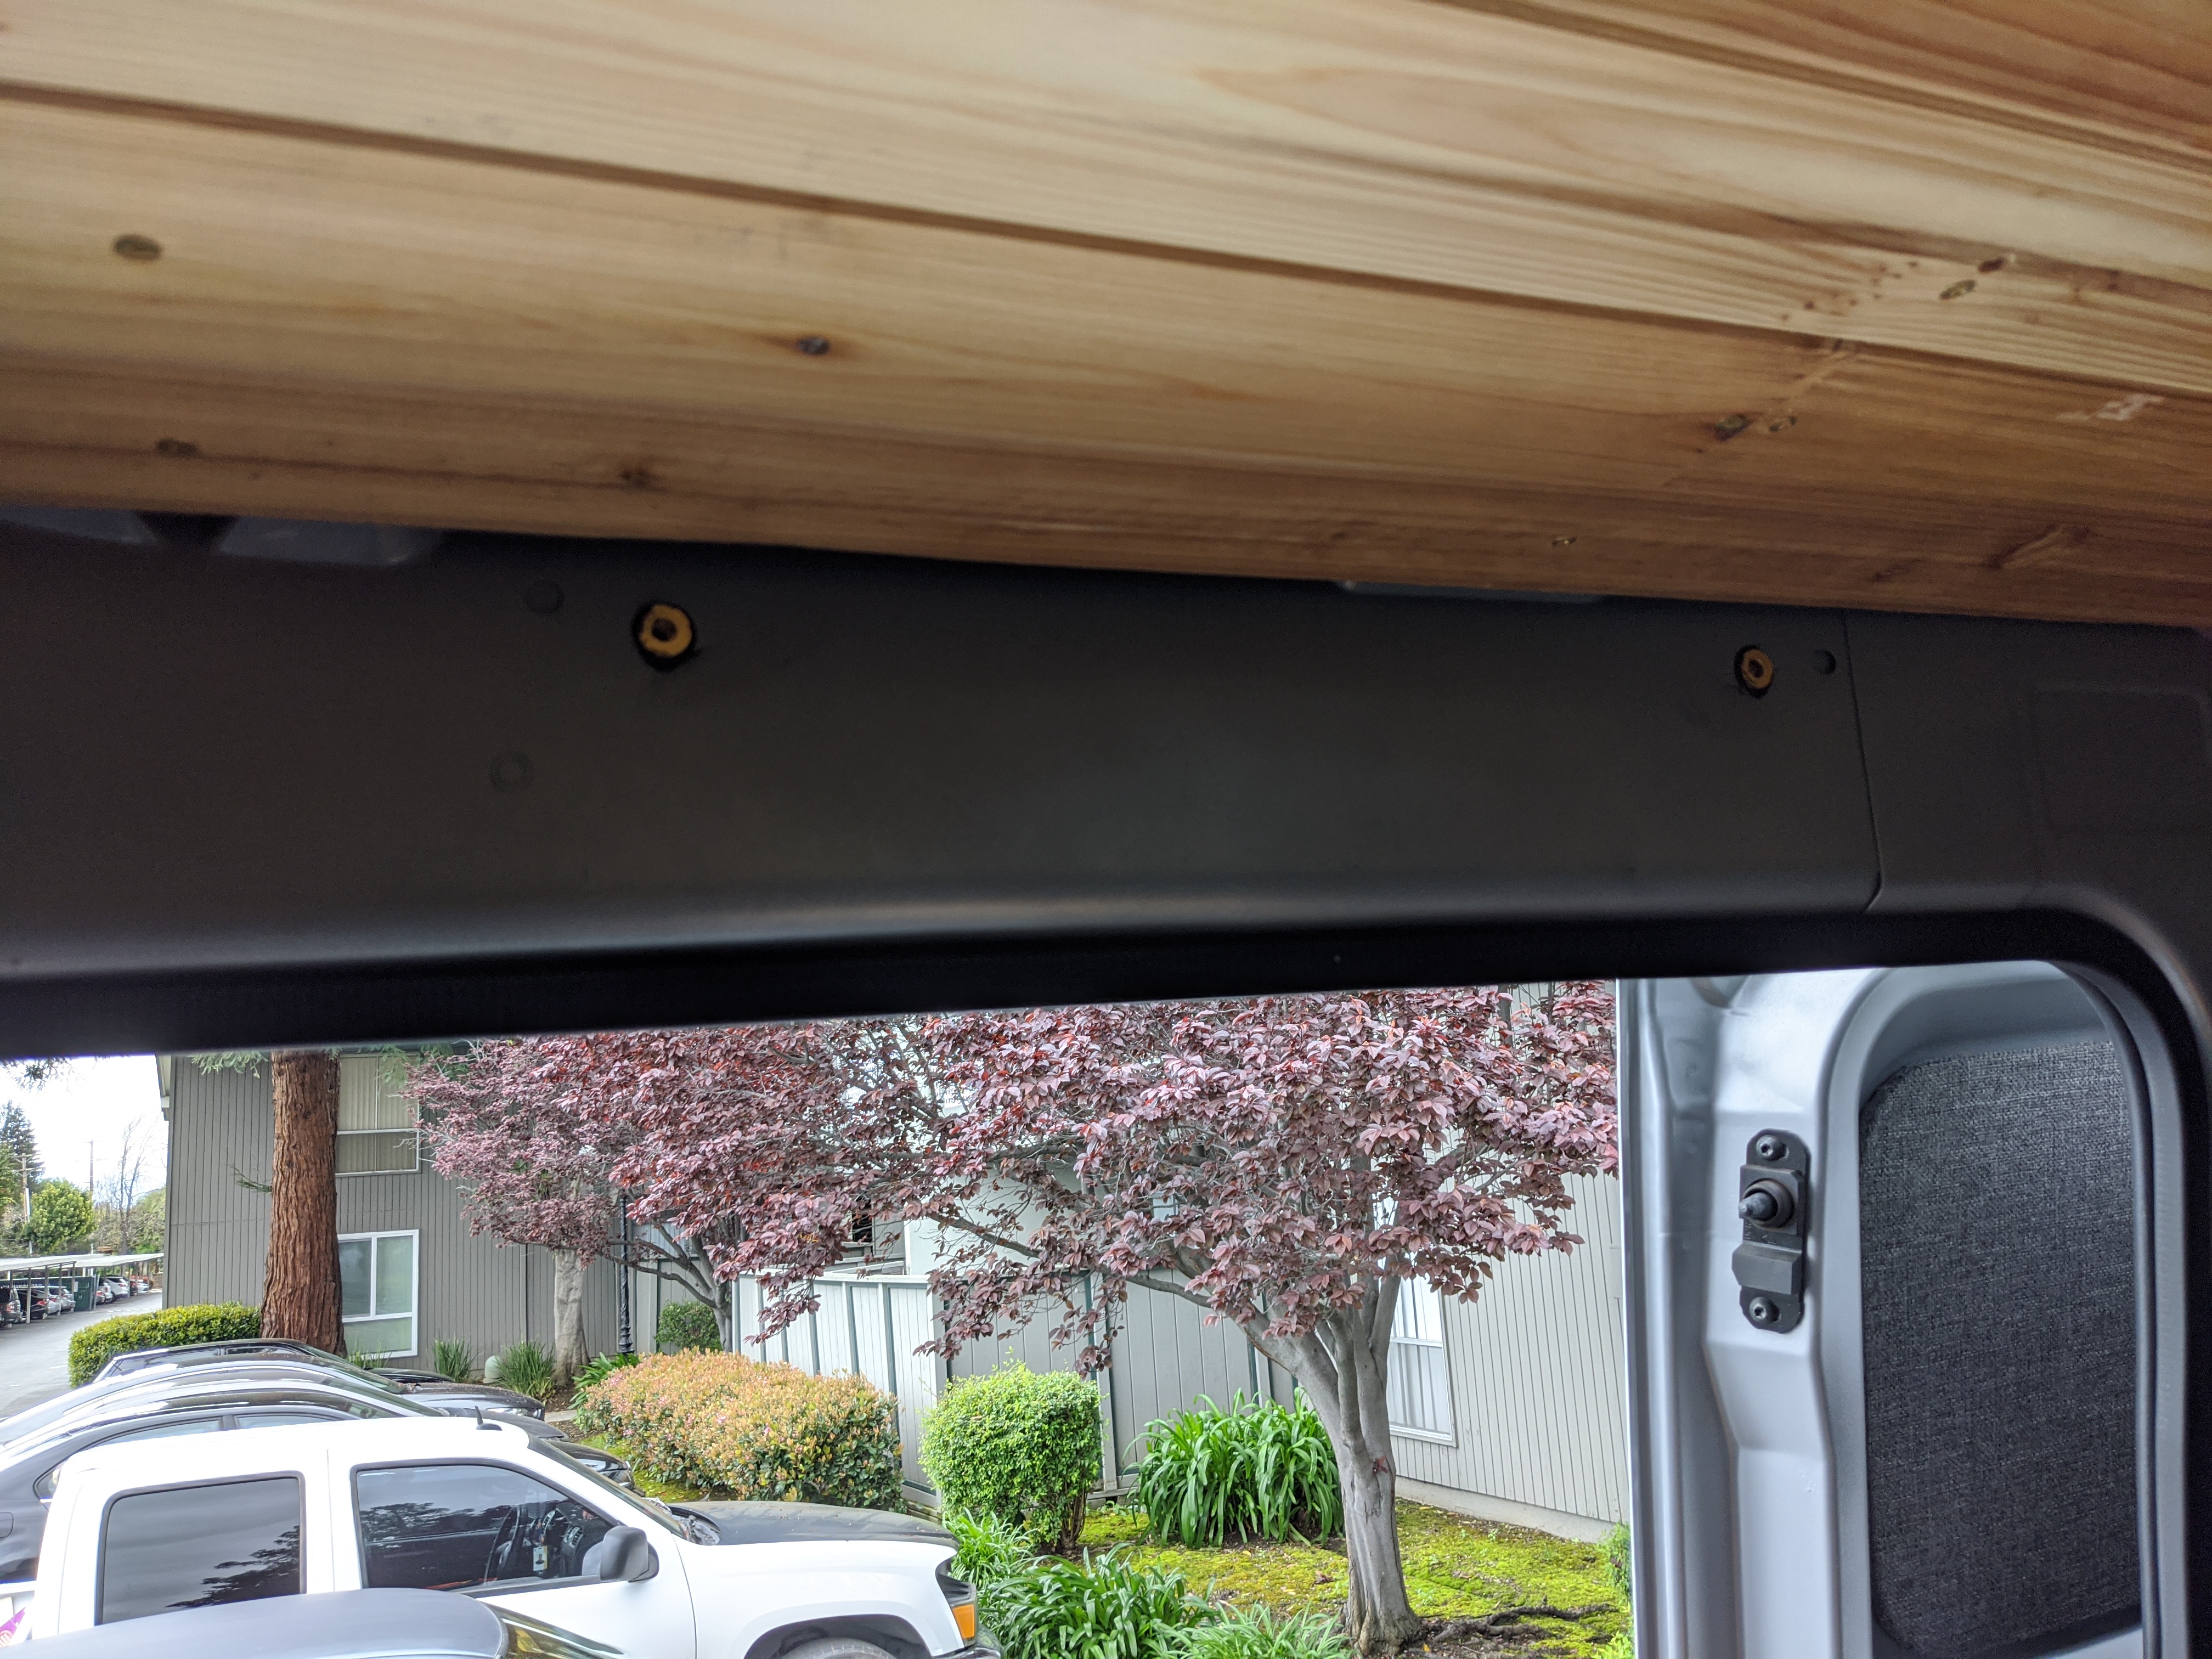
Problem is, there isn’t as much space above the door frame in my van, and the sliding door track gets in the way.
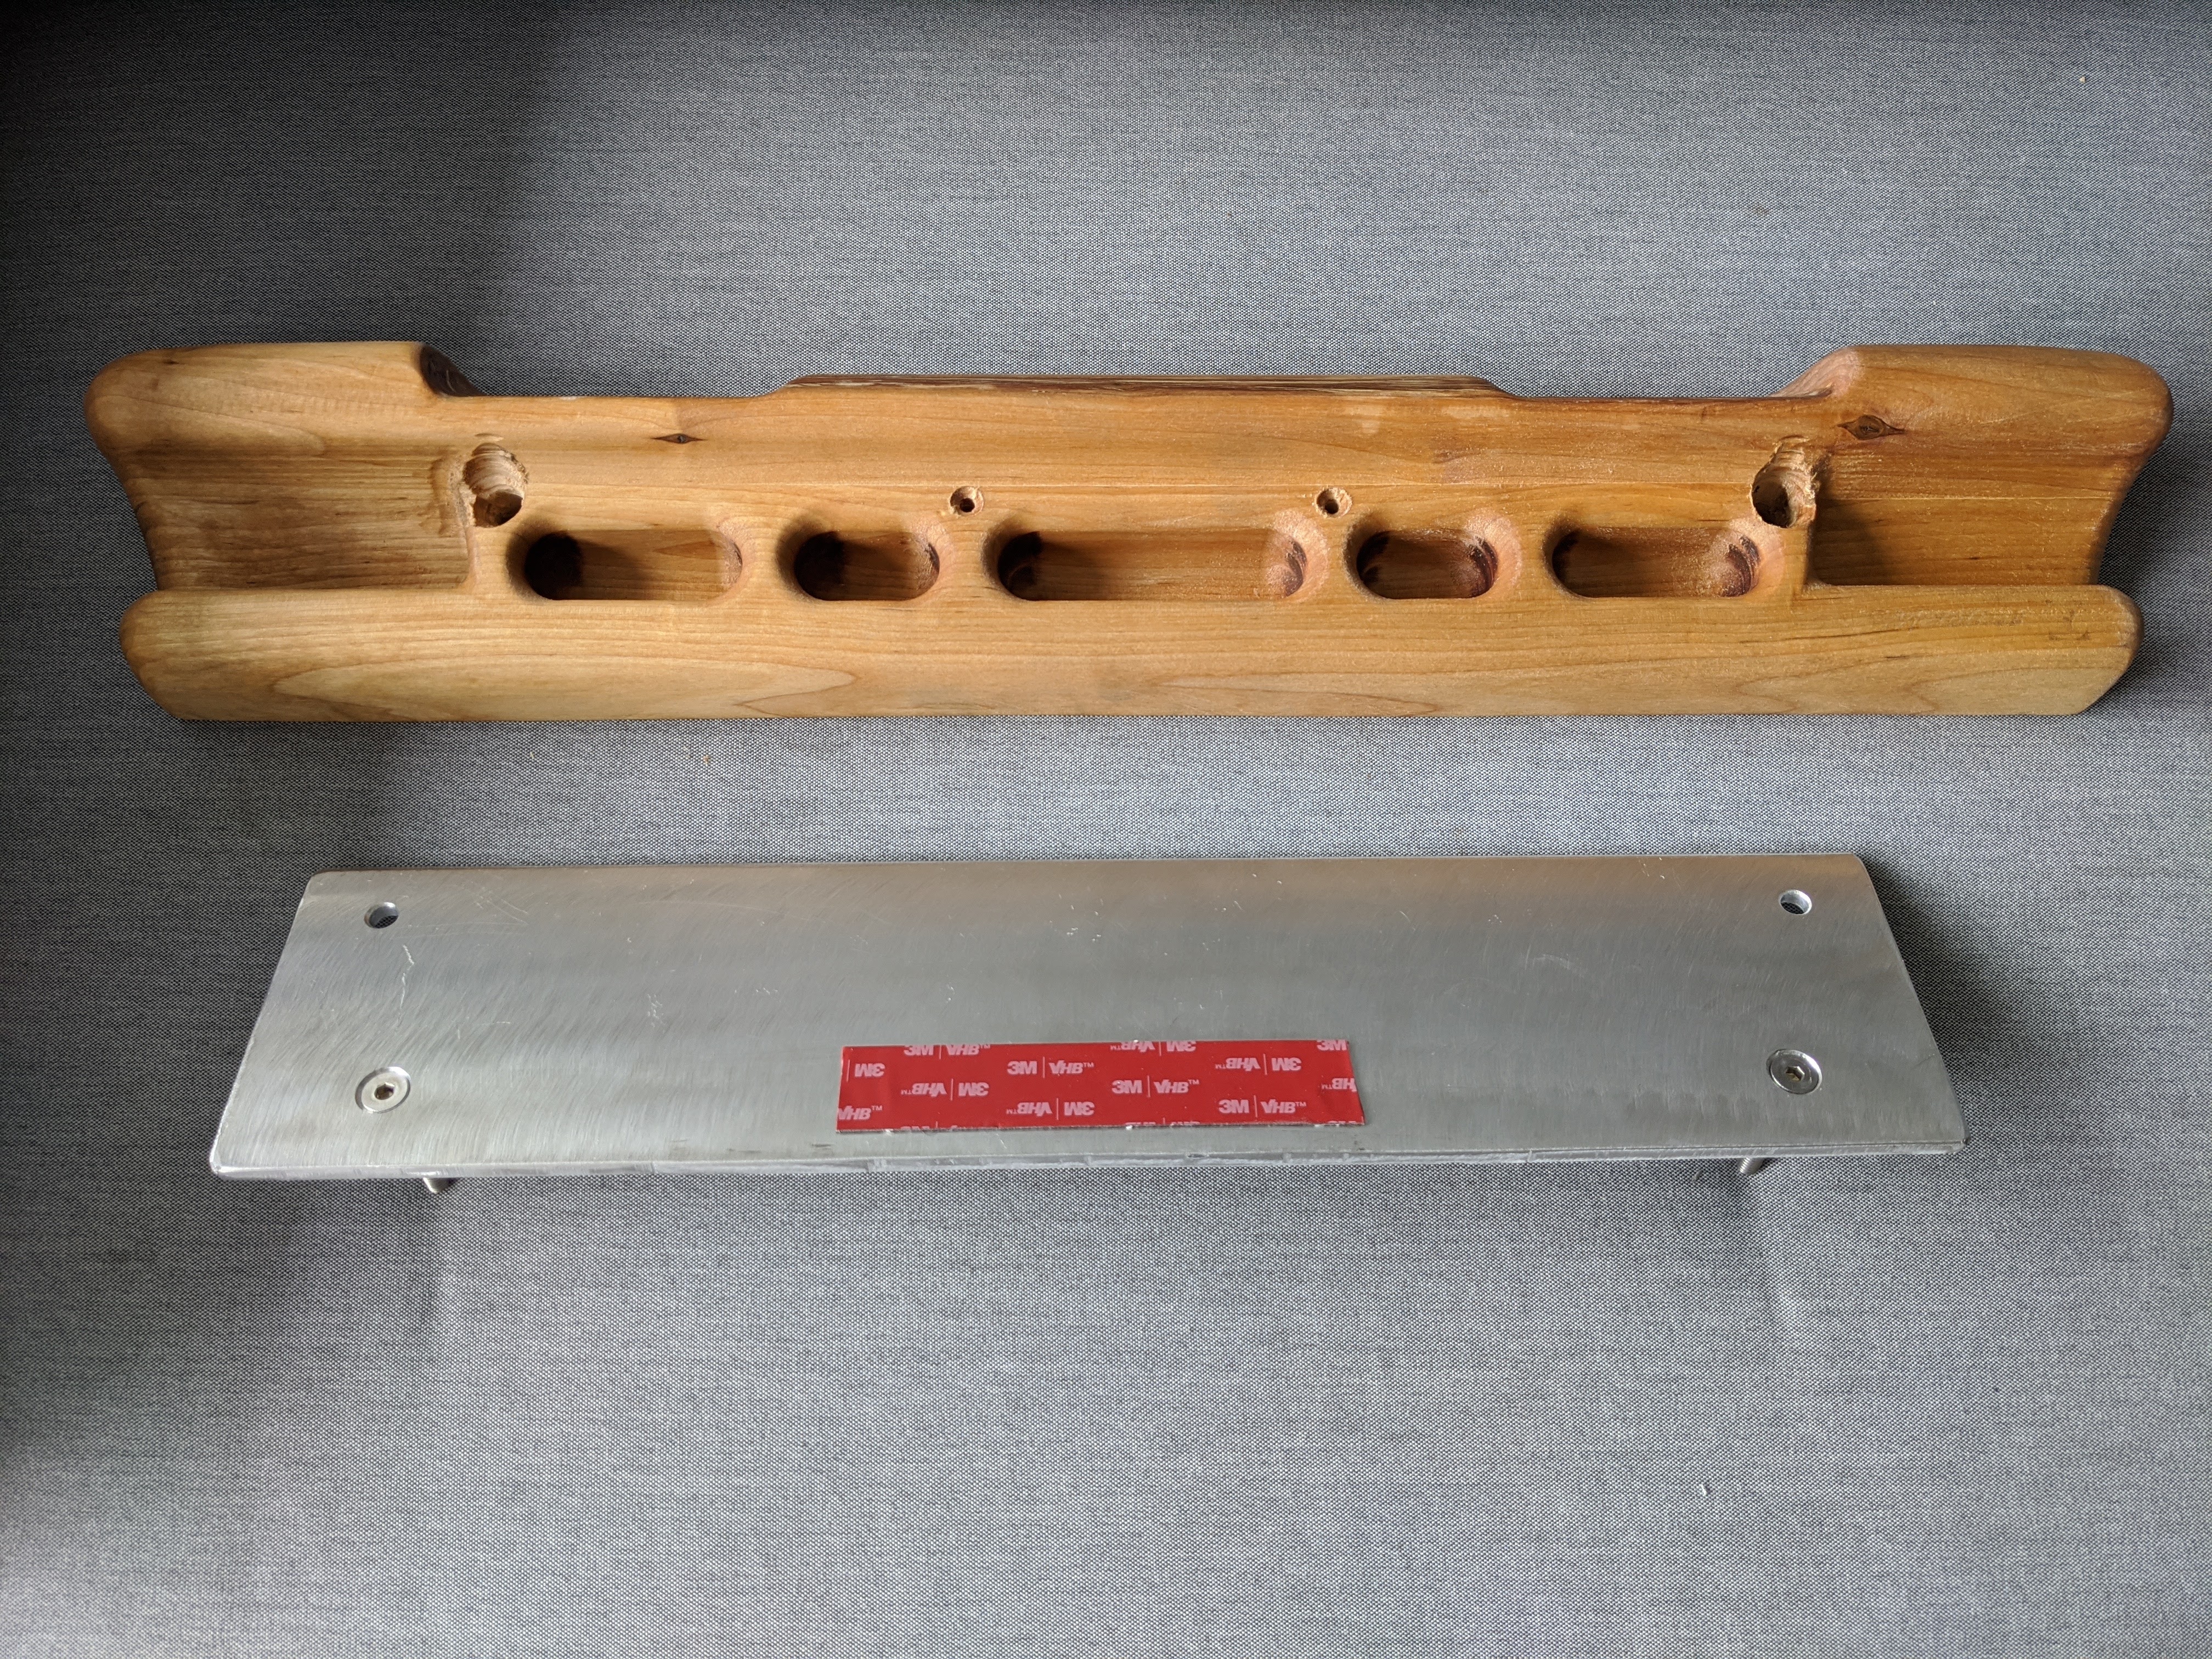
So I started with a Metolius Compact II training board, and cut the bottom rungs off. This was required for clearance, and I’m not really advanced enough to make use of them anyway. I also bored out two of the original mounting holes on the board to accomodate using studs/nuts to mount the board instead of wood screws.
Then I used an 1/4″ aluminum plate to make a mounting adapter, so I could move the bolts above the sliding door mechanism. Countersunk some bolts to make the studs for the hangboard, and some 3M VHB to prevent metal-on-metal rubbing when mounted to the van.
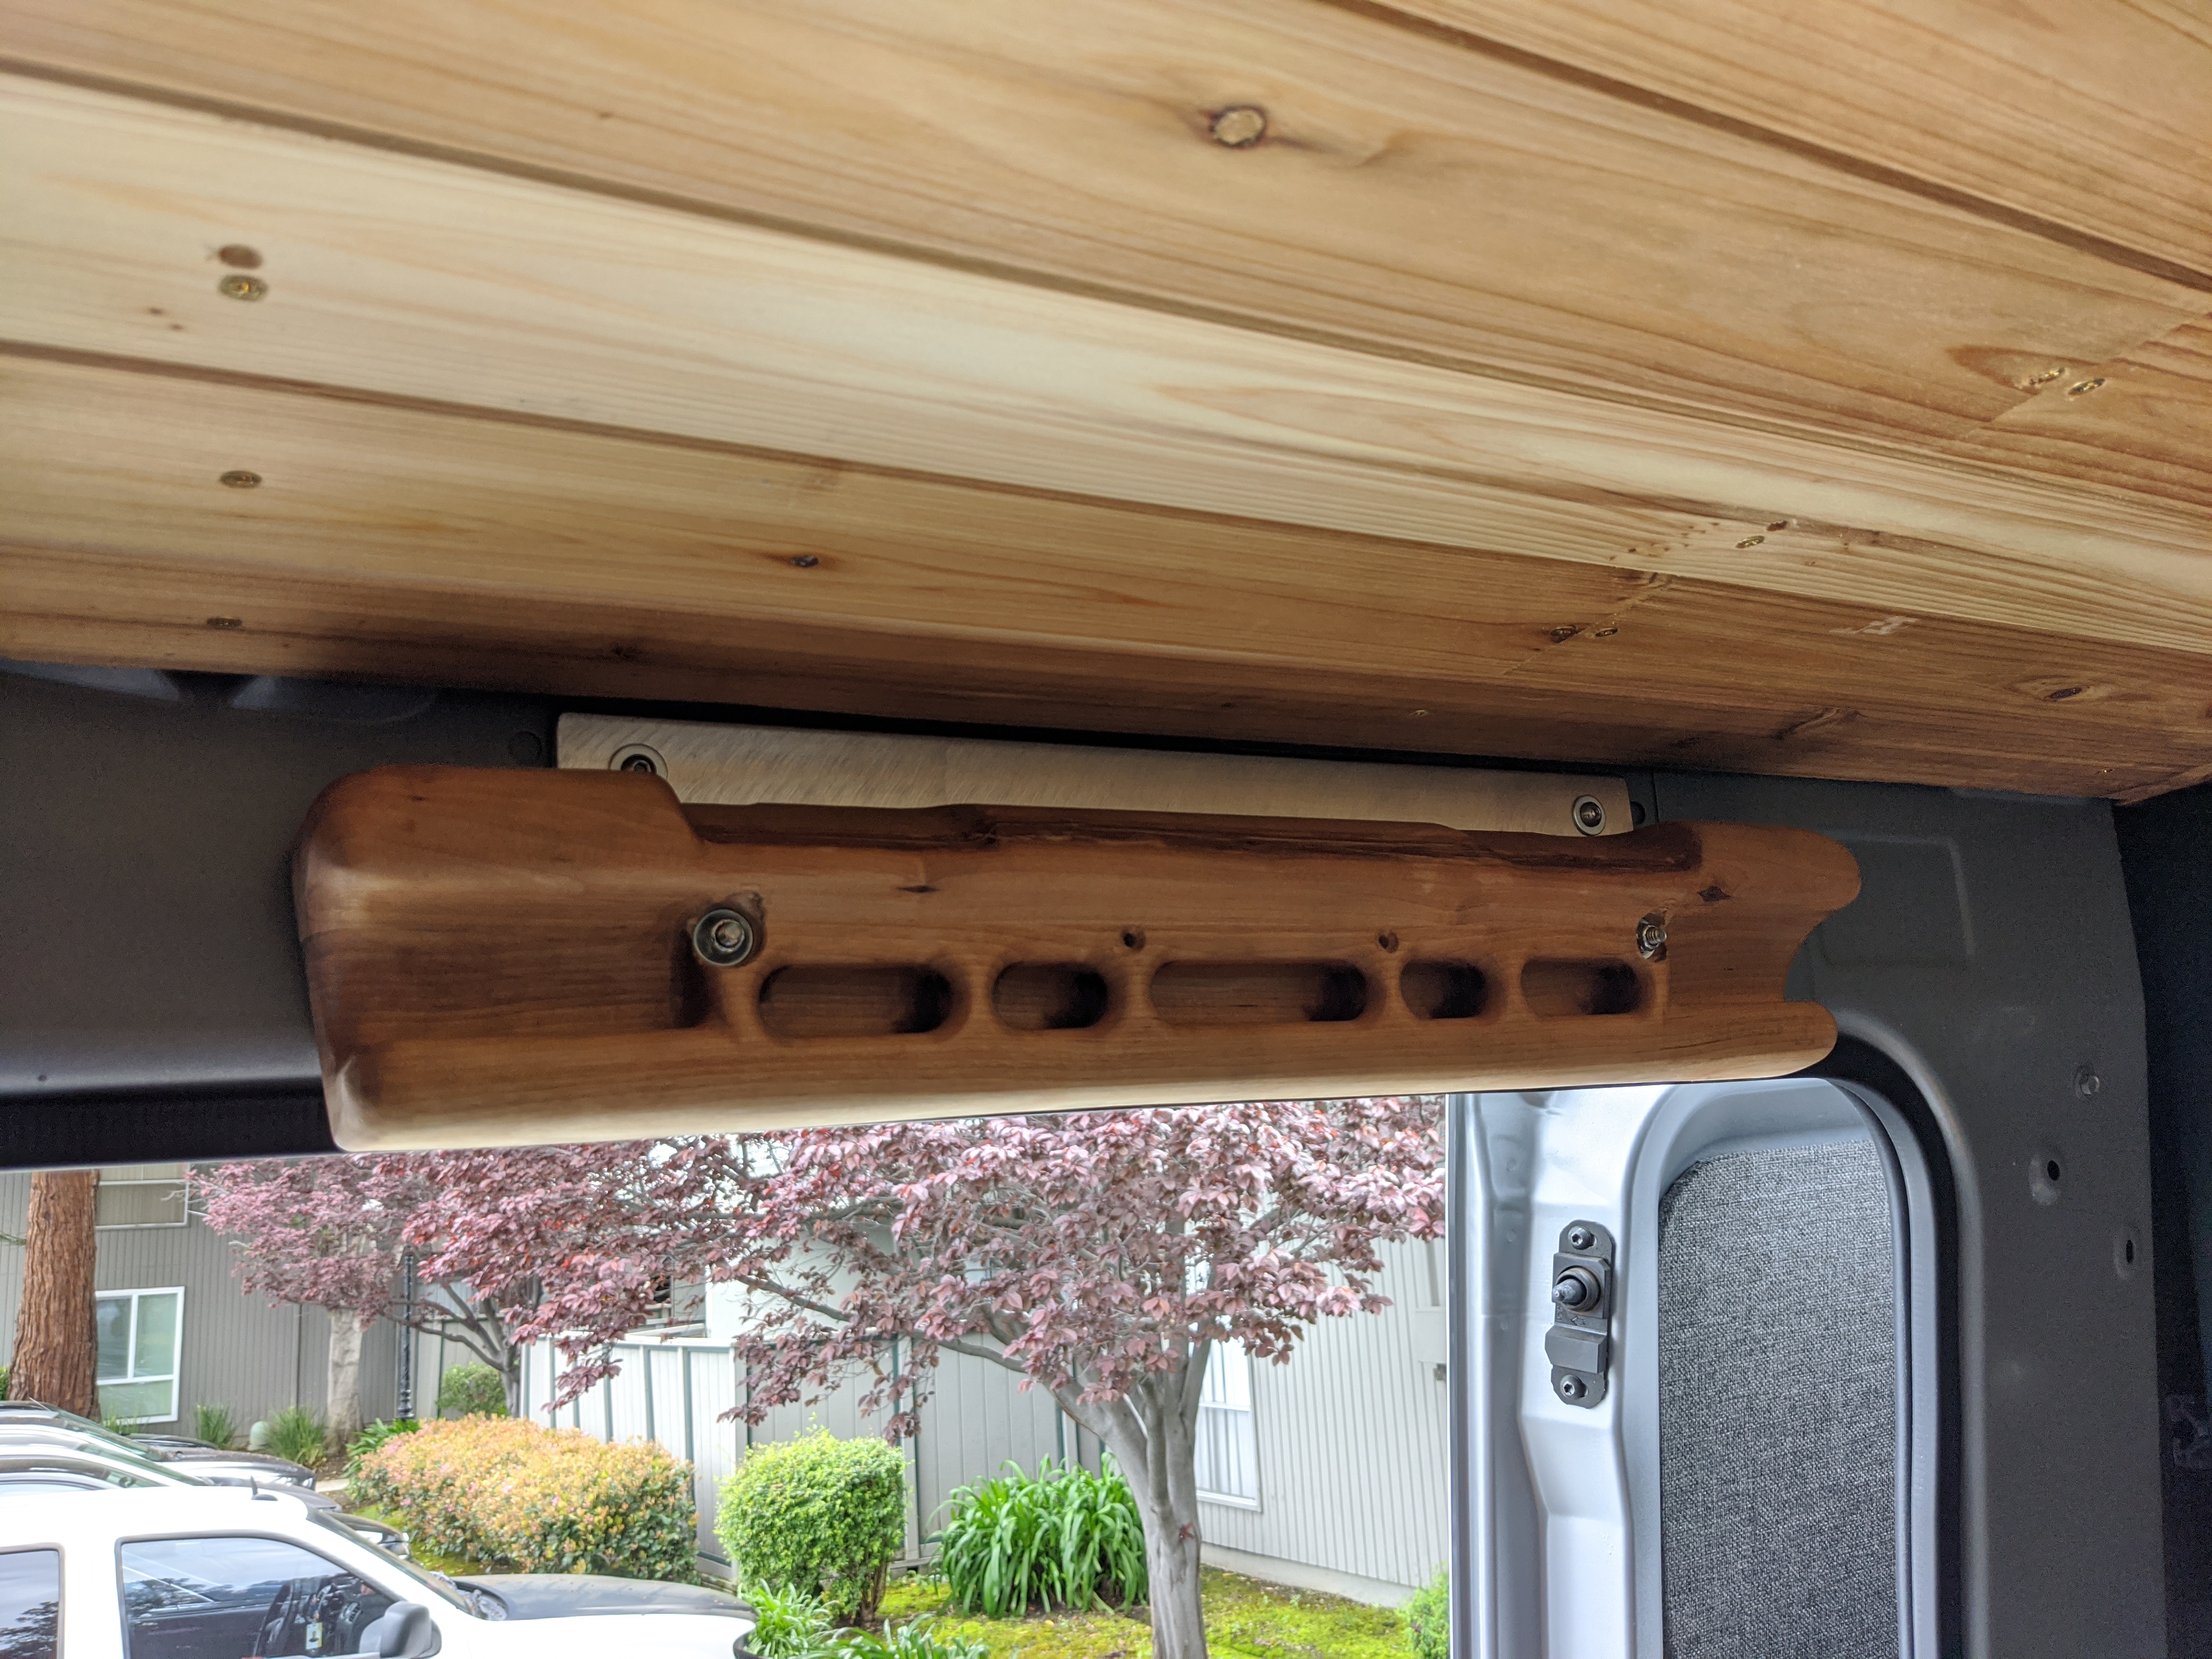
Installed some plusnuts above the door frame to bolt the adapter plate to, then bolted the hangboard to the plate.
Made a trip to test out the completed van over last weekend. Went to Tahoe on Friday night, skiied at Northstar on Saturday in a storm of fresh powder (which was amazing), and left to head back right as I-80 closed. And then got the news that resorts were closing starting Sunday, so I guess the timing was both good and bad, depending on how you look at it.
The 4-wheel-drive worked great in the snow, but the trip brought some ideas for a few tweaks to improve the livability of the van.
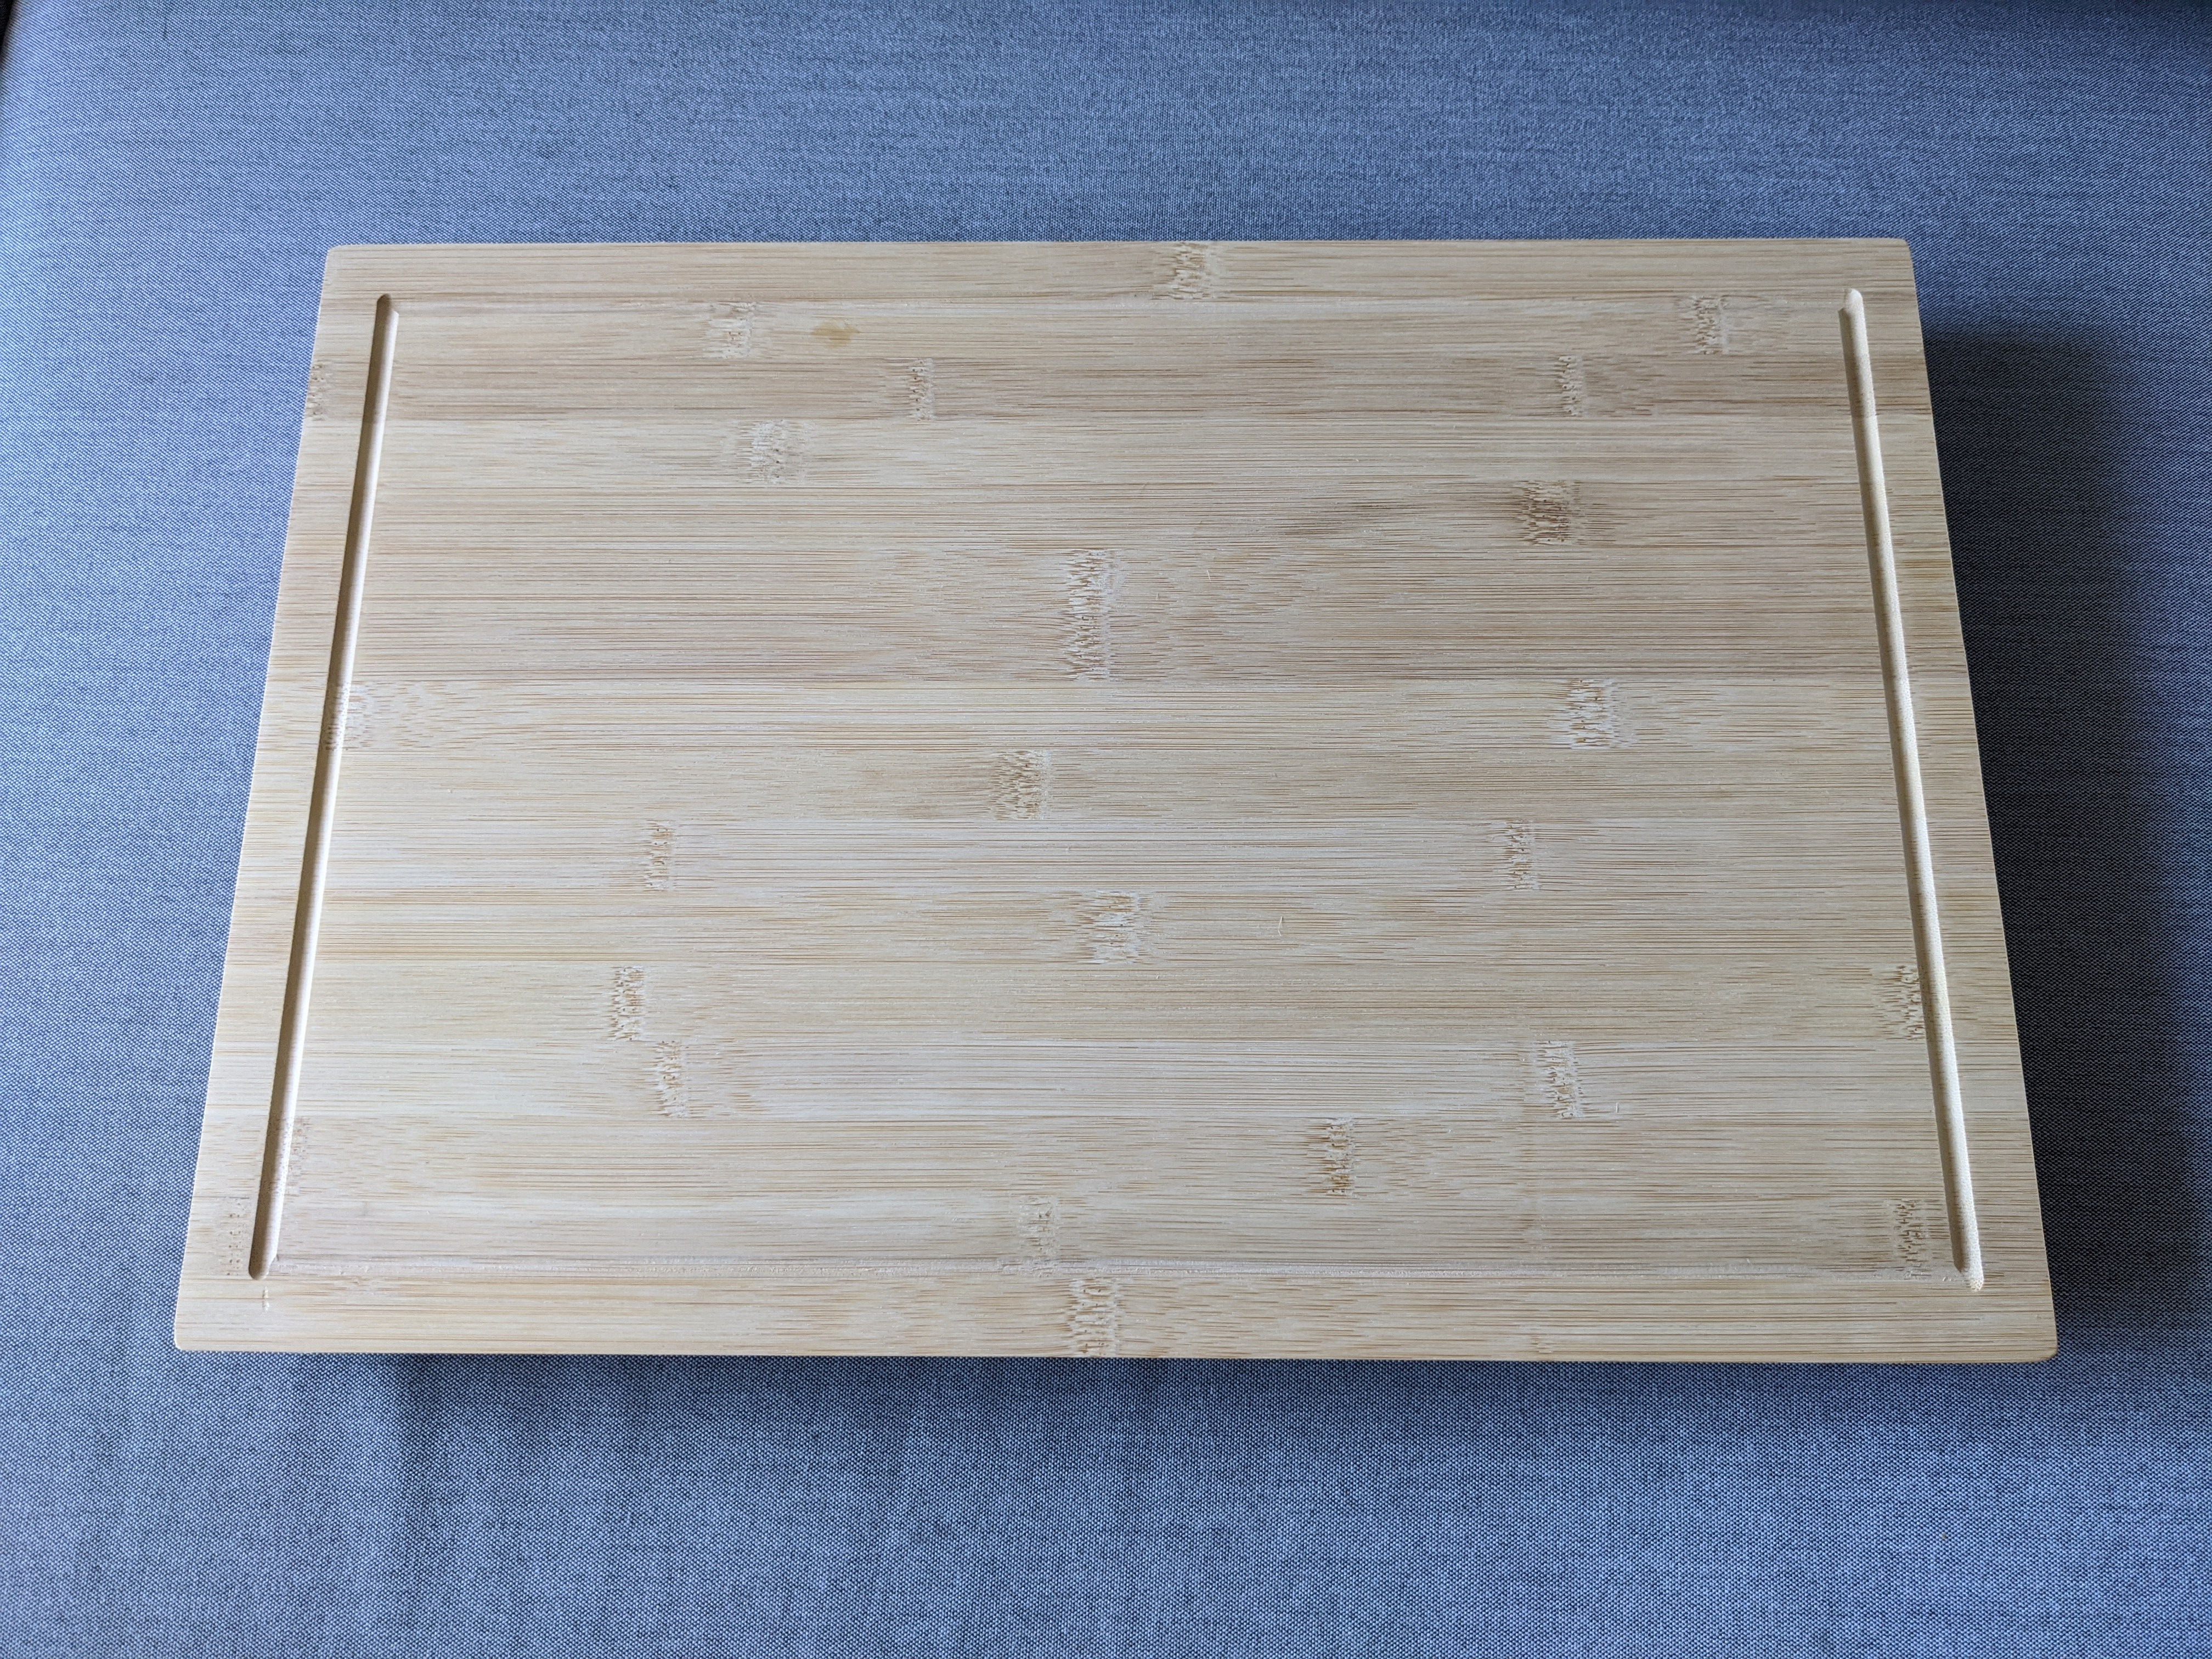
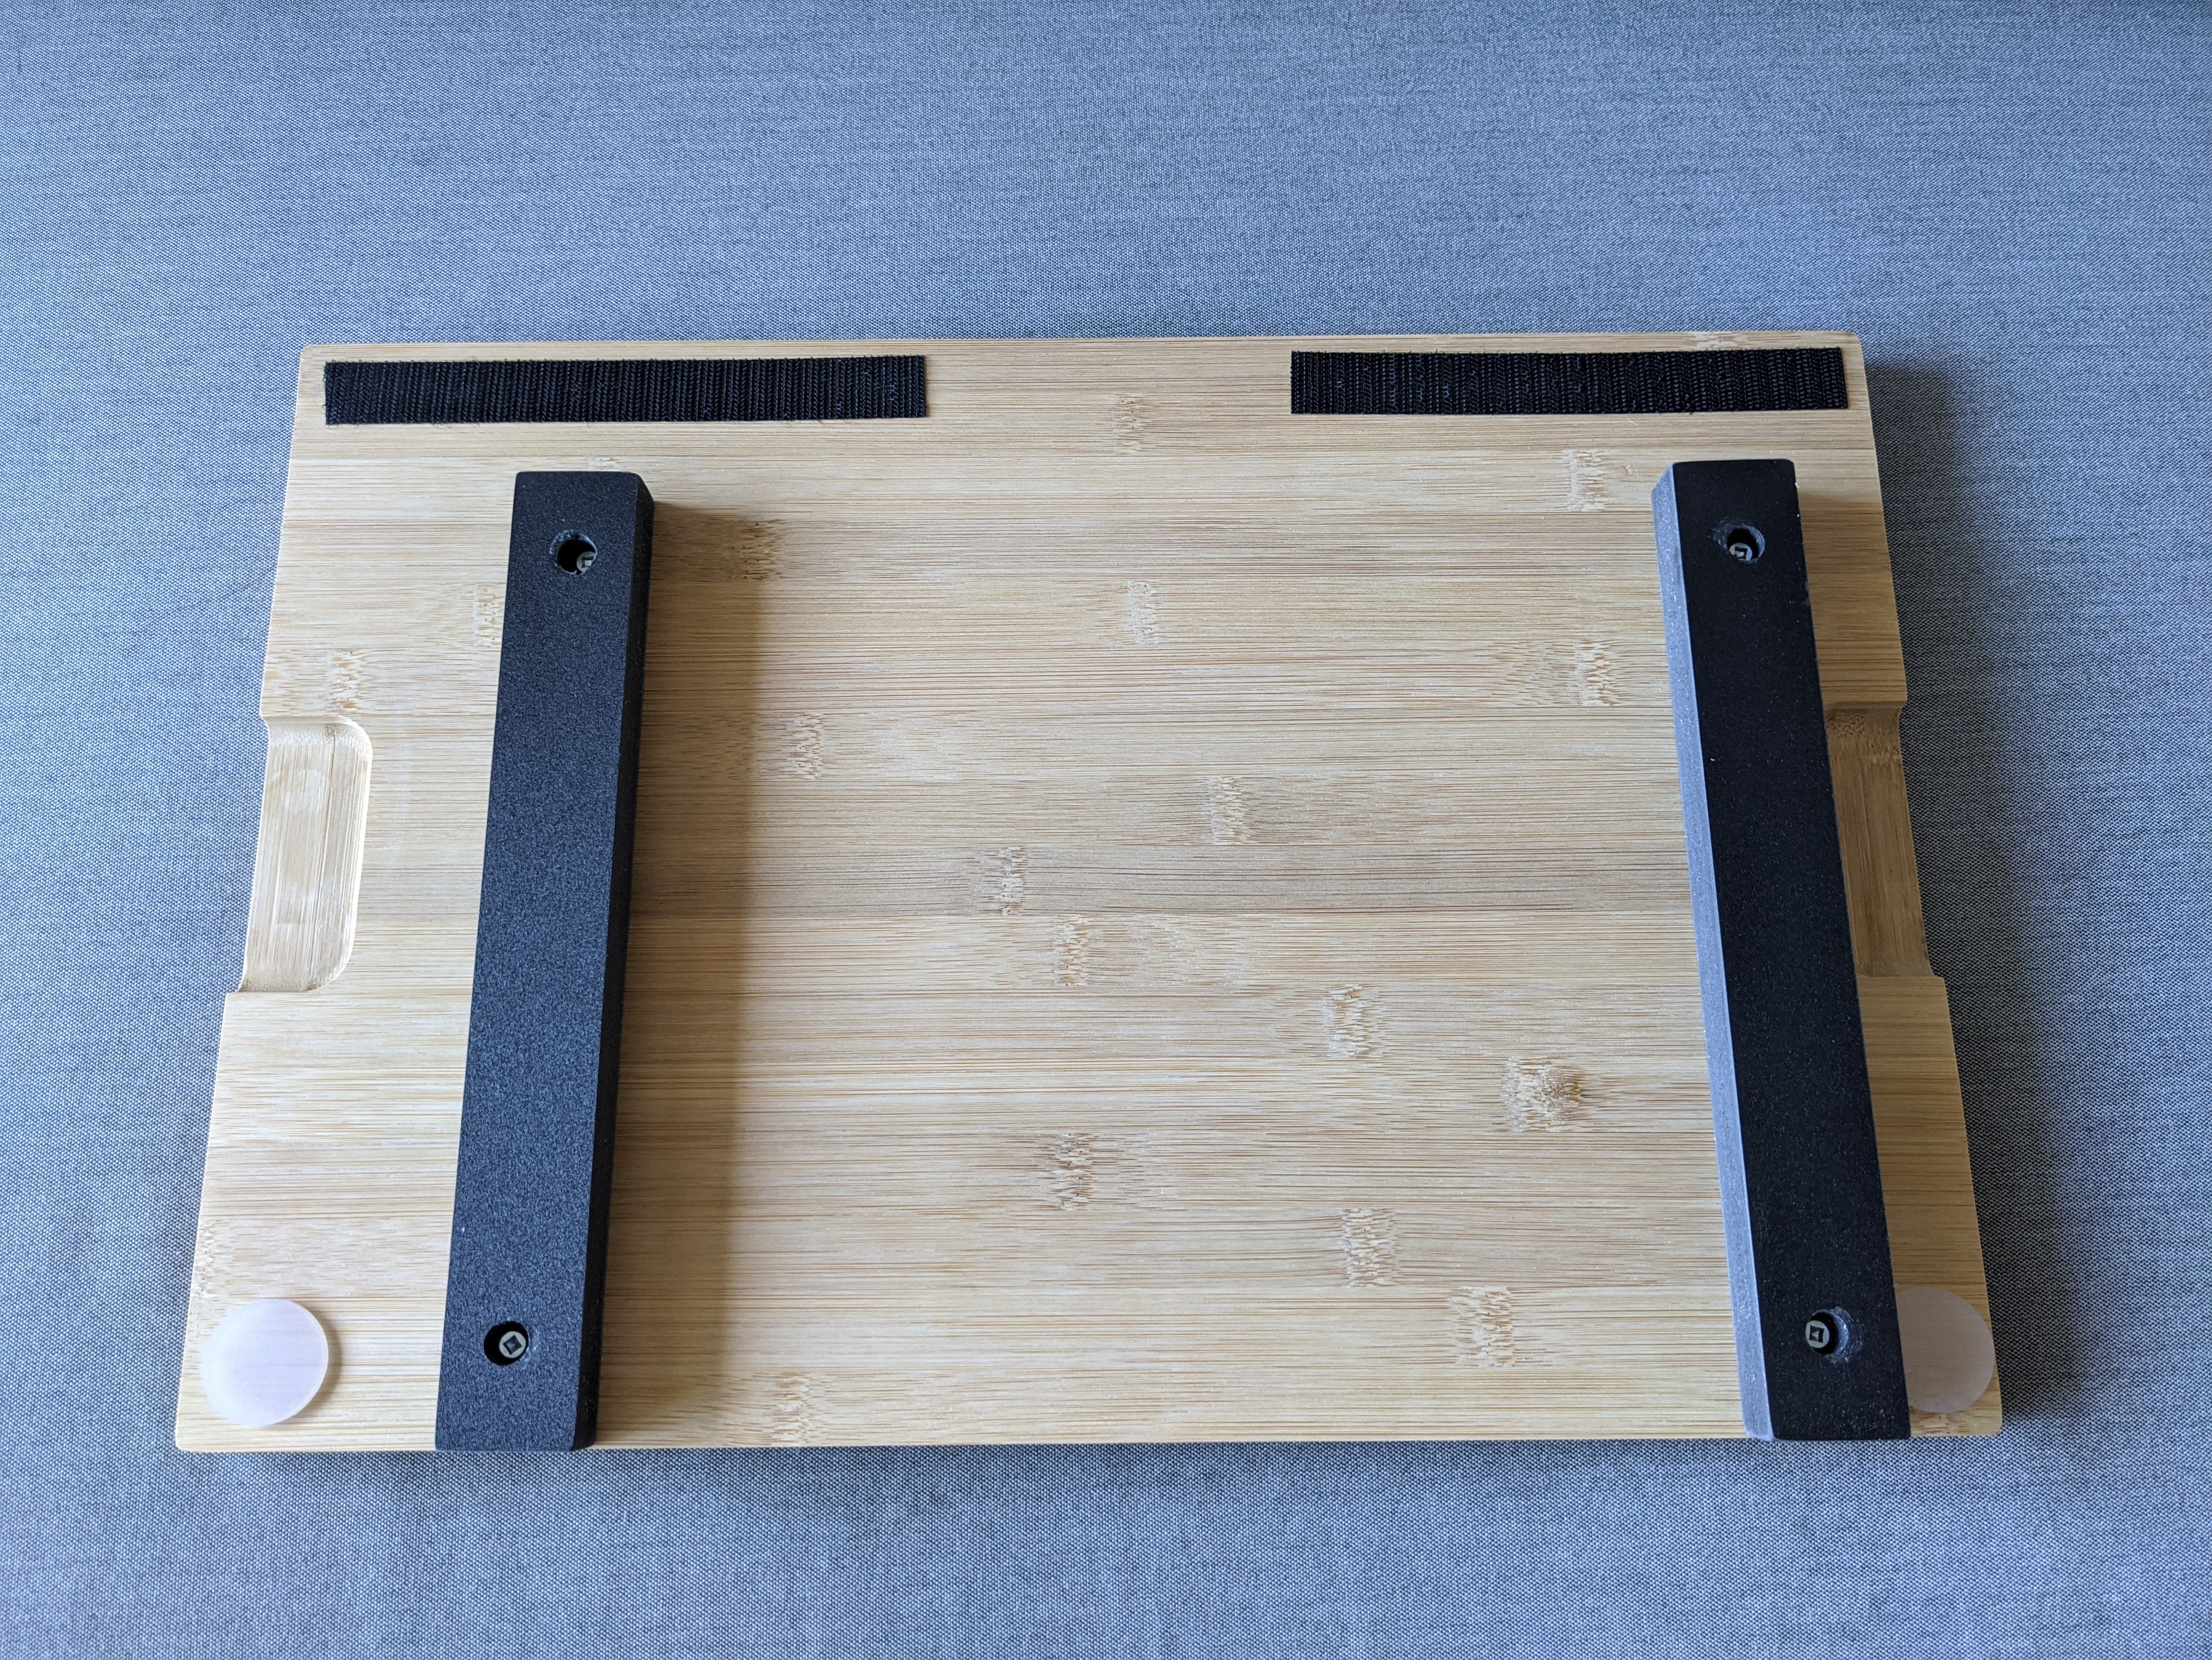
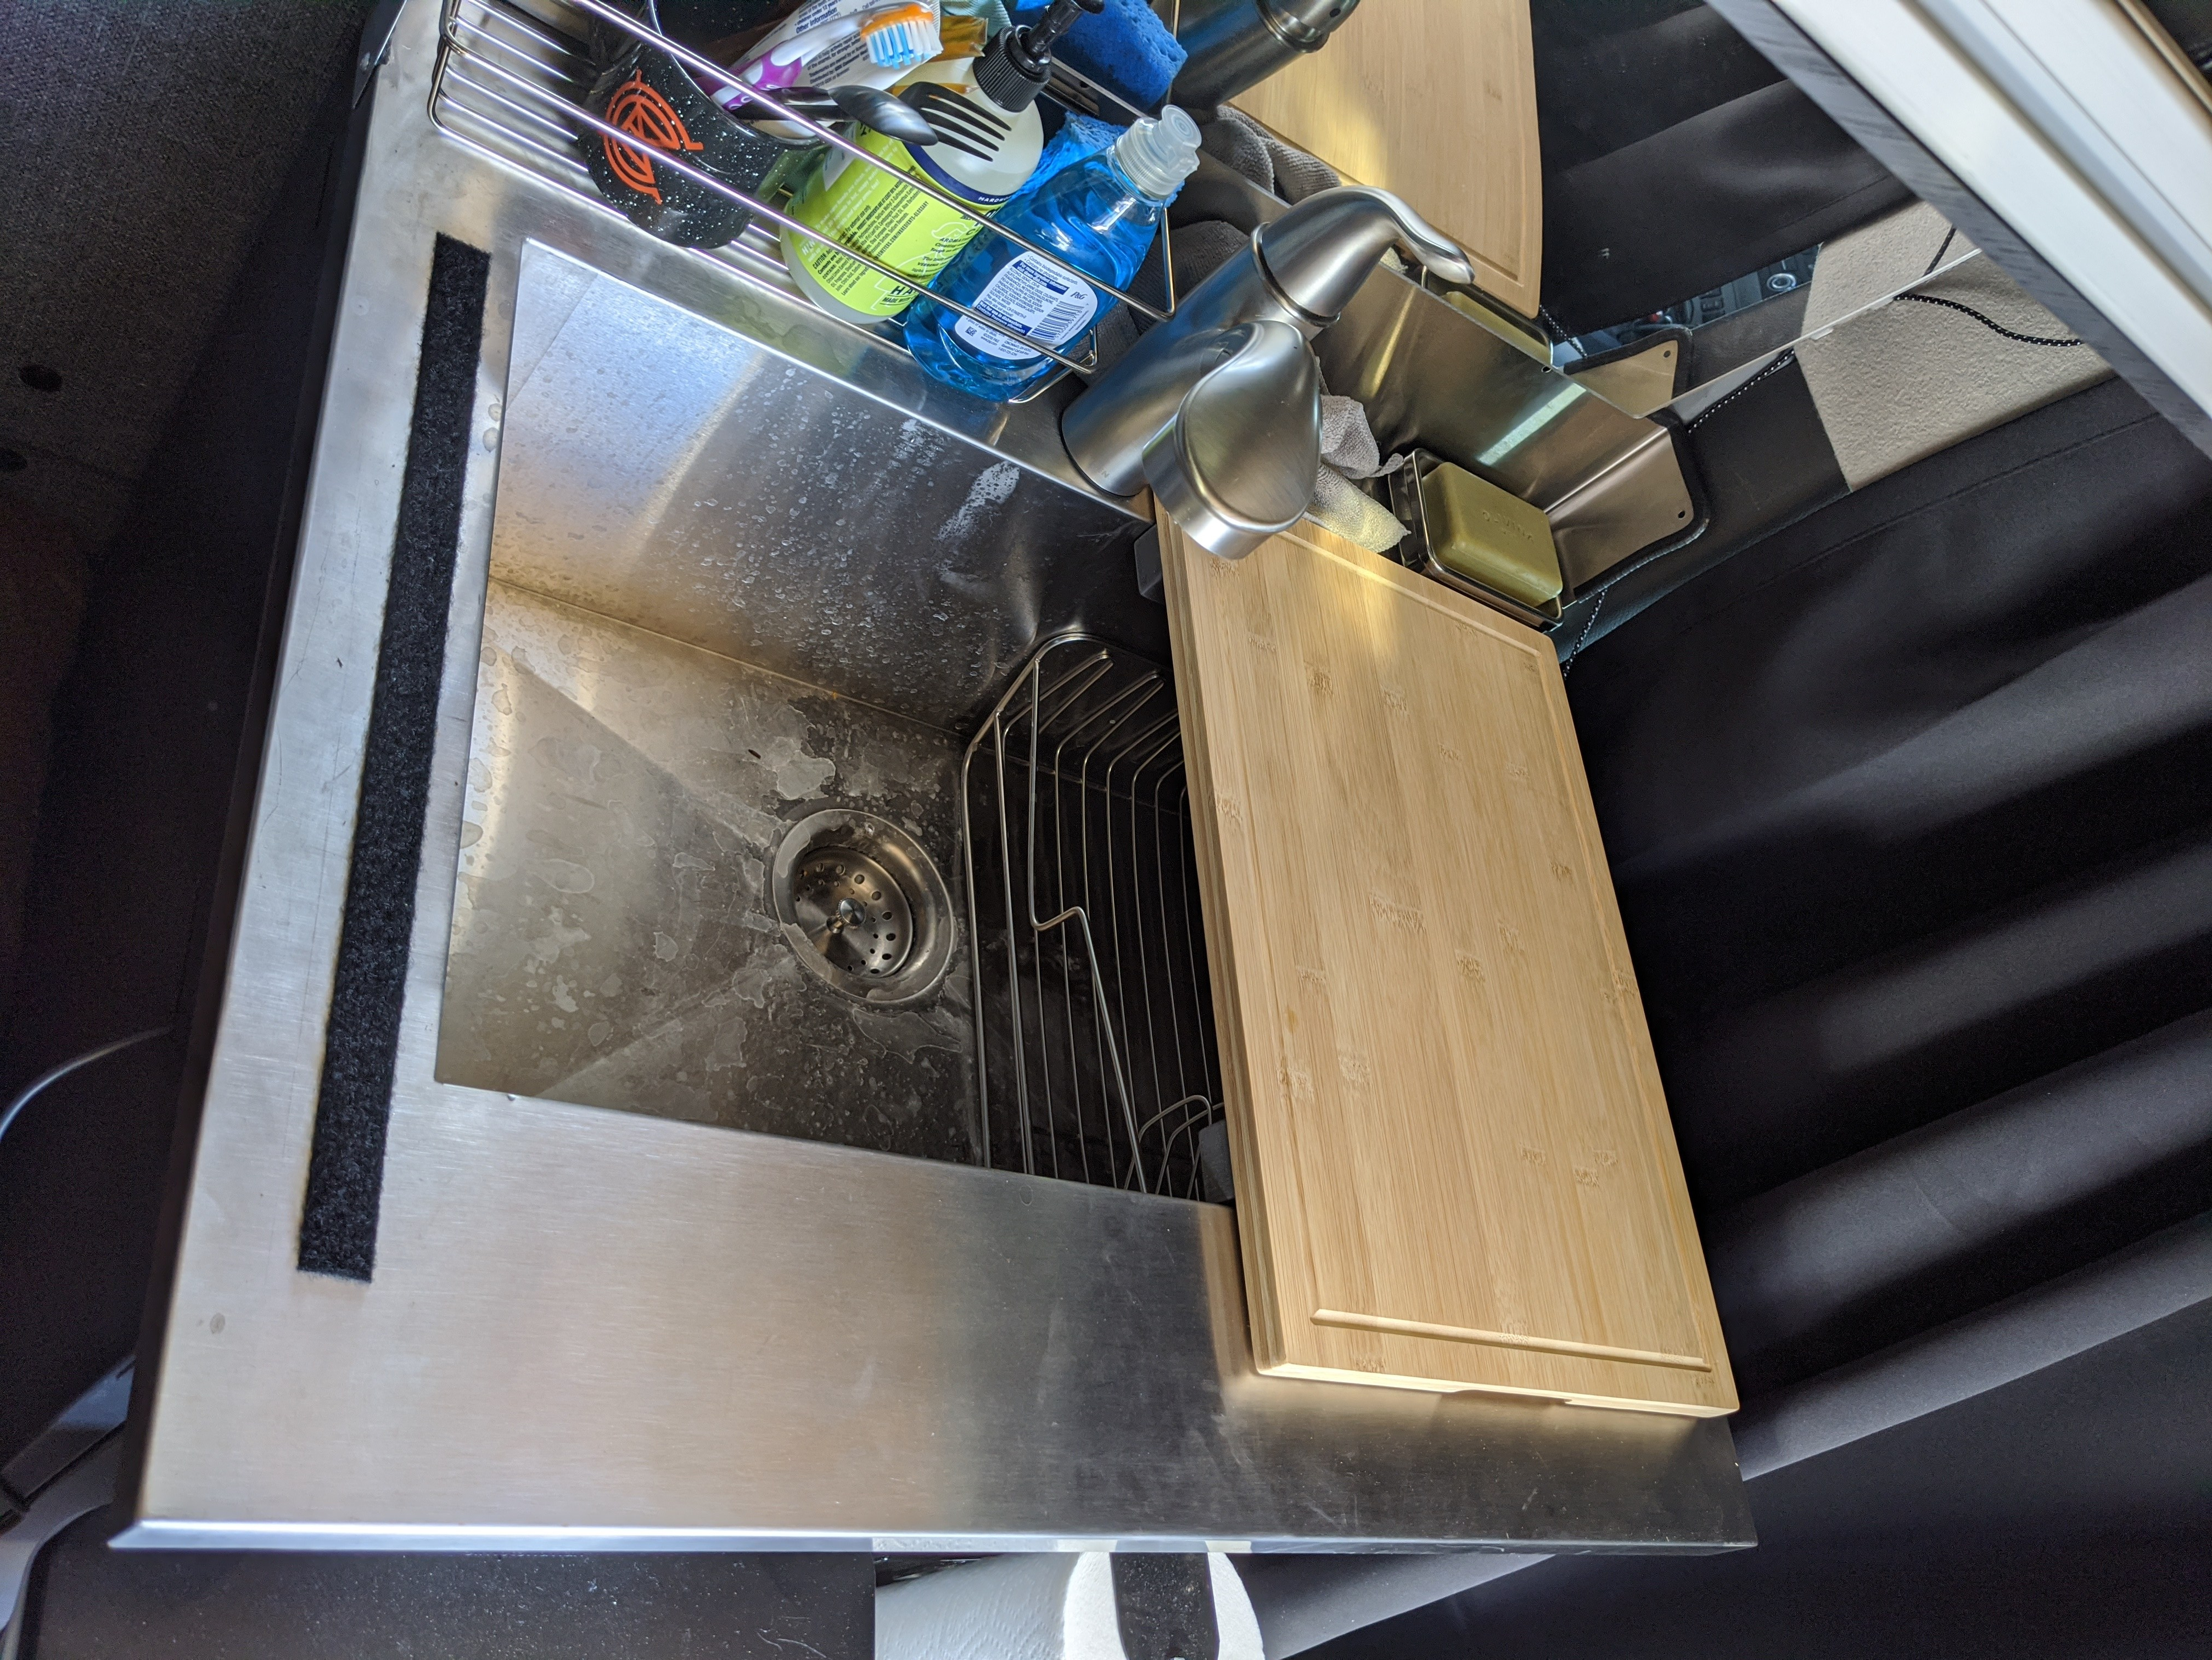
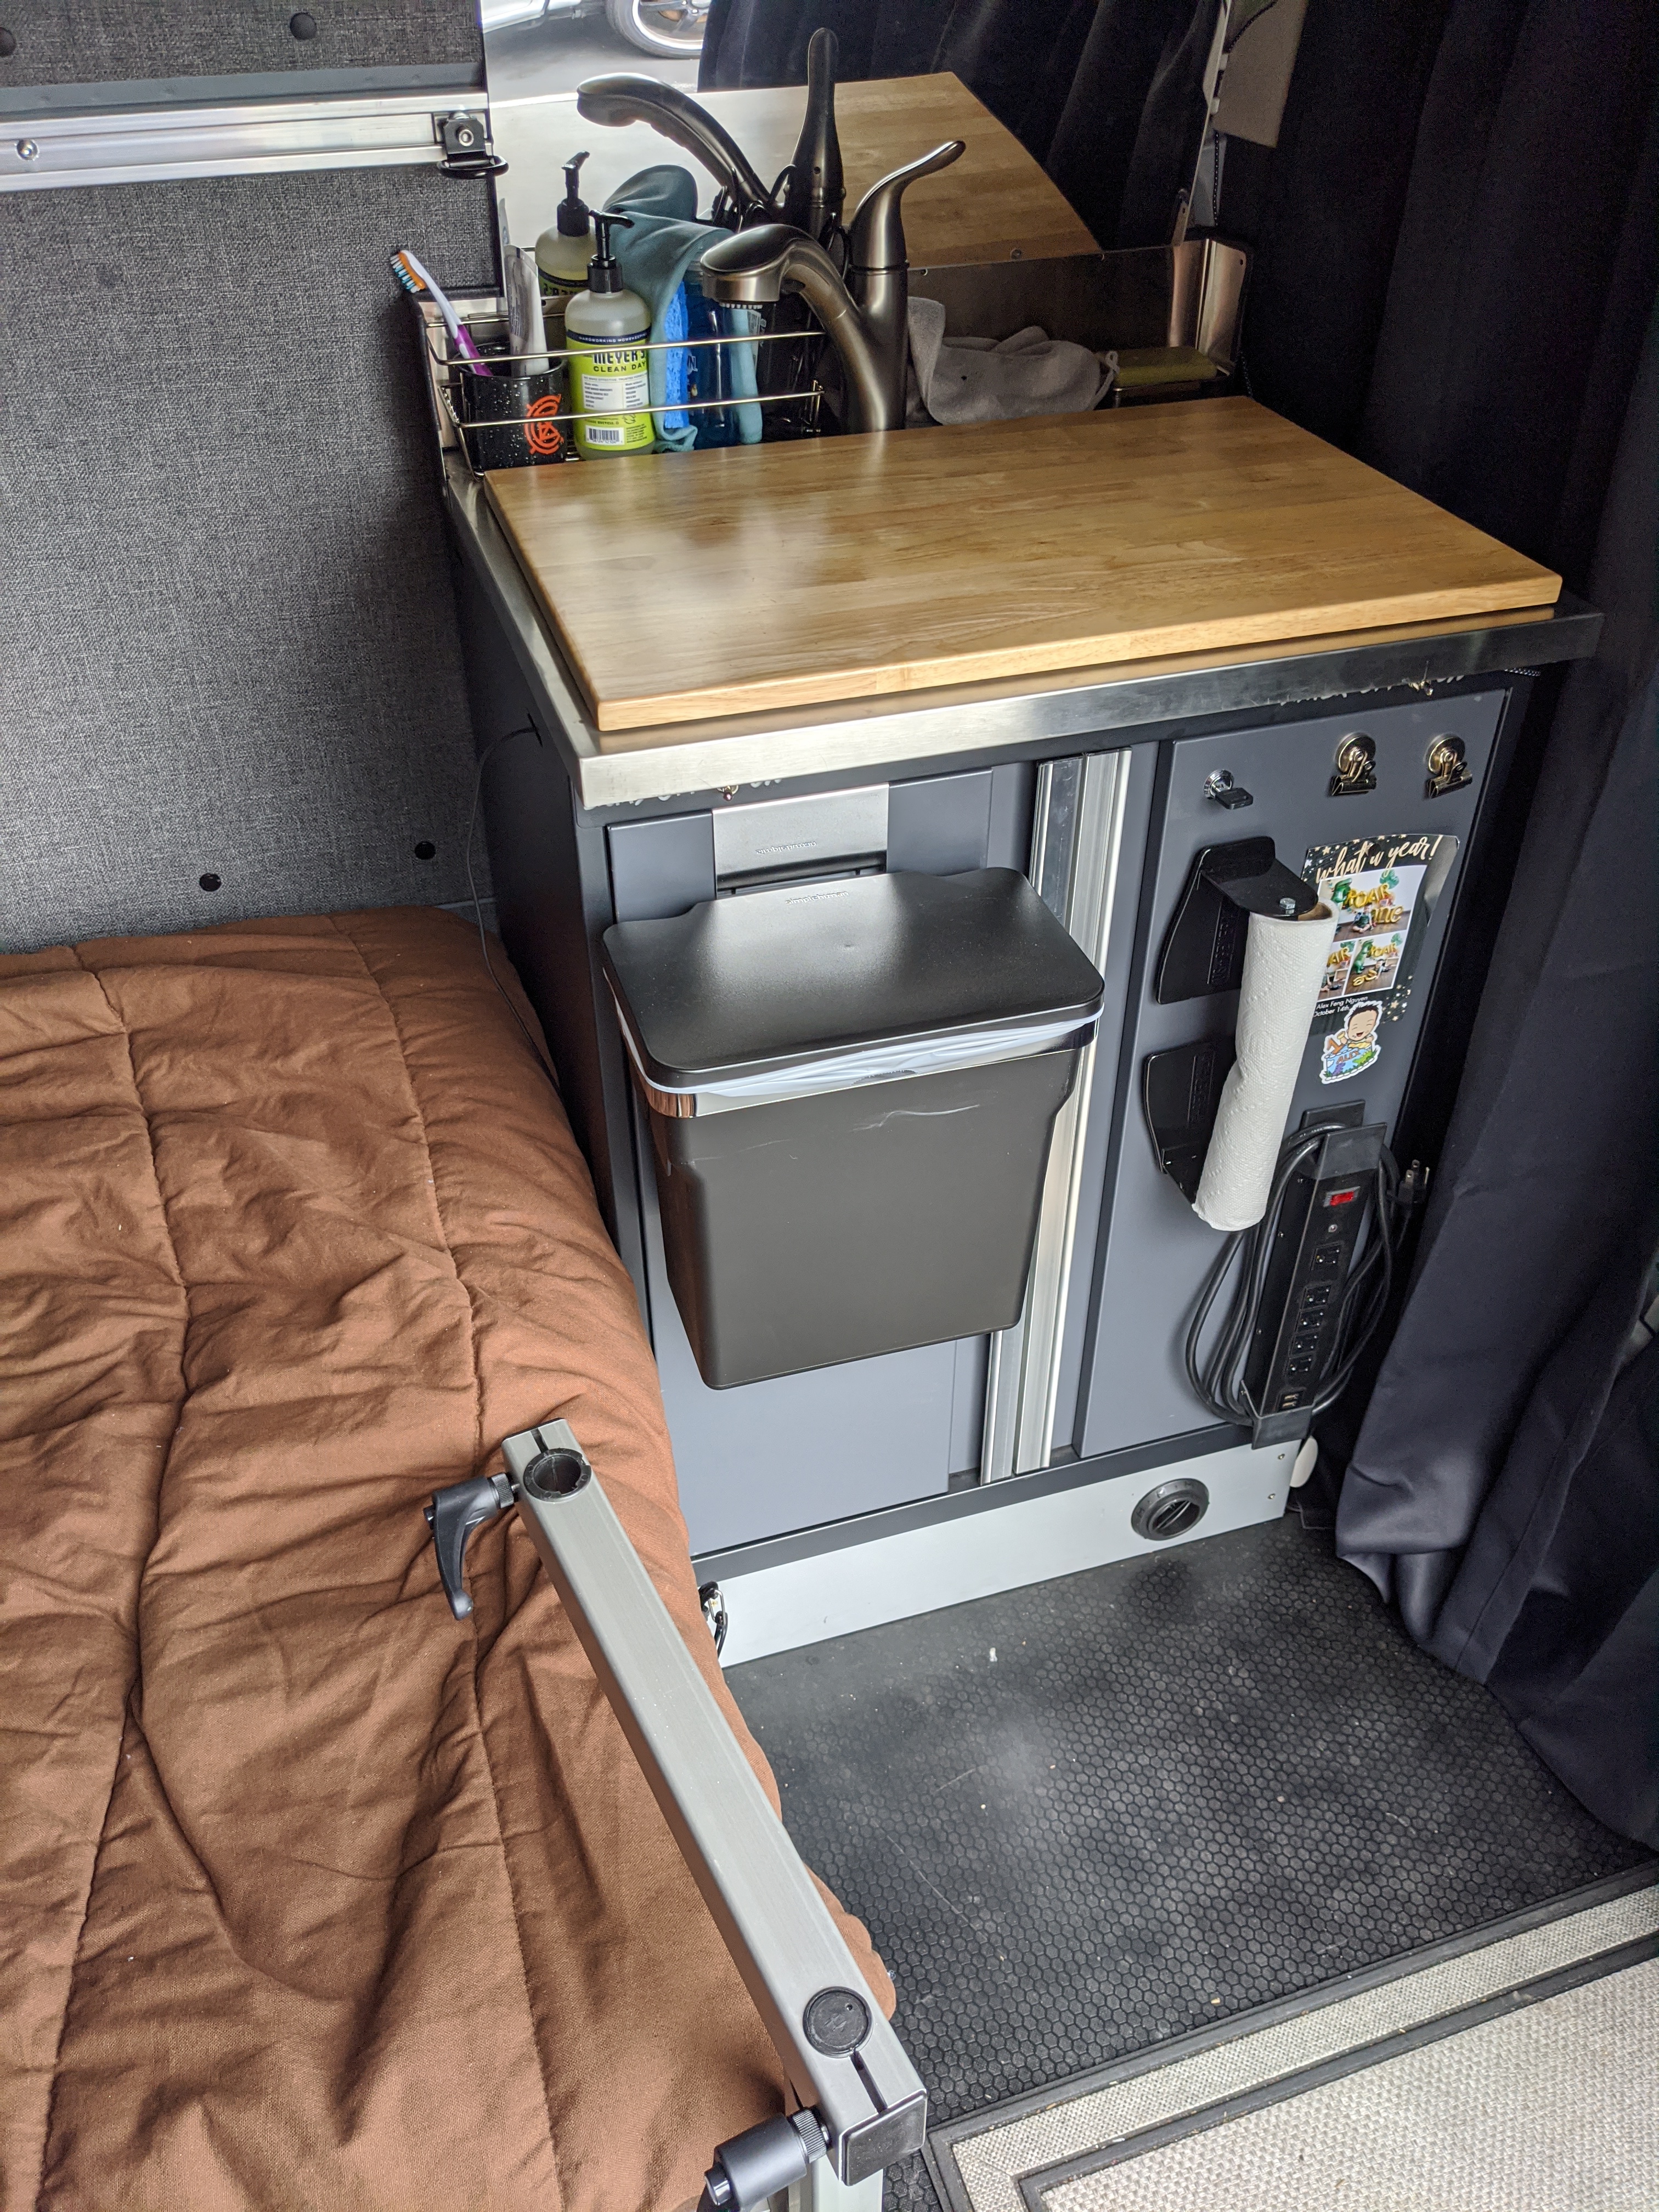
First was to ditch the idea of the Lagun tabletop being able to go on top of the sink. It makes the sink completely unuseable, just a hassle. I replaced it with a bamboo cutting board, mounting two plastic guides to the bottom of the cutting board, along with some velcro to hold it in place. Now half the sink is accessible, and half can be used as counter space. There’s a drying rack under the cutting board for storing dishes also.
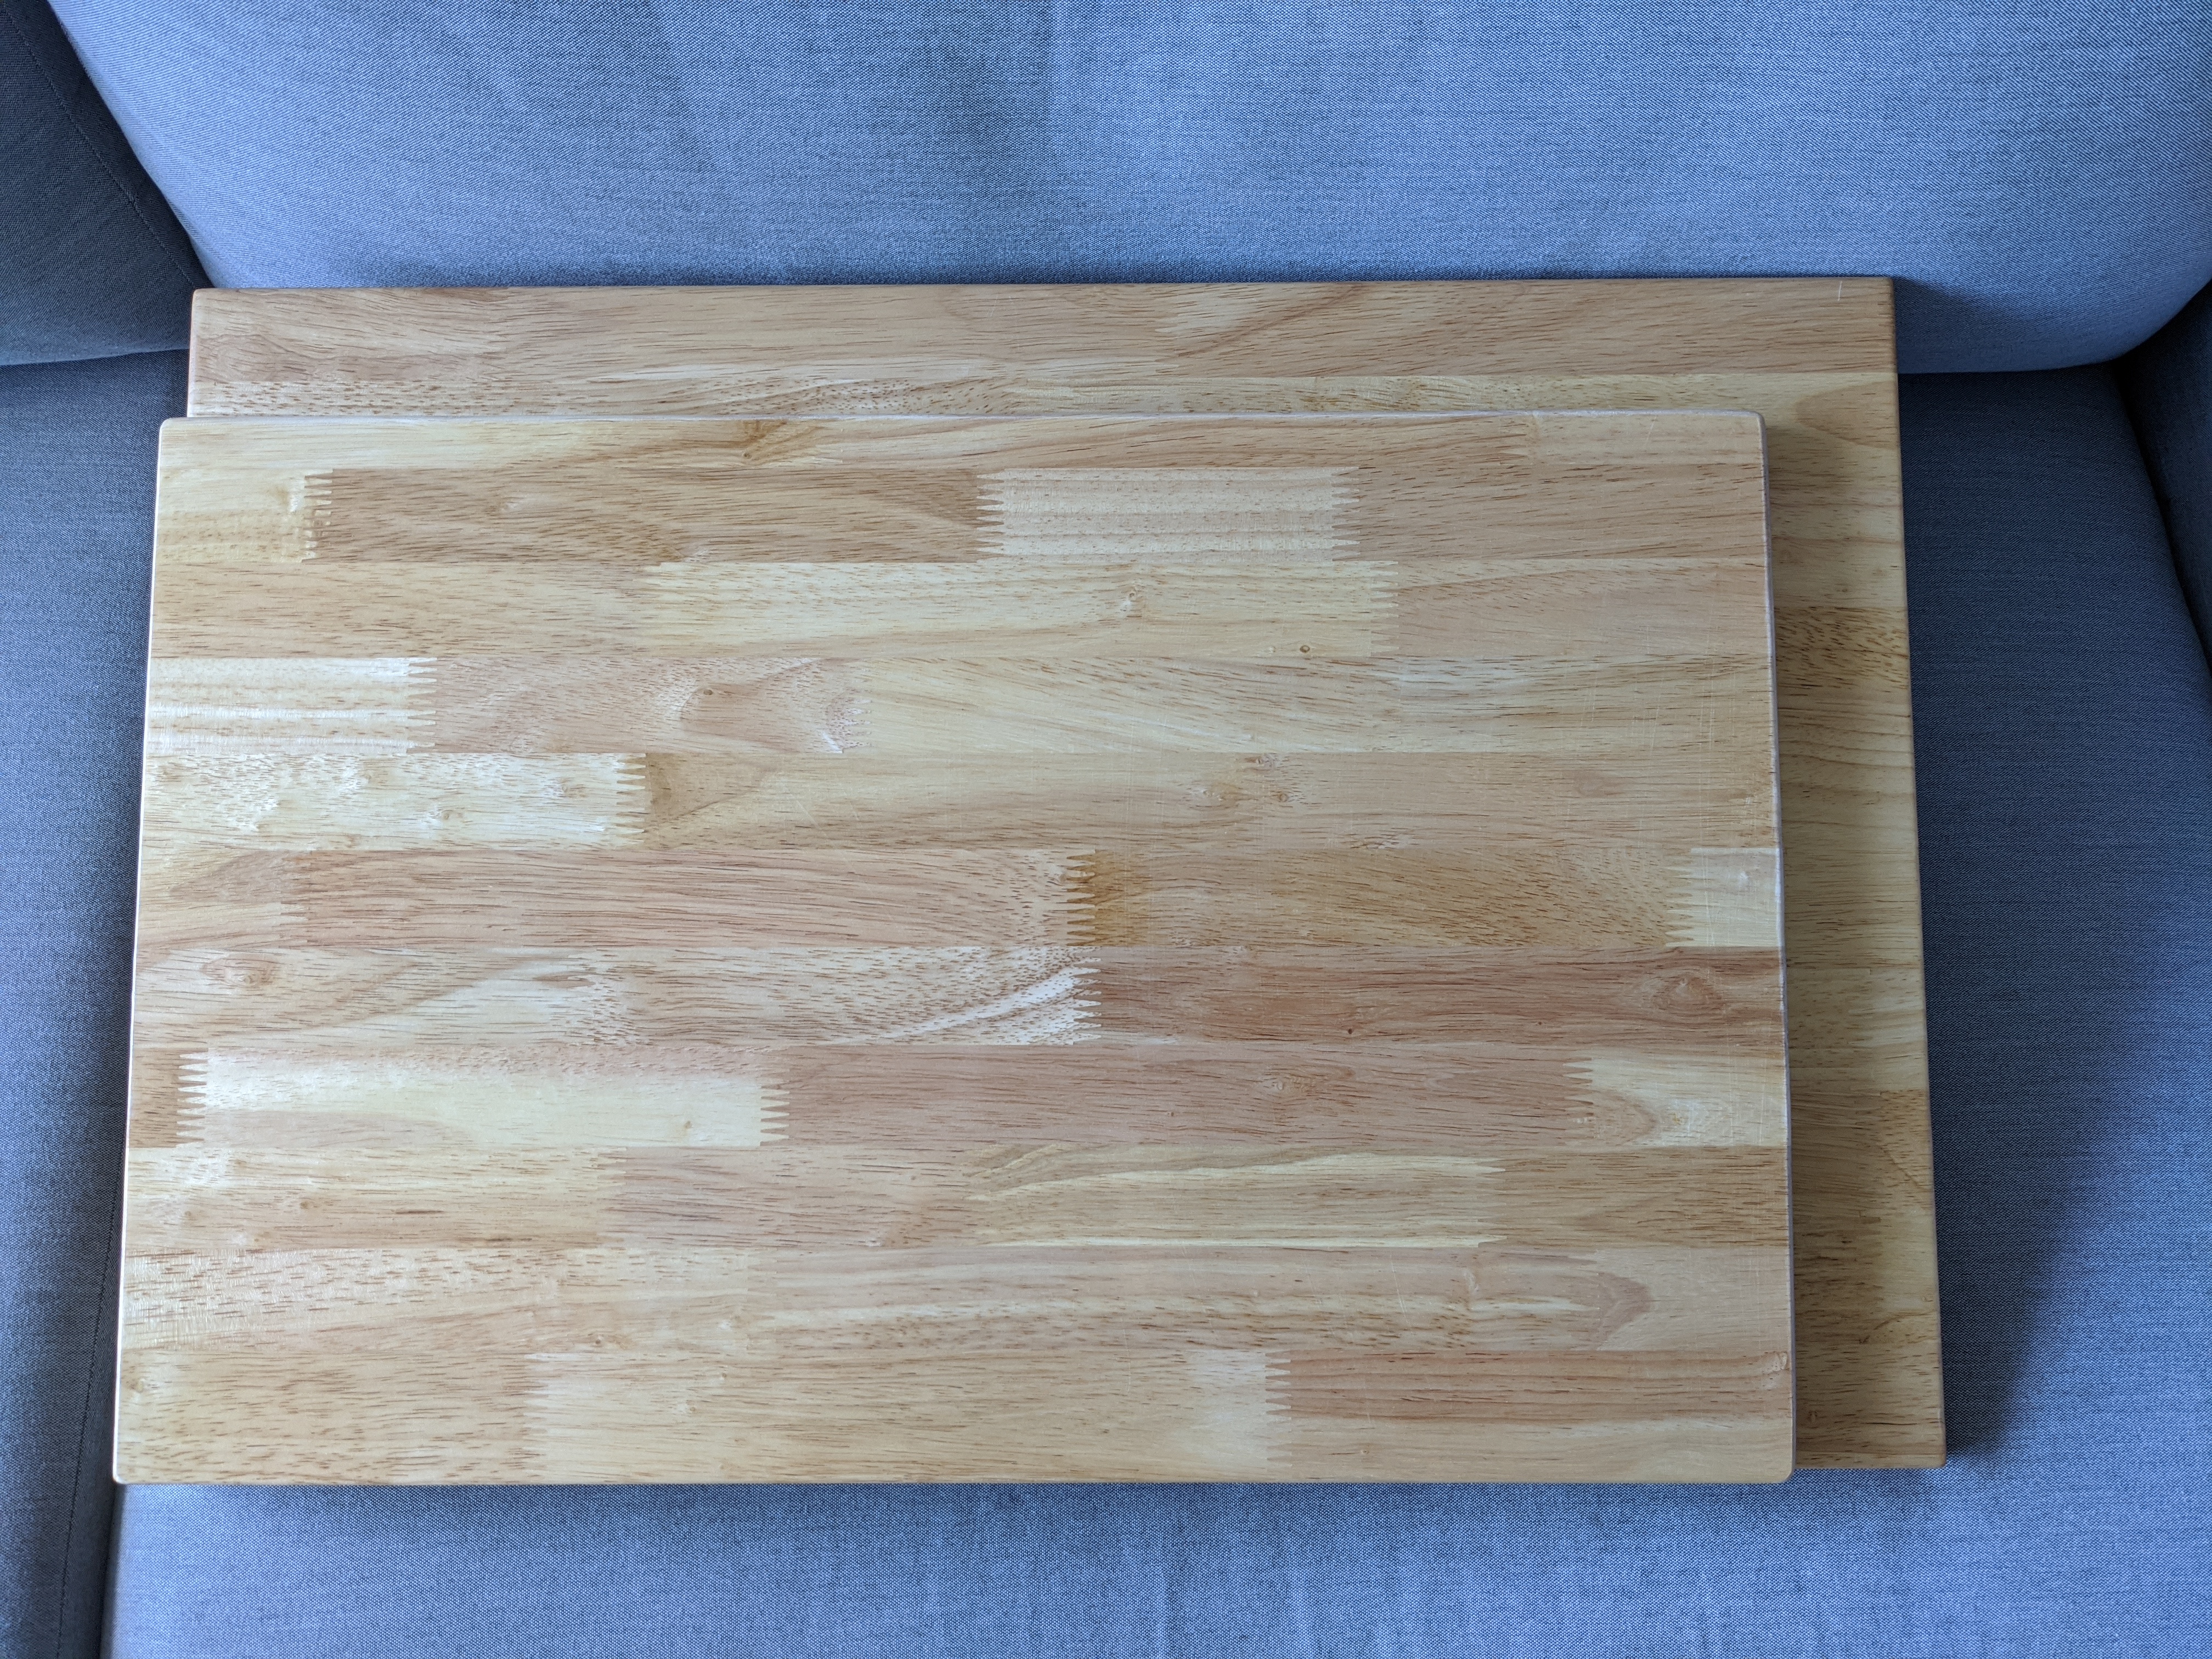
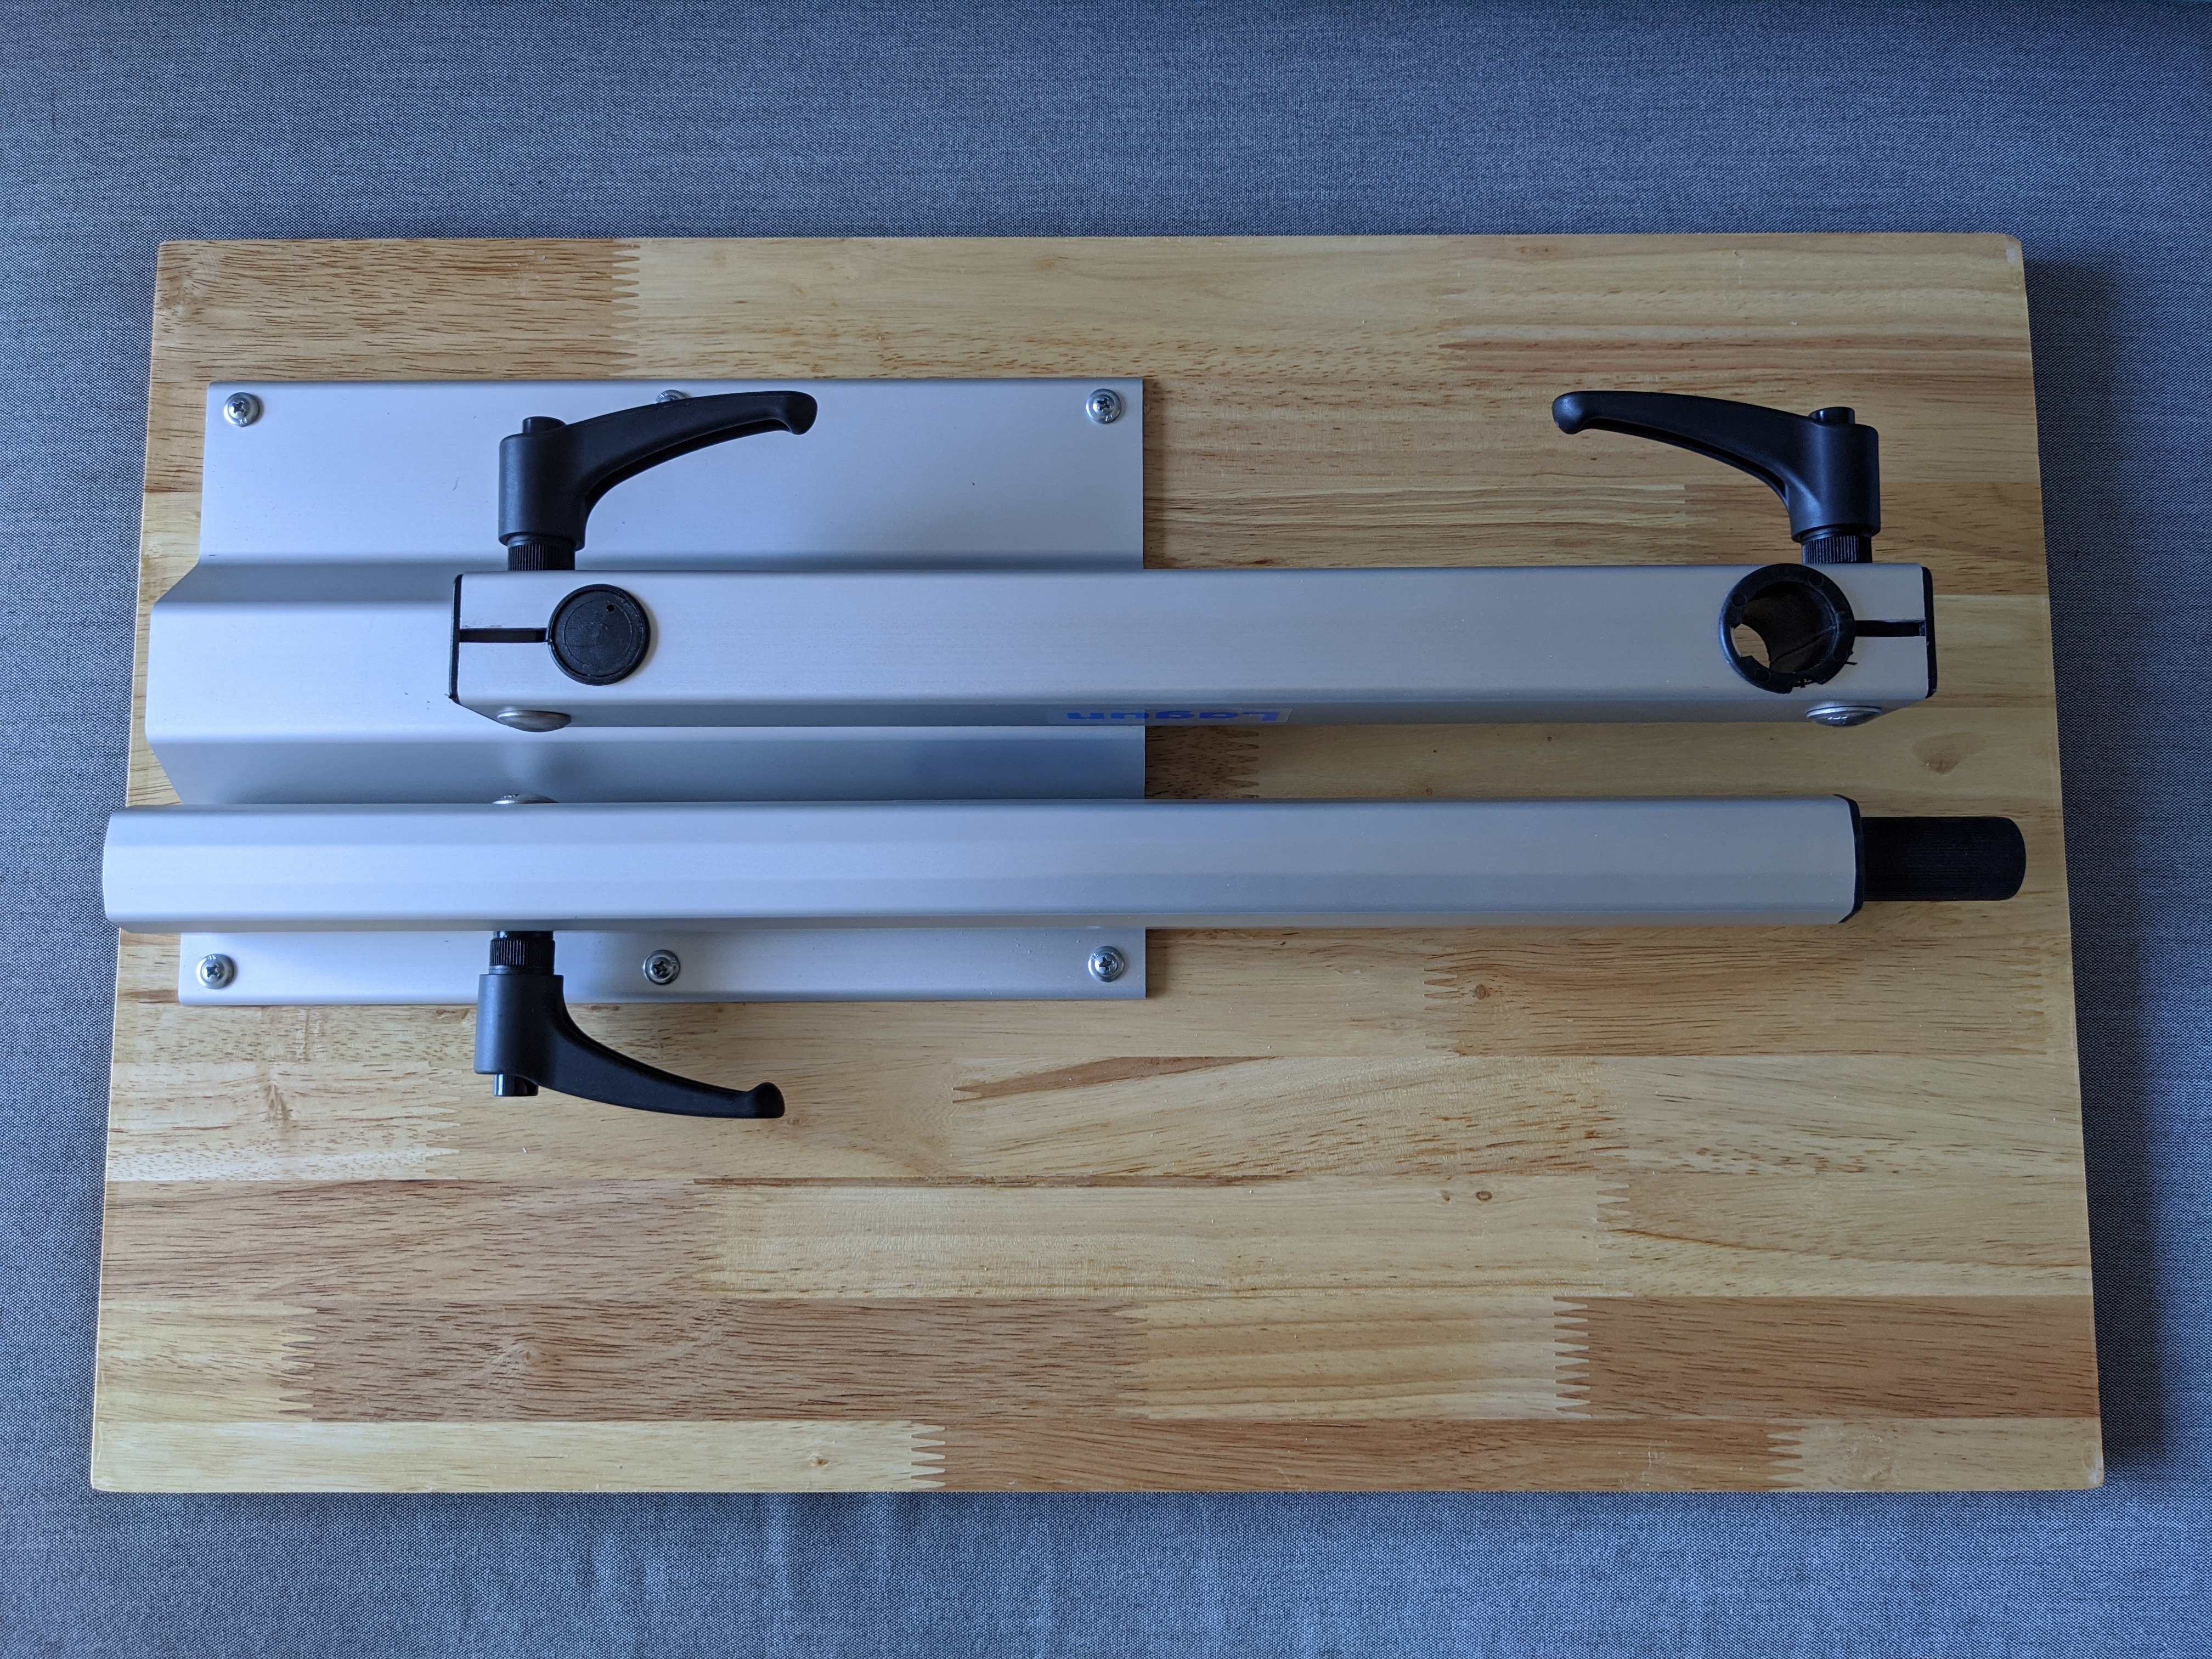
Next, I cut down the table top used for the Lagun mount. It was a little too big in such a small space, and barely fit, making moving around the van a little cumbersome. So I cut roughly 2 inches off each side, and refinished it in polyurethane. Now it’s much more useable.
Lastly, I used 3M VHB tape to stick down a strip a 1/8″ aluminum bar stock next to the legs of the bed, to stop the linear bearings from sliding the bed out when driving around. Every time I drove the van the bed would move around, and I’d have to move it back. This should stop that from happening, and still allow the bed to fold up easily.
That’s it for now. I want to mount a hangboard above the sliding door frame, but I’ve yet to figure out a good way to do that.
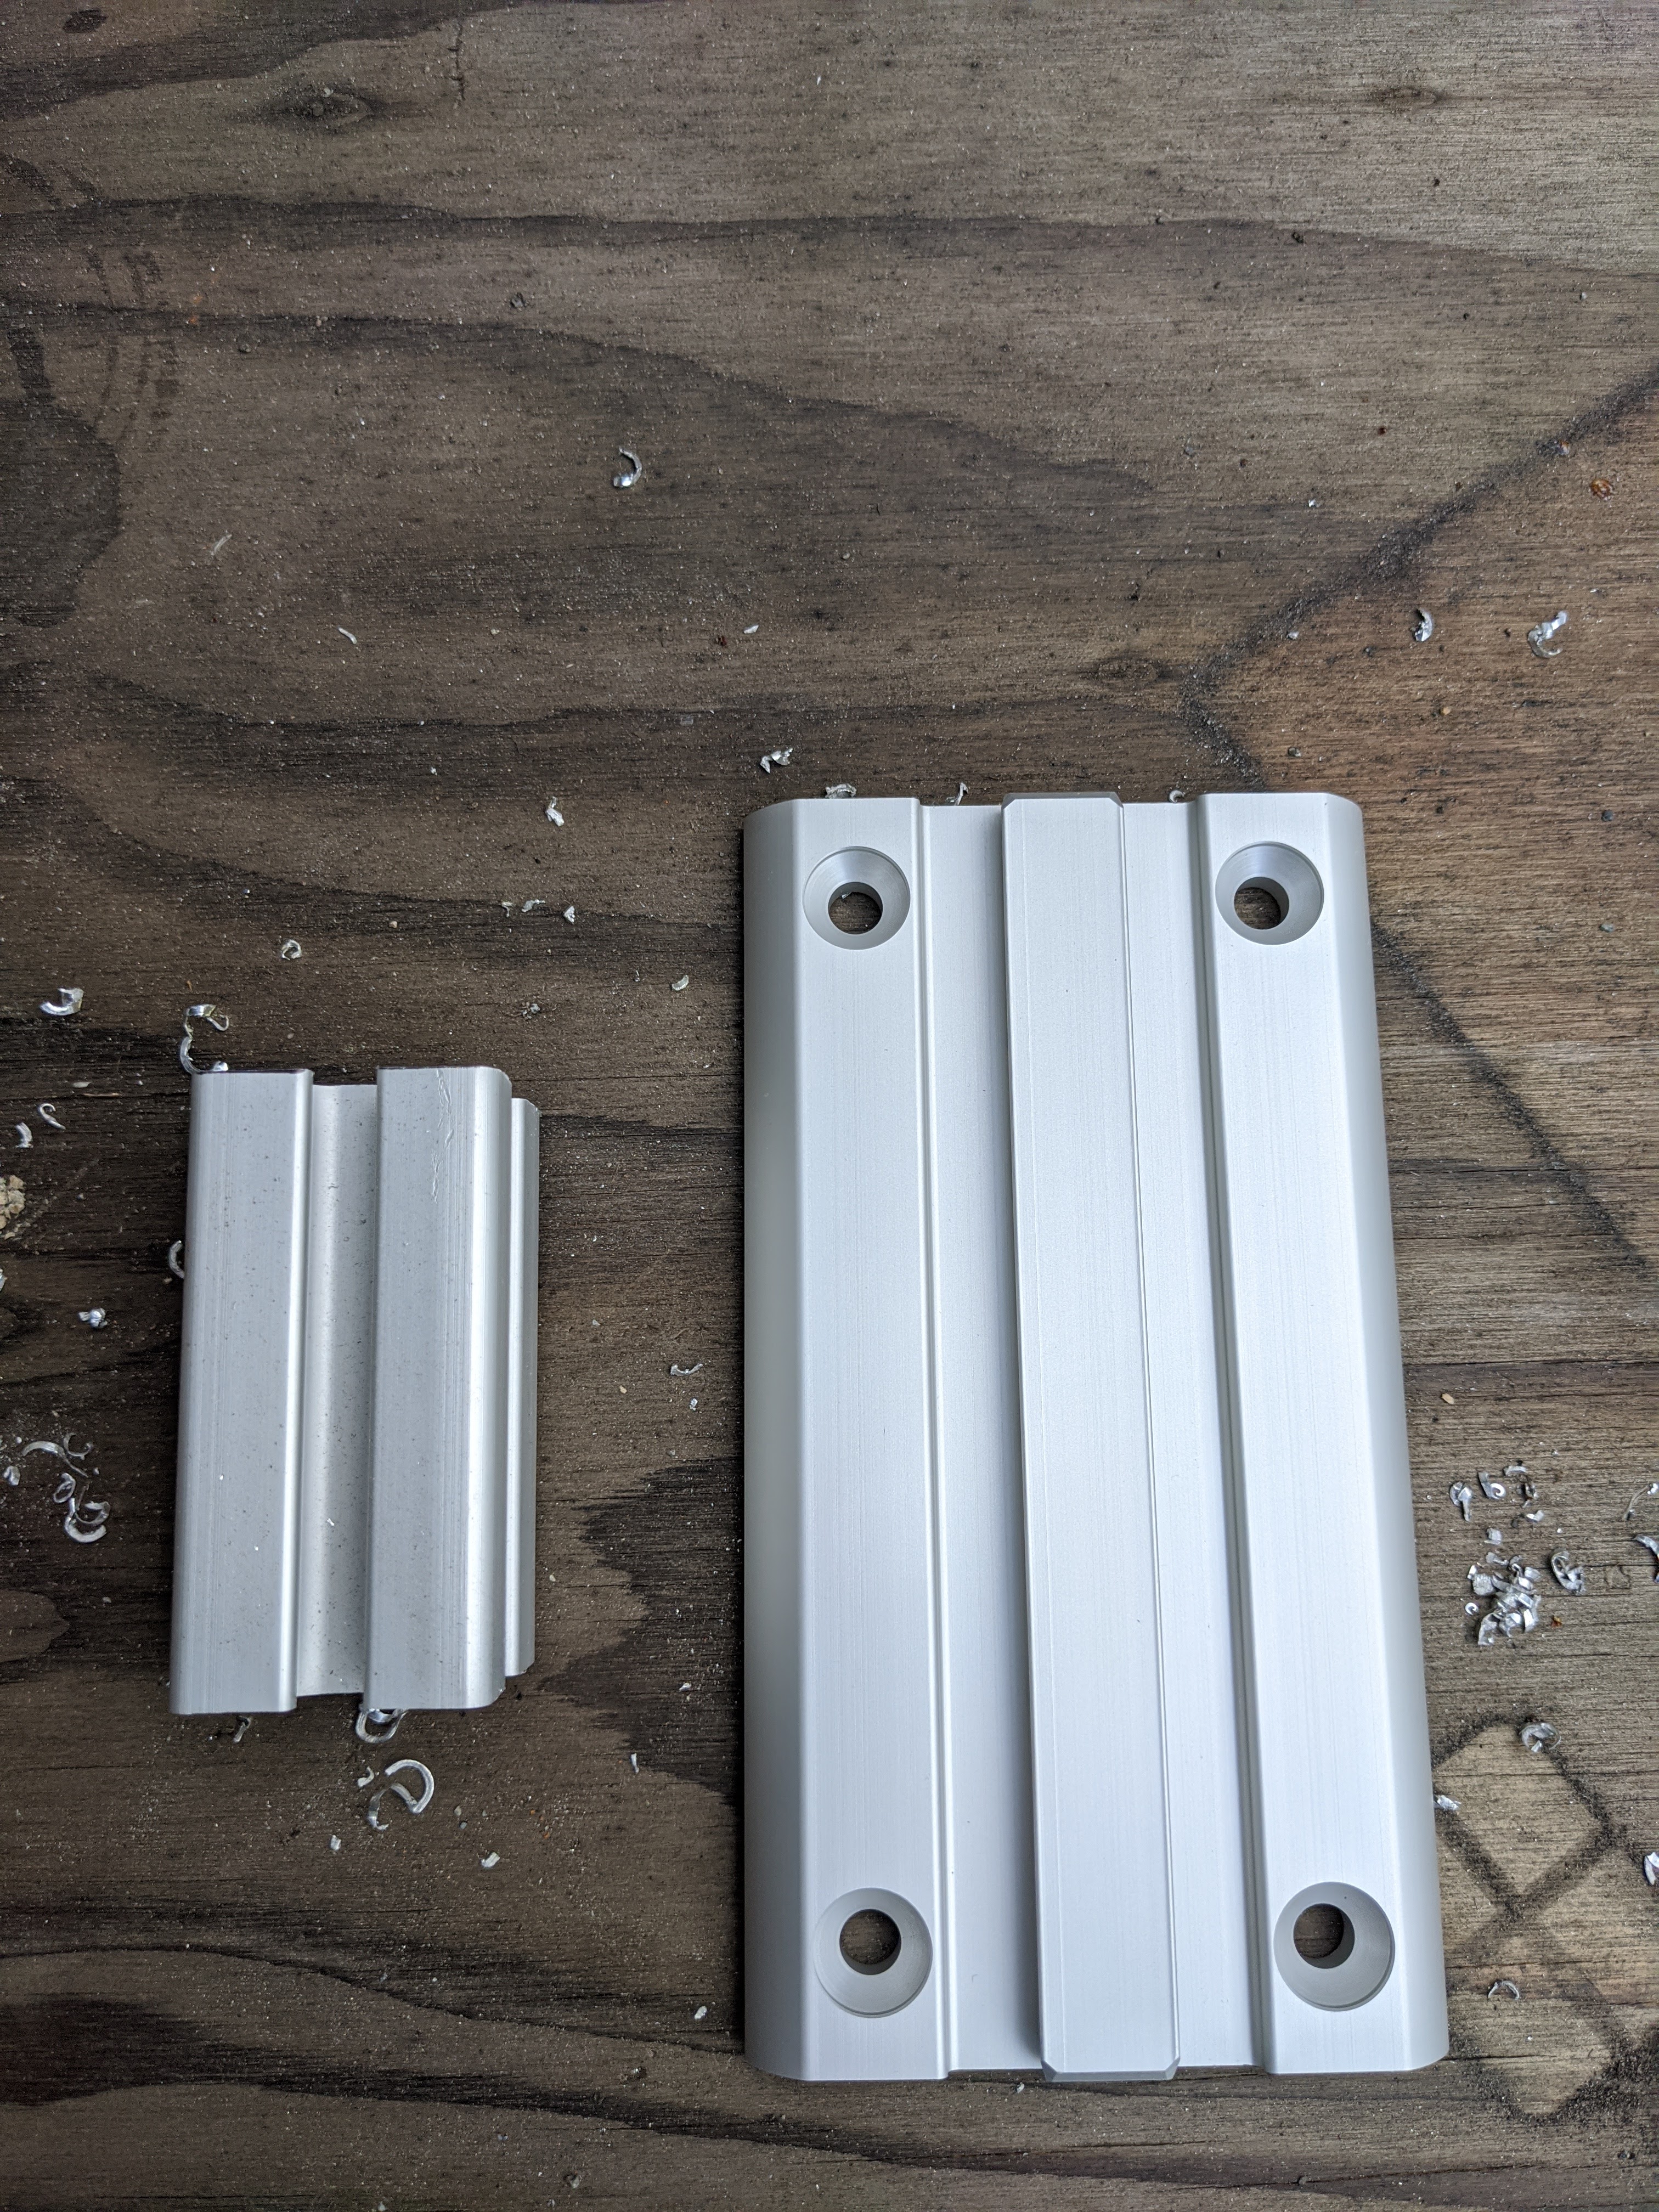
Lagun’s table mount comes with a fixture that’s intended to be mounted on some sort of wooden furniture, usually.
It’s wide, with 4 mounting bolts:
Since I’m going to be mounting to an 80/20 extrusion that is the leg of the bed, I needed to modify this.
Pretty simple, drill 2 holes, countersink for the heads, cut off the sides.
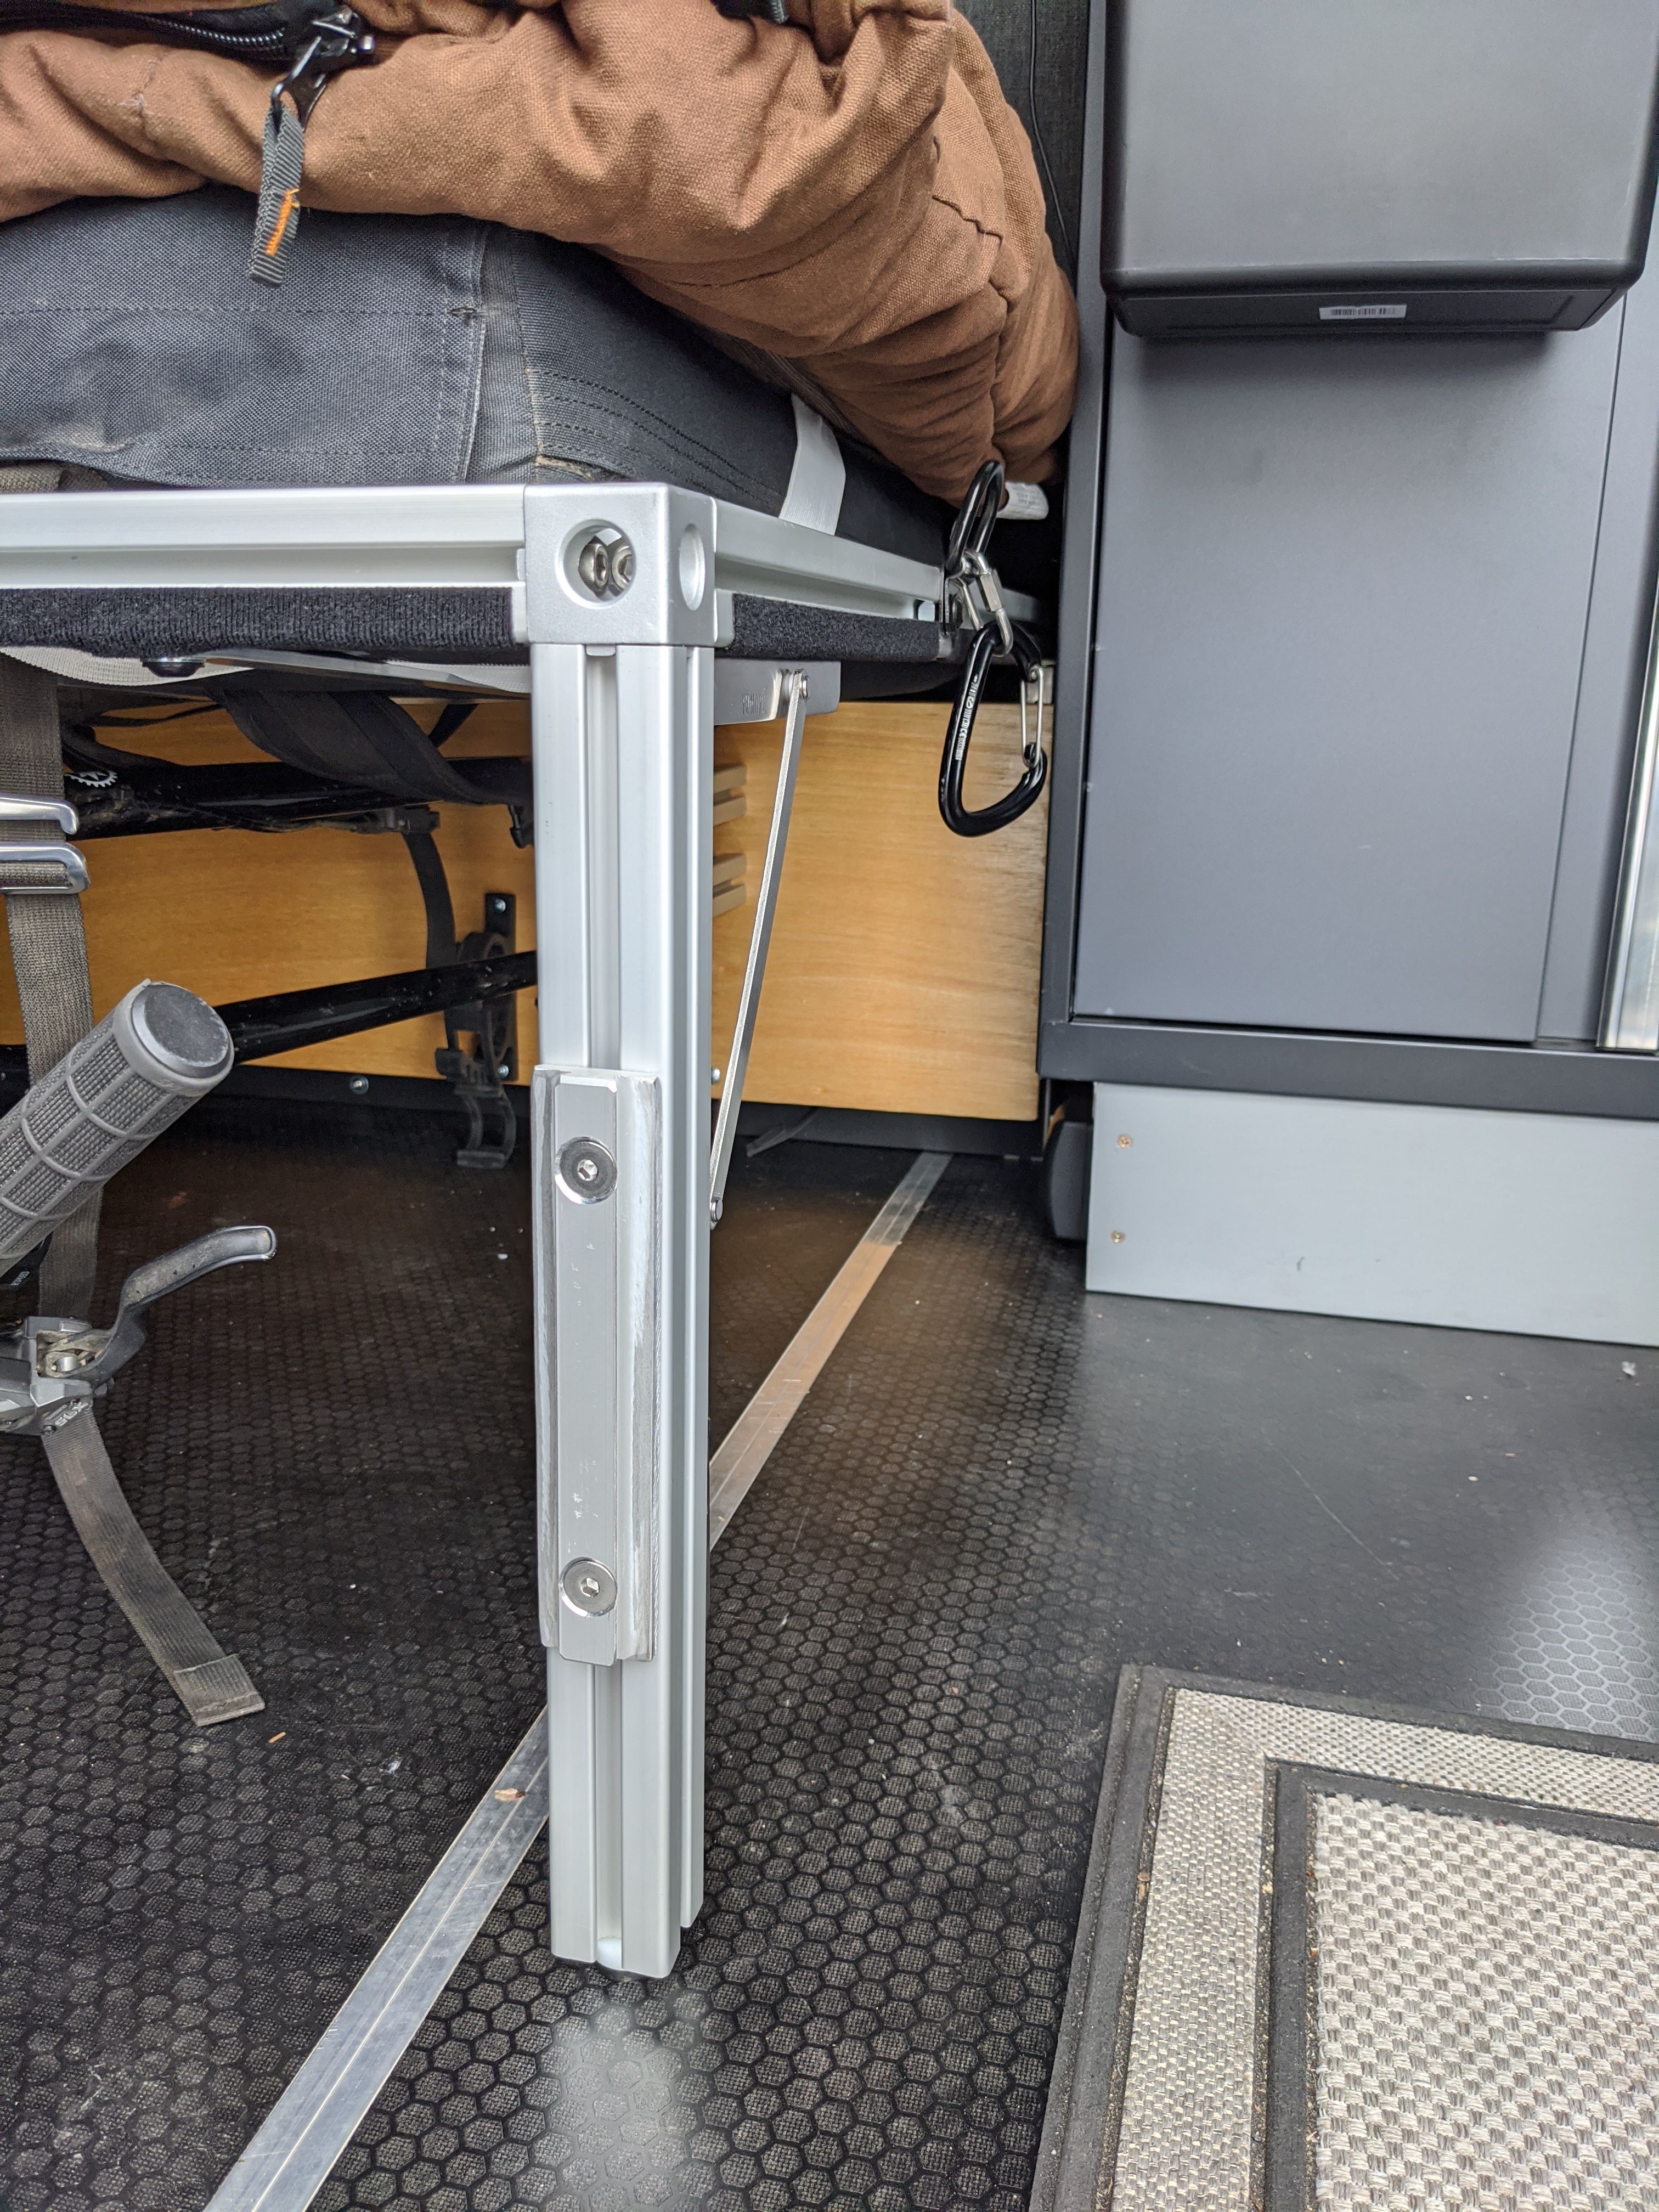
Now I have a table mount on the side of the bed that I can use as desk space for working, extra table space for cooking, etc.
The top of the leg is tapped for a 5/16×18 thread, so to take the stress of the table off of the pivot, I screw in a knob bolt through the 3-way corner connector to the top of the leg to stiffen everything up when the table is on.
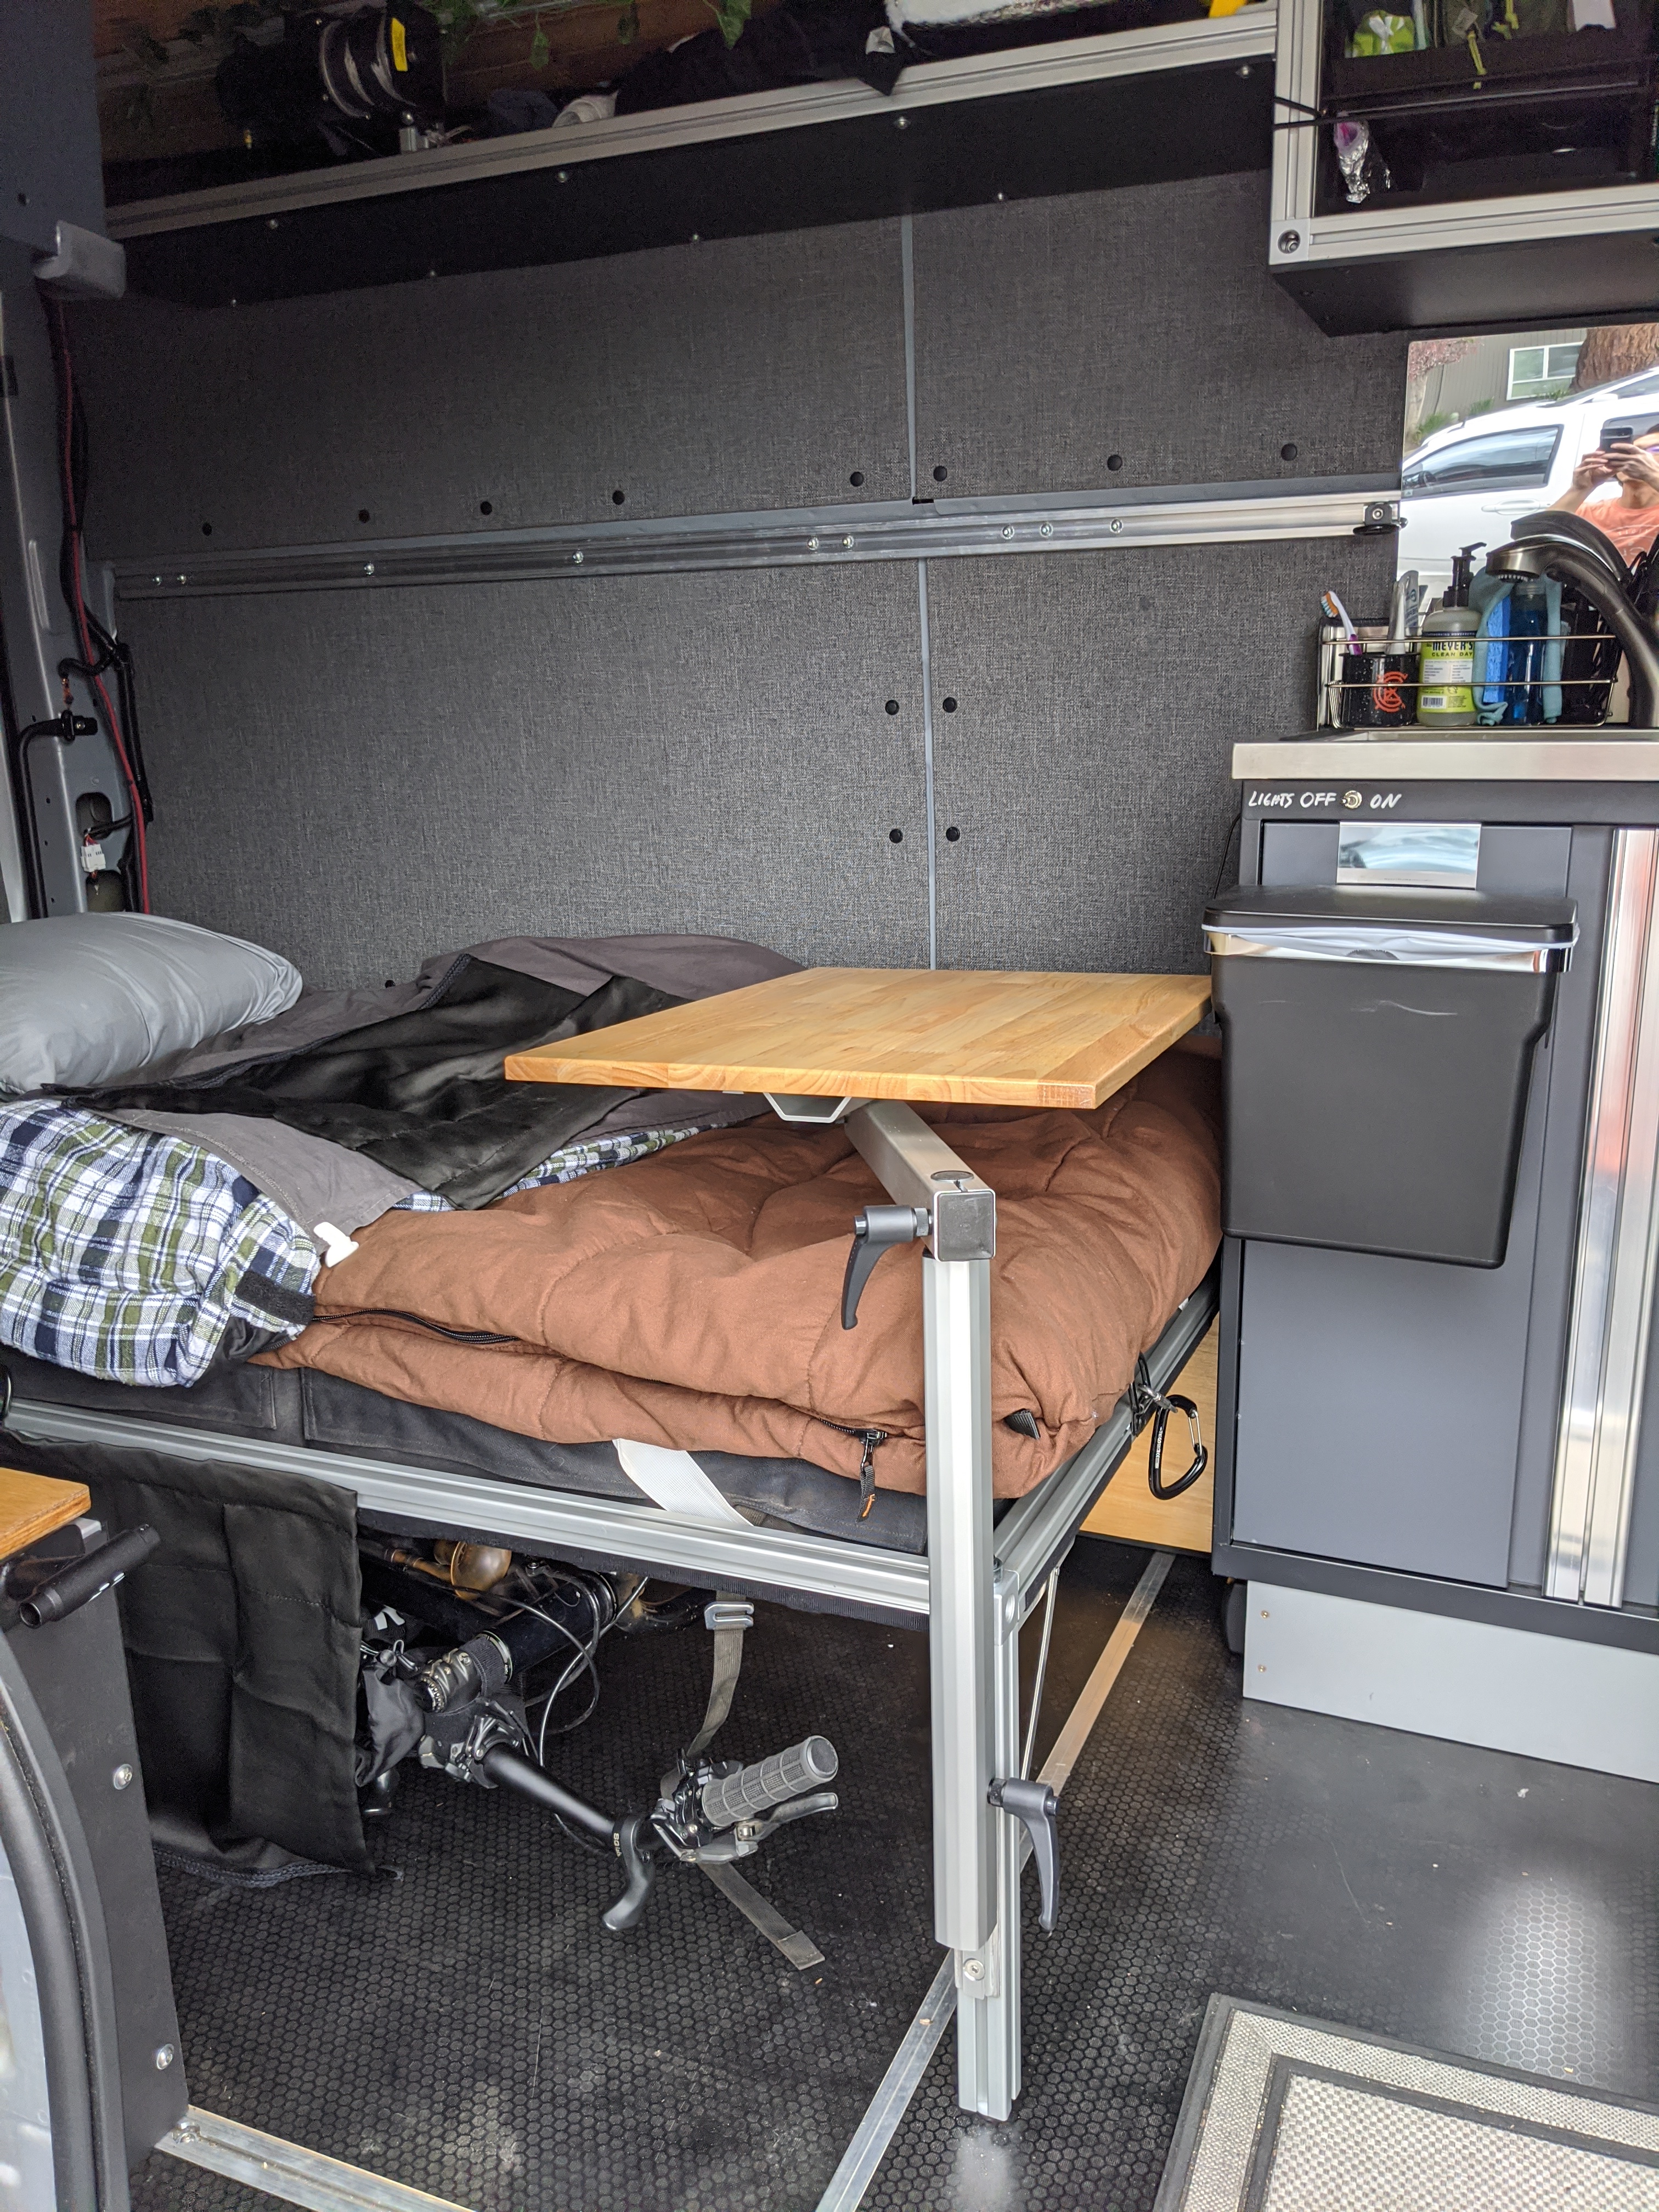
The countertop is another one of those hardwood workbench tops from HomeDepot, and fits either on the Lagun mount, on top of the sink, or stores behind the driver’s seat:
Now I can use this space at the end of the bed as a desk, or as counter-top space for cooking. Pretty simple, but very useful.
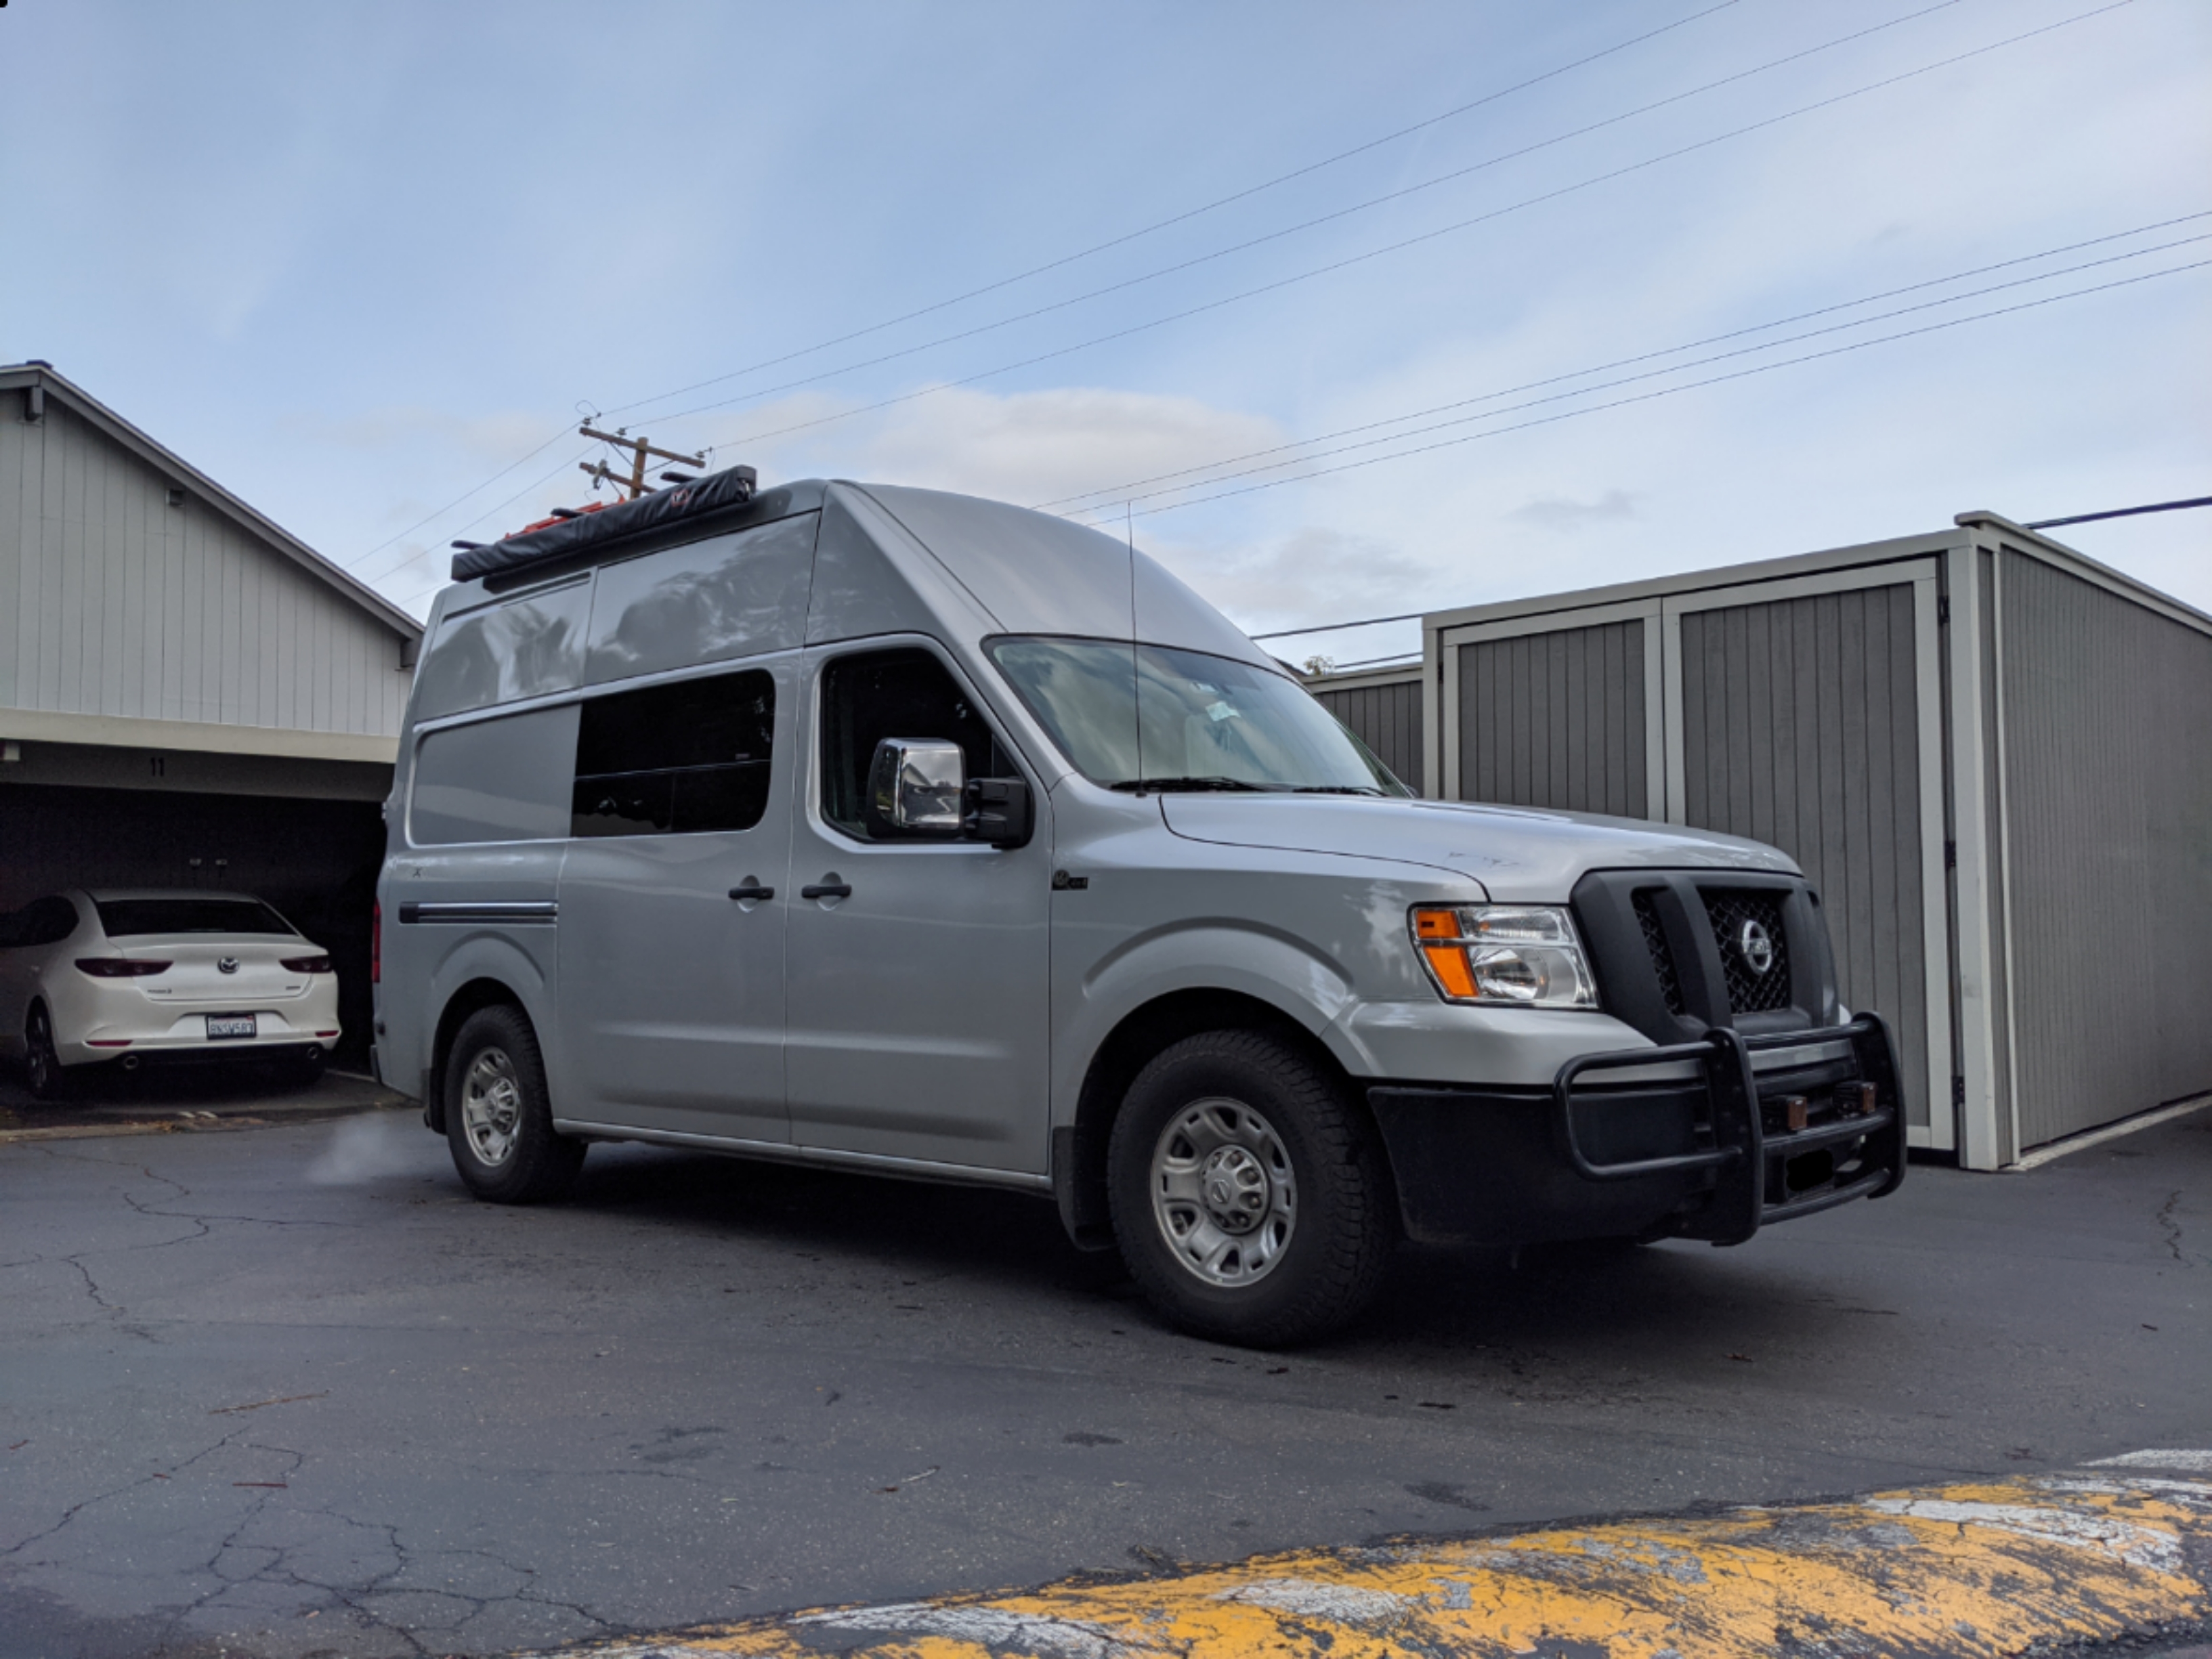
After a long hiatus, due to life, work, and just focusing on the build, the van is done.
There was a lot of work done in the last few months, but to sum up the van build:
2019 Nissan NV 2500 SV V8 High Roof
Quigley 4×4 conversion
Front push bar, with Rigid Amber fog lights
Recovery points from a 200-series Land Cruiser
265/70R17 Hankook DynaPro AT2 tires
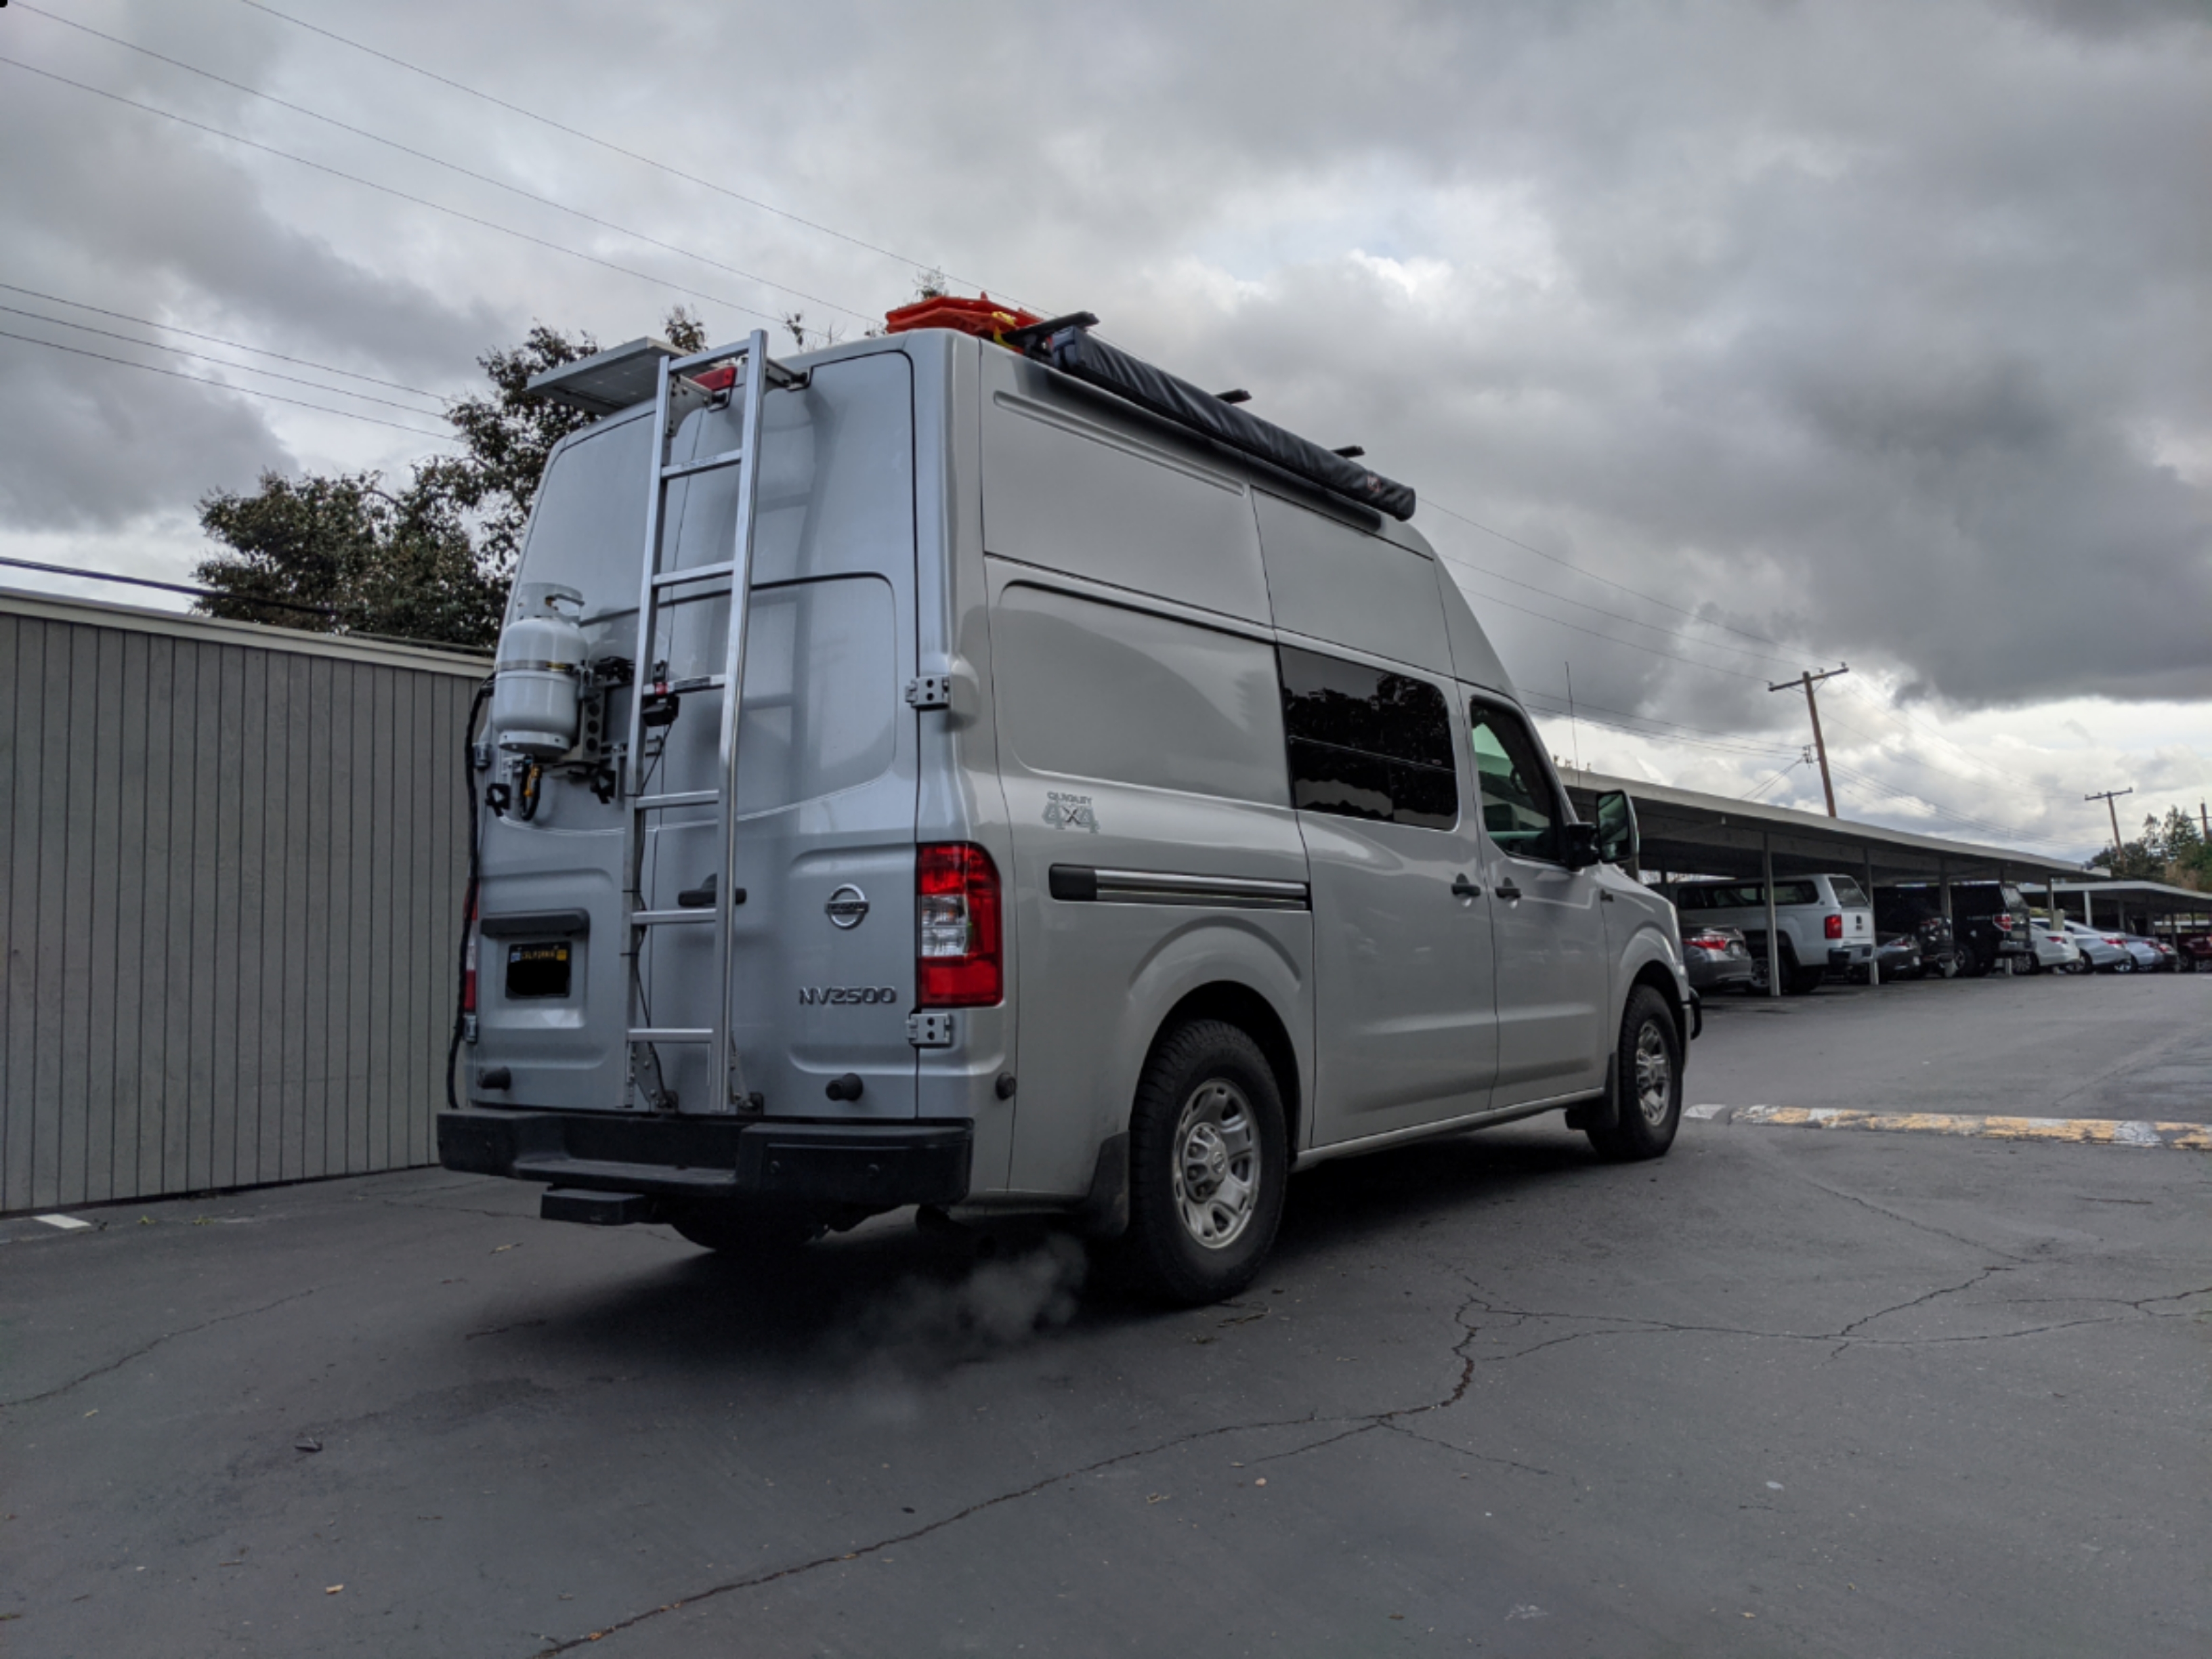
Prime Designs rear door ladder
HaloView rear view camera system
Rhino Rack roof rack
ARB 2M awning
2 100W solar panel
2 100 AH AGM batteries under the bed, next to the driver’s side wheel well
Thinsulate insulation for walls and ceiling
Cedar tongue and groove ceiling finished with Tung oil
1/2″ XPS foam board under 1/2 marine-grade plywood for flooring
1/4″ Hardwood underlayment plywood with heather grey tweed upholstering for wall panels
80/20 15-series extrusions used for all framing, with all paneling for the cabinets and shelves made from 1/4″ King Starboard marine HDPE sheeting (except for the plywood accents for the under-bed bike mount and passenger wheel-well compartment)
Murphy Bed, using 80/20’s linear bearing combined with a pivot, and a winch to raise/lower the bed (it’s heavy with two bikes mounted to it)
Mad Rock Mad Pad Triple crash pad, with a 2″ memory foam mattress topper, as the mattress
Grizzly Canvas 15 degree two-person sleeping bag (because it’s comfy and warm, and weight is not an issue)
2 Bikes stored under the bed, with the capability to carry another bike above the passenger wheel well compartment, and two bikes on the rear door (I like bikes.)
Indel B TB41A fridge in between the two front seats
New Age Products garage sink assembly and garage cabinets on the passenger side, used to minimize build time and because they’re higher quality and stronger than anything I can make.
All electrical and plumbing are located in the sink assembly, as described in a previous post.
Propex HS2000 heater under the sink.
2.5 gallon propane tank mounted high on the rear door, where the window would normally go.
Single burner butane stove, with a countertop that can be used with a Lagun mount or on top of the sink. A small camp kitchen, basically.
Cheap blackout curtains from HomeDepot for privacy.
I think that about sums up the big parts of the build. It’s going to take a long time to write through my thought process for most of the parts of this build, why I did what I did and chose the parts I chose, which is why I didn’t do it during the build process :).
The short version is that I wanted the ability to have a lot of floor space. It makes the otherwise small interior of the van feel a lot more open when you can walk around freely if you want to. It also allows me to carry cargo if I need to. I also wanted a low bed, as opposed to the ever-popular high bed, as having a low bed just makes using it easier, from sitting on it, to stretching out, it just feels more like a normal bed in a home.