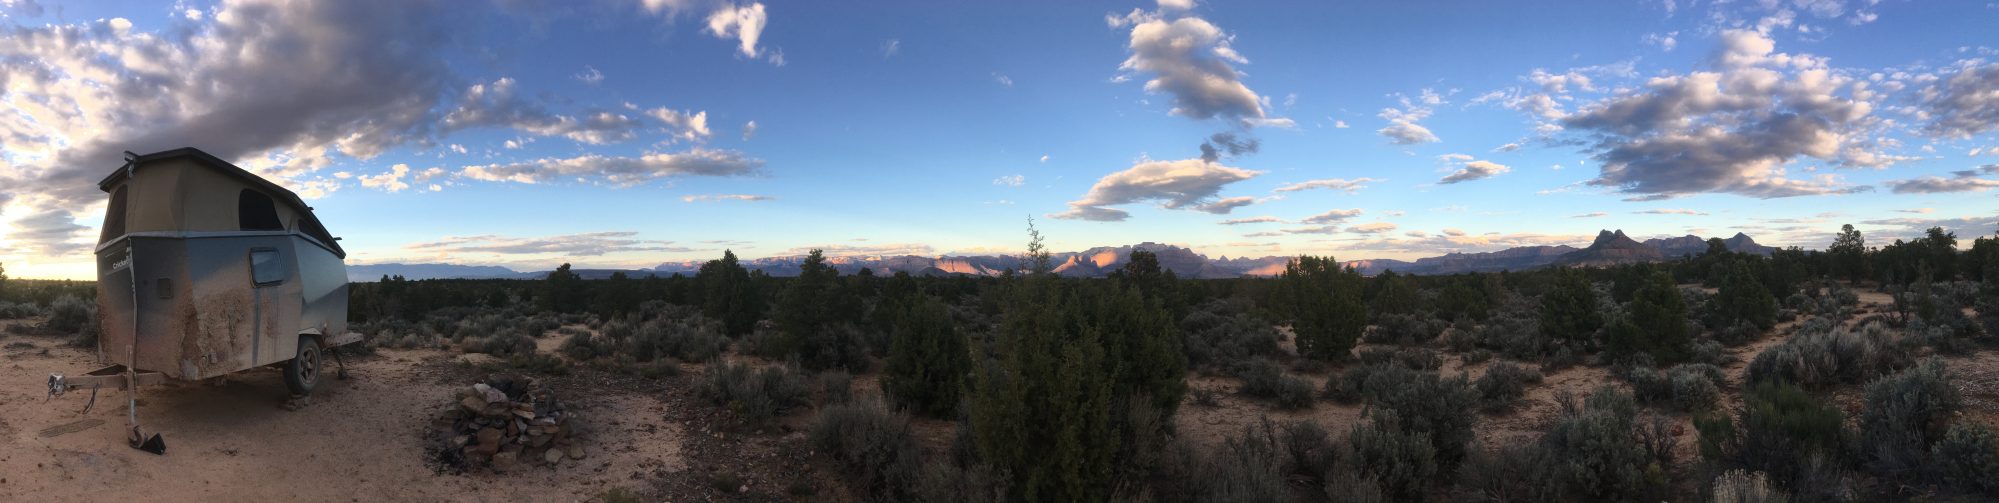
My future van does not have the most interior space, so I wanted to keep everything as efficiently laid out as possible. In the design I have in my head, this involves sticking as much of the water, electrical, heating, etc. into one unit.
Key design criteria:
- Accessible. All electrical and plumbing must be easily accessible for troubleshooting, modification, or repairs.
- Short wire runs. I want to minimize the amount of long wire runs to the minimum necessary:
- Alternator to charge controller.
- Solar to charge controller.
- Roof vent/interior lights to fuse box.
- House batteries to fuse box (short as possible).
- Modular. The entire assembly should be relatively easy to remove, should the need arise.
- Simple. I prefer to save time and effort using already-existing products and furnishings where possible. Also, I prefer working with metal to wood.
I ran across this product at Home Depot: New Age Products Pro Series 3.0 Garage Cabinet Sink. The dimensions happen to be perfect for what I want to accomplish, and it saves the time and effort of building an entire cabinet. It’s also made of sheet steel, so it should be much stronger than a wooden-framed or pre-fab particle board cabinet.
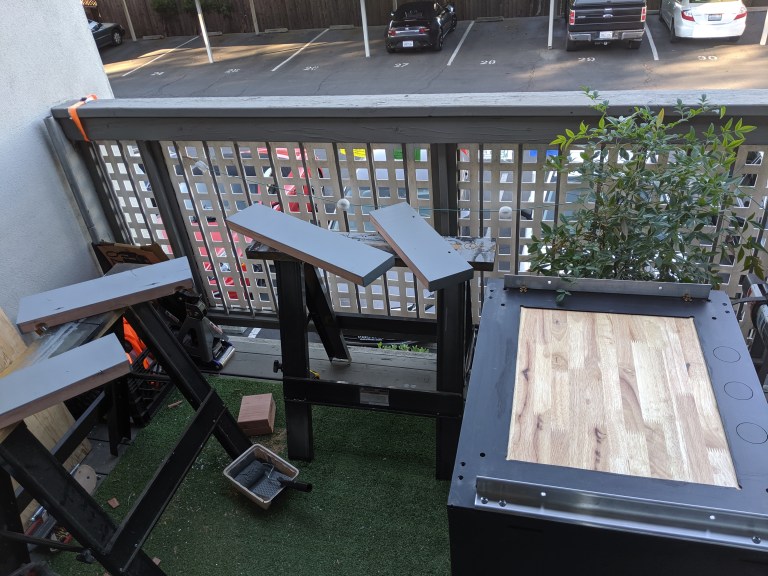
Furthermore, Home Depot’s 26″ hardwood workbench top fits rather nicely both in, and on top of this sink assembly.
This allows me to easily turn the sink into counter space, and also allows me to cut an access hole in the bottom of the cabinet for access to a Propex HS2000 heater I’ll be installing underneath. Since this benchtop is already cut to size and finished, it ends up saving a lot of time compared to cutting down a sheet of plywood, sanding, painting, etc. It also might actually be slighter cheaper overall.
So I mocked up the interior of the sink:
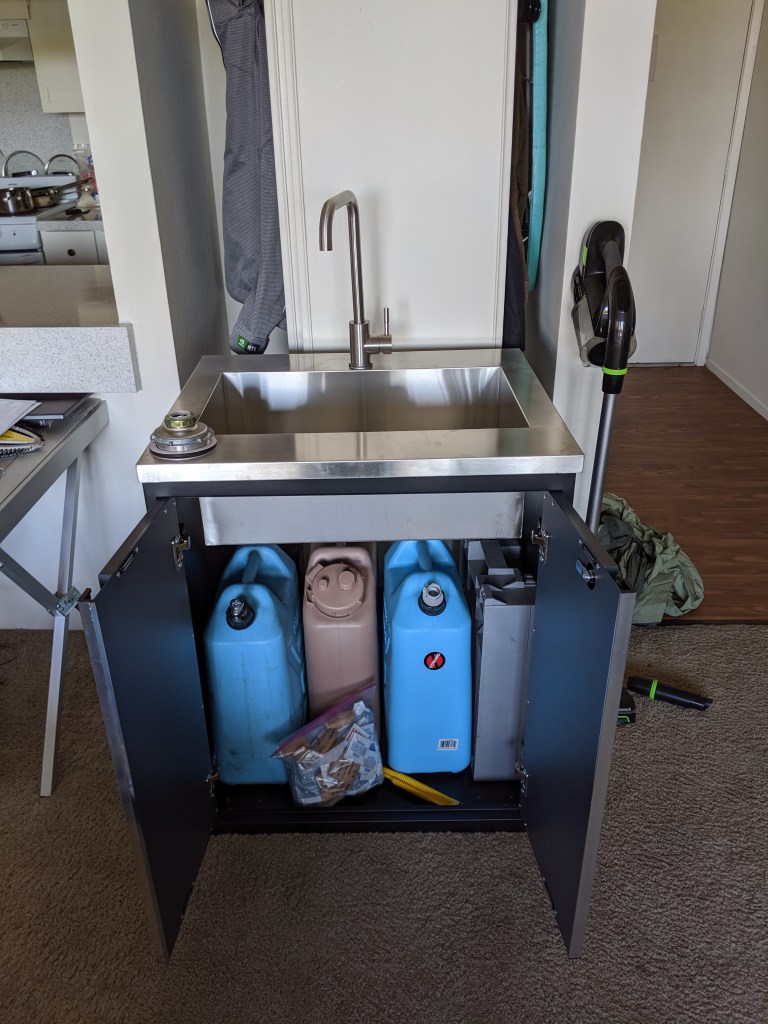
It fits 2 5 gallon Scepter water cans, a 5 gallon LCI USGI surplus water can, and a portable toilet perfectly, with plenty of room left over for the electricals.
To modify the sink assembly, I first cut a hole in the bottom of the cabinet, and used 2×6 boards to create a riser for the cabinet. This creates a space under the cabinet to mount the Propex heater. It raises the sink height to 39″, which is a little high, but just about the height of a standing desk. I covered the access hatch from the inside with the hardwood cabinet top from Home Depot, sealed around the opening with foam weatherstripping, and bolted it down using 1/4×20 plus-nuts. This way, the heater is easily accessible by removing 4 bolts, without needing to remove the entire sink assembly, and the floor of the cabinet is still watertight (after I cover over all the other holes).
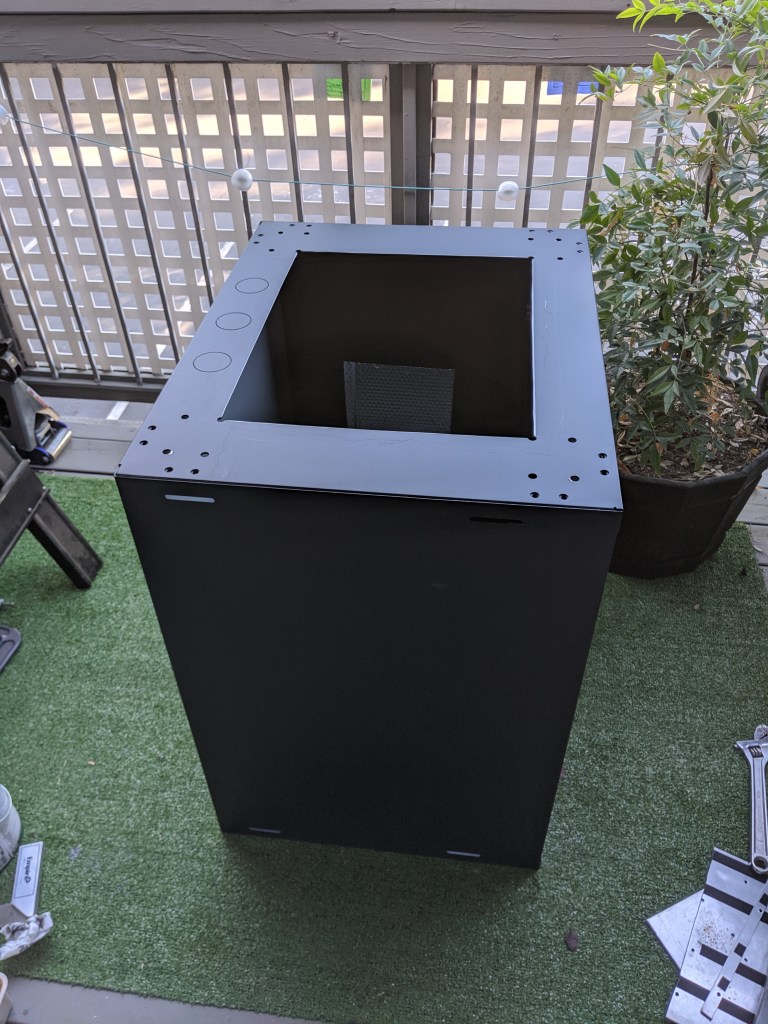
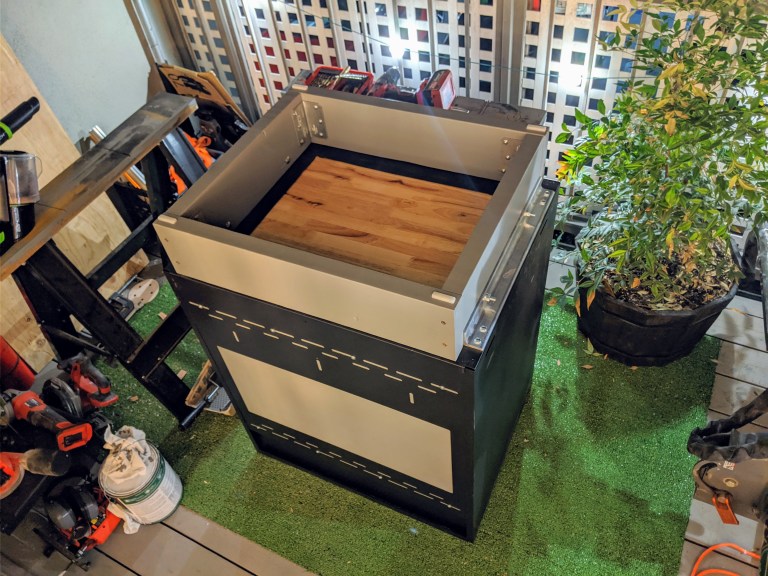
Next, I bent a stainless steel kick plate for a door to create a backdrop for the sink, so no water runs behind the cabinet. This was installed with a combination of rivets and 3M VHB tape, and sealed with silicone.
The whole assembly:

The plumbing comprises of the faucet and drain that came with the sink, a Seaflo 1.2 GPM diaphragm pump, a tee fitting to convert both compression fittings from the faucet inlets to a single 3/8 barbed fitting, and a Camco camper drain. The LCI can serves as the gray water tank, and the blue cans are potable water, using these quick-connects to connect the suction line to the water pump. The Camco drain plugs right into the LCI can using a double-ended barbed adapter, and is easily removed to empty the can.
For electrical, I cut a 3/4 plywood 2′ x 4′ hobby board down to size to use as the panel to mount all the electrical components to. I’m using a REDARC BCDC12225D dual battery charger. It has inputs for both solar and alternator power, and handles the switching and charging automatically, removing the need for a separate charge controller and voltage-sensitive relay (VSR) or solenoid, etc. There’s also a Samlex 300W pure sine wave inverter (it’s what I had), a Blue Sea fuse block, and a 3 port 12v cigarette lighter output for aux. The lights, water pump, and heater are also wired to the fuse block, as will be the fridge and roof vent once those are installed. External connections will be made via either 30A or 50A Andersen plugs, depending on the wire size.

As you can see, the majority of the accessory wiring to the fuse block is extremely short, and all contained on the panel. I took care to make sure no wires contact any of the edges on the inverter/charger, and are isolated from wire-on-wire rubbing as much as possible. This should make it more reliable, efficient, and easy to troubleshoot, no need to chase wires.
The electrical panel gets mounted inside the cabinet on the side using 3M VHB. The side is the farthest point from any plumbing connections, and the panel will also be covered by a plastic sheet, separating it from the water cans in case of any leaks. I left room on the panel to bolt a Lagun table mount to the cabinet, and to drill a hole for passing through wires.
The leftover piece of the hobby board was used to block off the back opening of the cabinet, and also serves as the mounting location for the water pump.
I also made another small panel to mount on the front interior face of the sink using 3M VHB. It holds the Propex controller/thermostat, the dimmer for the lights, and an indoor/outdoor thermometer. The lights and water pump are switched, and the switches are mounted on the cabinet directly.
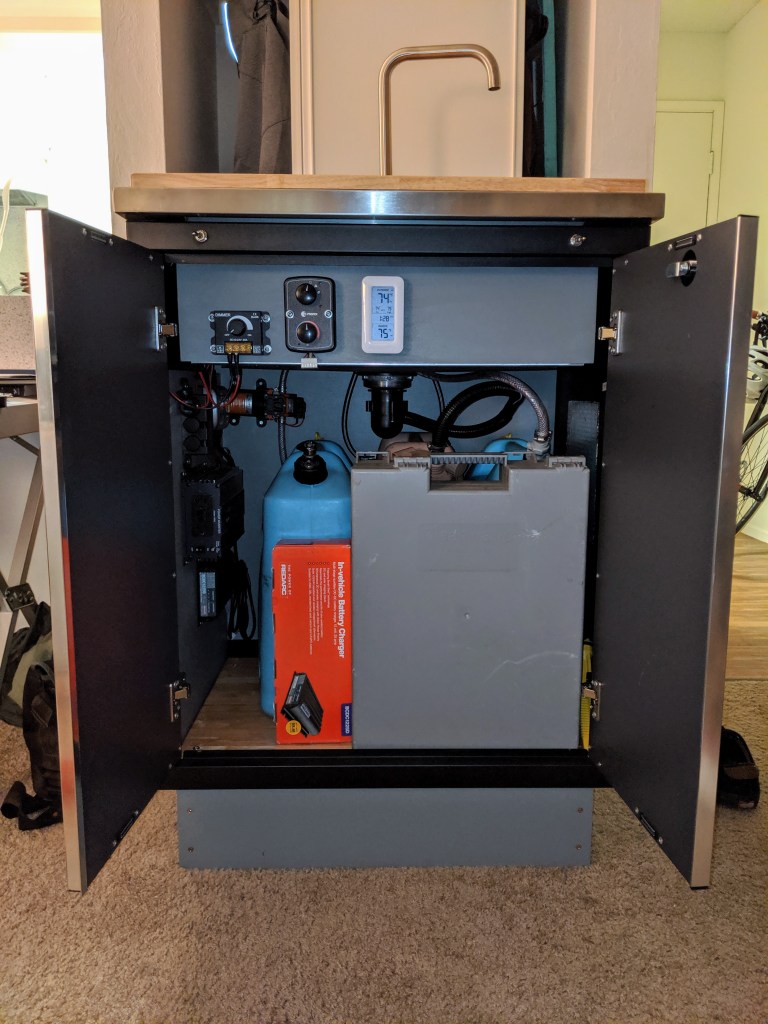

Now I have a single cabinet assembly containing all my plumbing and most of the electrical, where the only external connections are to the house batteries right next to it, to the solar panels, to the alternator, to the lights, and to the roof vent.
All that’s left is to mount it in the van and complete the wiring, but to do that I need to receive the van first.